Recent Articles
-
Christmas Sword Buying Guide 2025
Dec 03, 25 10:53 PM

How To Sharpen Swords 101
A Beginners Guide
What follows are some basic techniques you can use to sharpen swords.
While in this day and age, a sword doesn't have to be sharp to be classed as battle ready or functional, personally I prefer my swords to be sharp..
And if you prefer yours to be sharp too, the following guide will help you transform a blunt sword into a sharp one WITHOUT ruining the geometry or the temper (or losing any fingers in the process)...
But before we begin with this technique, some general sword sharpening pointers (pardon the pun)..
The Basic Do's and Don'ts of Sword Sharpening
- DON'T attempt to sharpen swords that are antiques leave that to the experts, otherwise you will almost certainly destroy their value.
- DON'T use normal power tools to
sharpen swords unless you REALLY know what you are doing. For a start, it's extremely dangerous. Secondly, the friction can heat up the blade, ruining the swords
temper and heat treatment, and it's all too easy to lose the swords
geometry.
- DO be very careful and patient when sharpening swords. More accidents occur when performing sword maintenance than at any other time, so make sure that you are paying 100% attention to what you are doing and eliminate outside distractions.
- DO get some practice on a cheap stainless steel wall hanger before attempting to sharpen a more valuable sword. You will probably destroy the geometry of the first few blades you try and sharpen so if something is going to end up messed up, it's better a machete or a stainless steel wall hanger (just don't use it to try and cut stuff with).
What You Will Need to Sharpen Your Sword
At a bare minimum, you will need:
1) A sword
:-)
2) A metal file
3) A whetstone
4) Oil for the whetstone
5) 3M 400 Grit Emery paper
6) Some paper (to wipe stuff with)
7) And a block of wood
Plus some patience and elbow grease..!
Now if you are only retouching an edge on an already sharp sword, you can skip stage 1 altogether and proceed to either stage 2 or 3 depending on how sharp your sword already is.
POWER TIP
When you sharpen swords ALLOW THE EDGE TO REVEAL ITSELF.
The most common mistake when you sharpen swords is paying too much attention to the edge. Instead you should concentrate on simply removing the metal until the edge is naturally exposed.
REMEMBER: there IS such a thing as a sword that is TOO sharp! If the sword is too sharp, it will very rapidly lose its edge when cutting and may even chip and break. So when you sharpen swords, less is more.
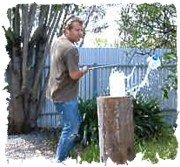
Stage One

Set yourself up somewhere where you are comfortable and have plenty of light, lay your sword on the table and prop it up with a block of wood or something similar.
Using even, measured strokes at a 30 degree angle, proceed to begin shaping the edge with your file - counting strokes one at a time down the length of the blade one way, then turning it over and doing the same thing on the other side .
Pay attention that you don't take too much of one side, just keep filing and turning the blade over until a rough edge starts to appear. It will look very rough at this point, but don't let that worry you, you will refine the swords appearance in the next two stages.
Stage Two
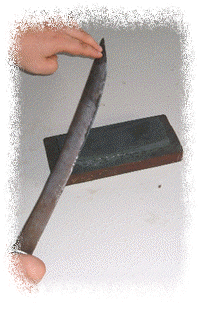
Now get out your trusty whetstone and apply a thin film of oil to the surface.
What you are doing here is polishing, not grinding. So pass the blade over the stone, again at a 30 degree angle, using a slow and uniform stroke.
The motion you should be using is just back and forth - NOT polishing in a circular fashion. Again, pay careful attention that each side receives the same amount of polishing and inspect the blade often, though don't worry about how the blade feels yet. Just make sure you have worked the stone over the entire surface of the blade while maintaining the surface geometry.
A good light source is essential to seeing where you have missed. Remember that you are not sharpening the edge. You are removing metal until the edge is exposed.
Stage Three
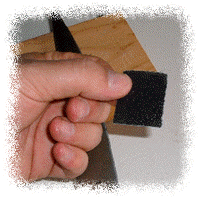
To complete the sword sharpening process, and blend your newly sharpened blade with the rest of your sword, get some 400 grit sandpaper from 3M (dont bother with the cheap stuff its not worth it!) and tear off a postage stamp sized piece (see left).
Wet with a little water, and VERY CAREFULLY run the paper along one side of the edge of the blade with your finger at a 30 degree angle.
I can't stress enough how dangerous this can be to your fingers and just one slip could open up a very nasty cut. So make sure you turn off the TV and focus ALL your attention solely on what you are doing when you sharpen swords or YOU WILL CUT YOURSELF! (Besides, focusing intently on this process is actually quite therapeutic and relaxing - in a slightly disturbing kind of way...!)
Finally, you might optionally want to consider rubbing the blade with some water and vinegar to brown the surface of the blade to make the sharpening less obvious still.
You can also use stage three on any sword to deburr it and touch up the edge if it has started getting a little dull from repeated usage.
Looking for a Shortcut?
Of course, if this all sounds like too much trouble and/or you are in a hurry (i.e. zombies are attacking) you can also use a knife sharpening tool to sharpen swords with. The best one I have found that actually works for swords (many do NOT) is the Accusharp, a $13 tool with dual carbide blades that creates a quite servicable edge that anyone can do.
The drawback is that an experienced personal using the more detailed method shown above will get a better looking and more satisfying edge.
I hope this information on how to sharpen swords has been helpful. Click here to return to How to Sharpen a Sword from How To Sharpen Swords 101, A Beginners Guide
Buying Swords Online Can Be DANGEROUS!
Find the Best Swords in the:

Popular & Recommended ARTICLES


The ONLY true free online magazine for sword enthusiasts. Delivered once a month on the 1st day of the month, no filler and no BS, just the latest sword news & info delivered straight to your inbox.
VISIT OUR SPONSORS:


