Recent Articles
-
Christmas Sword Buying Guide 2025
Dec 03, 25 10:53 PM


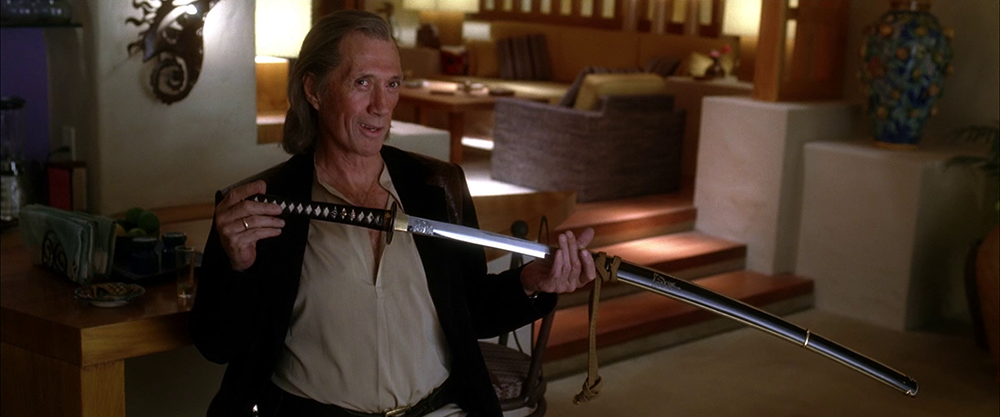
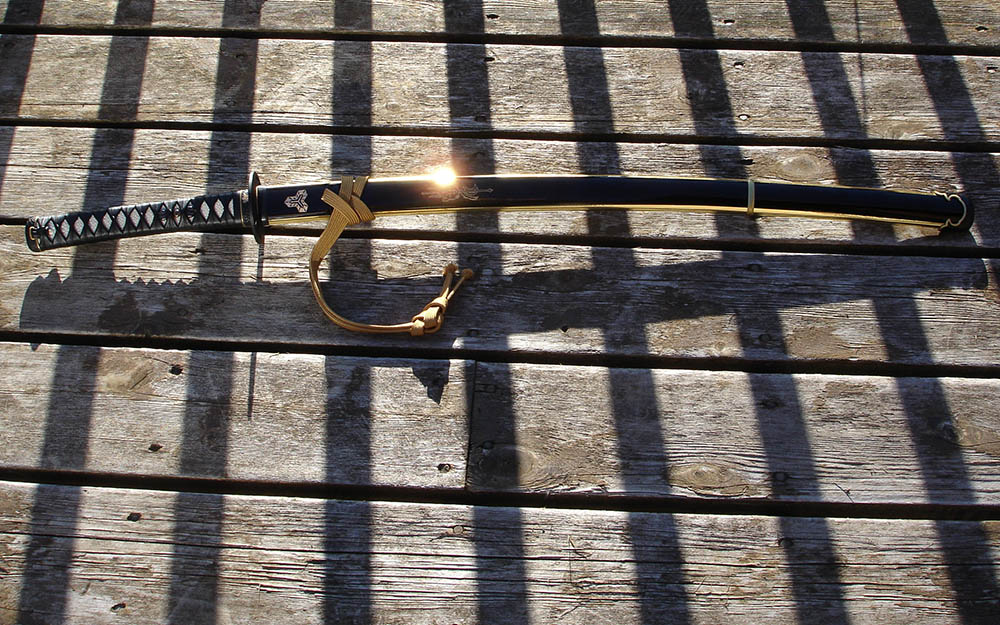
Hattori Hanzo Sword Build
A SBG member makes a Movie Accurate Replica for Adam Savage from Mythbusters
The Hattori Hanzo Sword replica made by SBG member Jason Blakey took neatly a year to make, and is an exact replica of the Brides stunt sword seen in the Kill Bill movies. Jason is not a famous sword customizer - though he should be..
An extremely humble man, he doesn't have a website or a YouTube channel with a million subscribers. He doesn't even usually take sword customization commissions. But he is a SBG member with some real talent, the tools needed to do the job, and an eye for detail few others have these days..
It was this eye for detail that was noticed by none other than Adam Savage, former co-host of the hit TV show Mythbusters, and after stumbling upon some pictures of his previous work - Adam make contact with Jason and asked him if he could make him a replica of the Kill Bill Brides Sword..
The rest, as they say, is history..
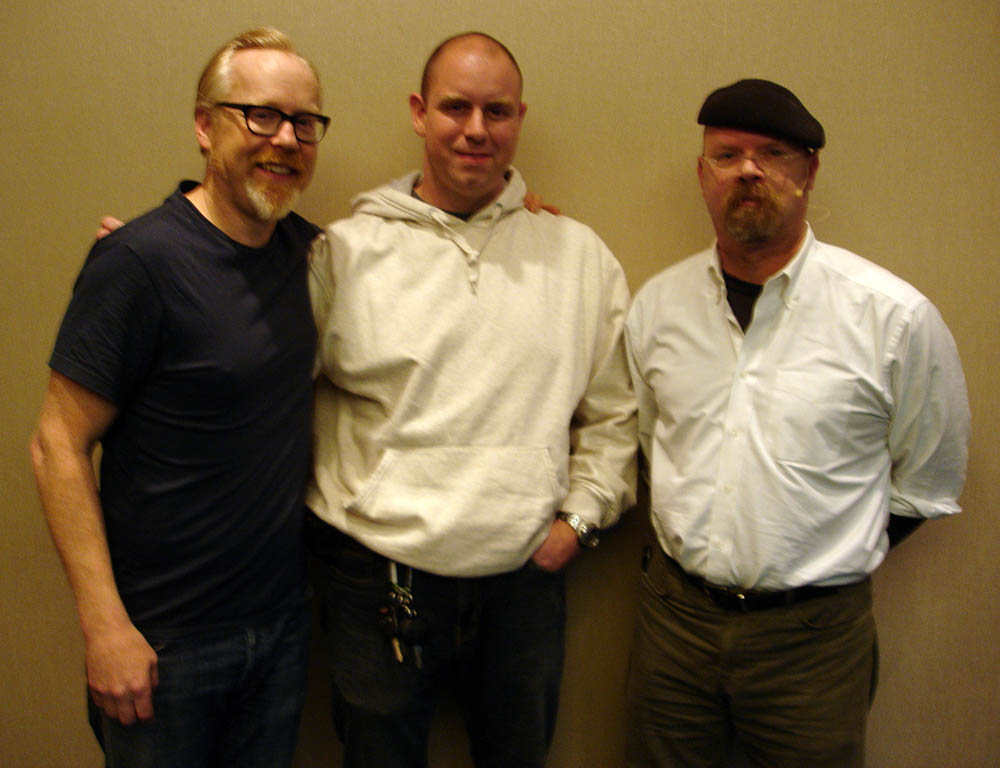 Jason Blakey With Adam and Jamie from Mthbusters at the Hattor Hanzo Build official handover
In this article, originally posted on the SBG forum over a 10 month period, Jason documents the process of sourcing the parts that were used to make the ORIGINAL stunt sword seen in the movie, and transforming a zinc aluminium Japanese training sword known as an Iaito, into a replica that is so close to the original that if you put them side by side you would be hard pressed to figure out which one was the original and which one was Jason's screen accurate replica.
This is not a tutorial per se, as a lot of the equipment and techniques used are beyond the ken of the average sword customizer at home (which is why Adam Savage commissioned him) but it has within it many tips and ideas that sword collectors and DIY customization enthusiasts will serve as inspiration to spark their own ideas and custom projects. And at the end of the article, we provide a some step by step tutorials available on SBG explaining in detail how to wrap the tsukakami, make a new tsuka core, etc.
It is a long article, peppered with over 100 images documenting the process of building this Hattori Hanzo Sword replica, but whether you are a fan of Kill Bill, Mythbusters, Japanese Swords, Sword Customizing or just curious to see what went into it, I think you will enjoy the read..
Enough from me, time to hand the stage over to Jason as he documents the project from day one, to seeing the sword he made featured on TV..
As this article is over 6000 words long in total and has roughly 100 images in there, if the page loads a little slowly please be patient - it is worth it.. :-)

HATTORI HANZO BUILD SWORD LOG: May 4, 2011
I'm very excited about this new project I've just started on.
Thanks to a request from none other than Adam Frikin' Savage, I've
begun putting together a screen accurate replica of the Bride's sword. I
had posted up some pics of my Bride's Sword (BS) a little while ago,
and Adam contacted me concerning building a replica for him. I explained
that there were three options available:
1. Cheap, not so accurate, barely usable.
2. More expensive, not so accurate, very usable.
3. Very accurate, not usable (for anything other than iaito drawing practice), very expensive.
To
my great excitement, Adam picked option #3! I'd finally be able to
build a spot-on replica, using special order Japanese iaito parts (just
like in the films). I'd also get to put together and start using a home
workshop CNC (for the carvings).
So, here's where things stand at this point :
1.
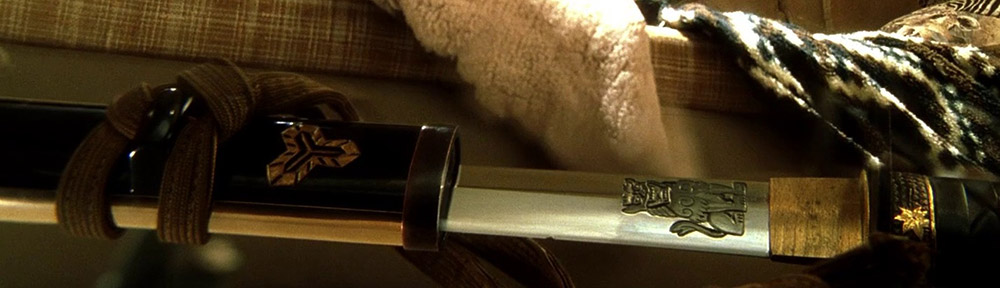
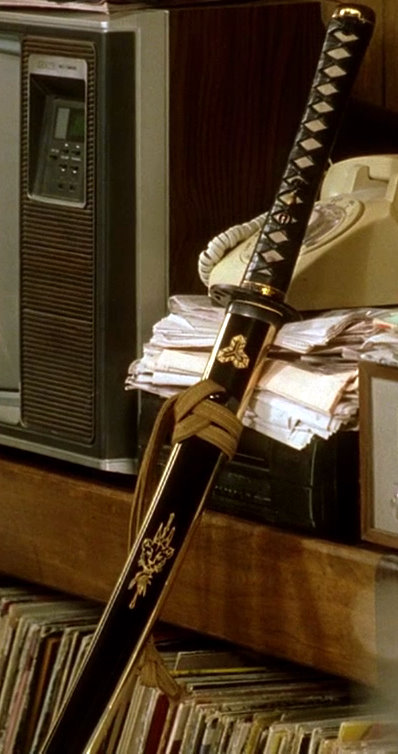
I've determined sword dimensions using promo material, screen shots,
and some pics of the stunt sword taken for "Profiles in History"
Hollywood auction number 37.
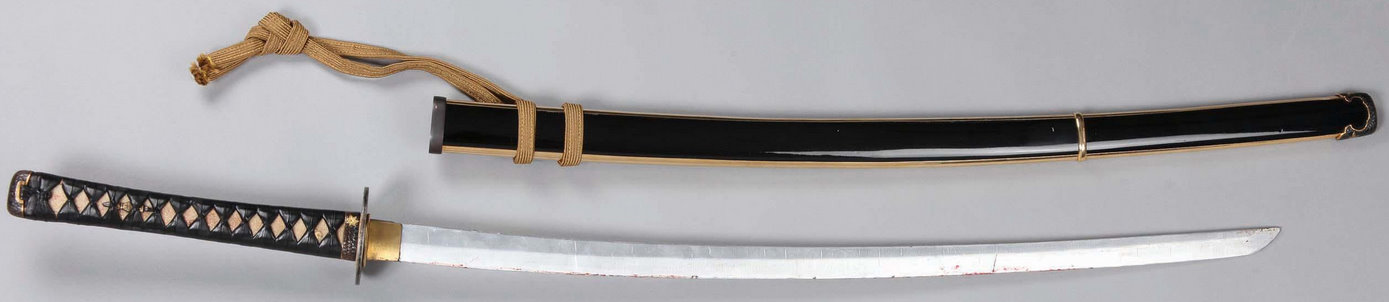
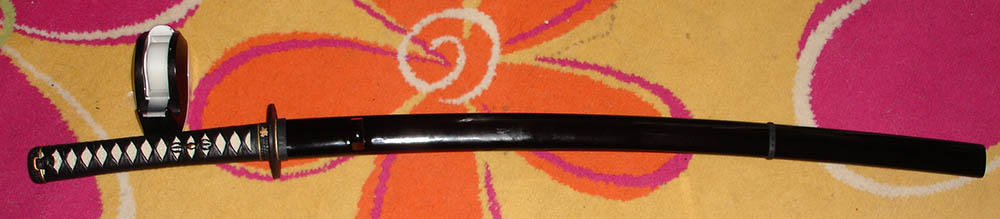
 Hollywood Auction Number 37 - the stunt sword
2. I've researched all the parts used on the sword, tracked down their vendors, ordered relevant bits and bobs.
3.
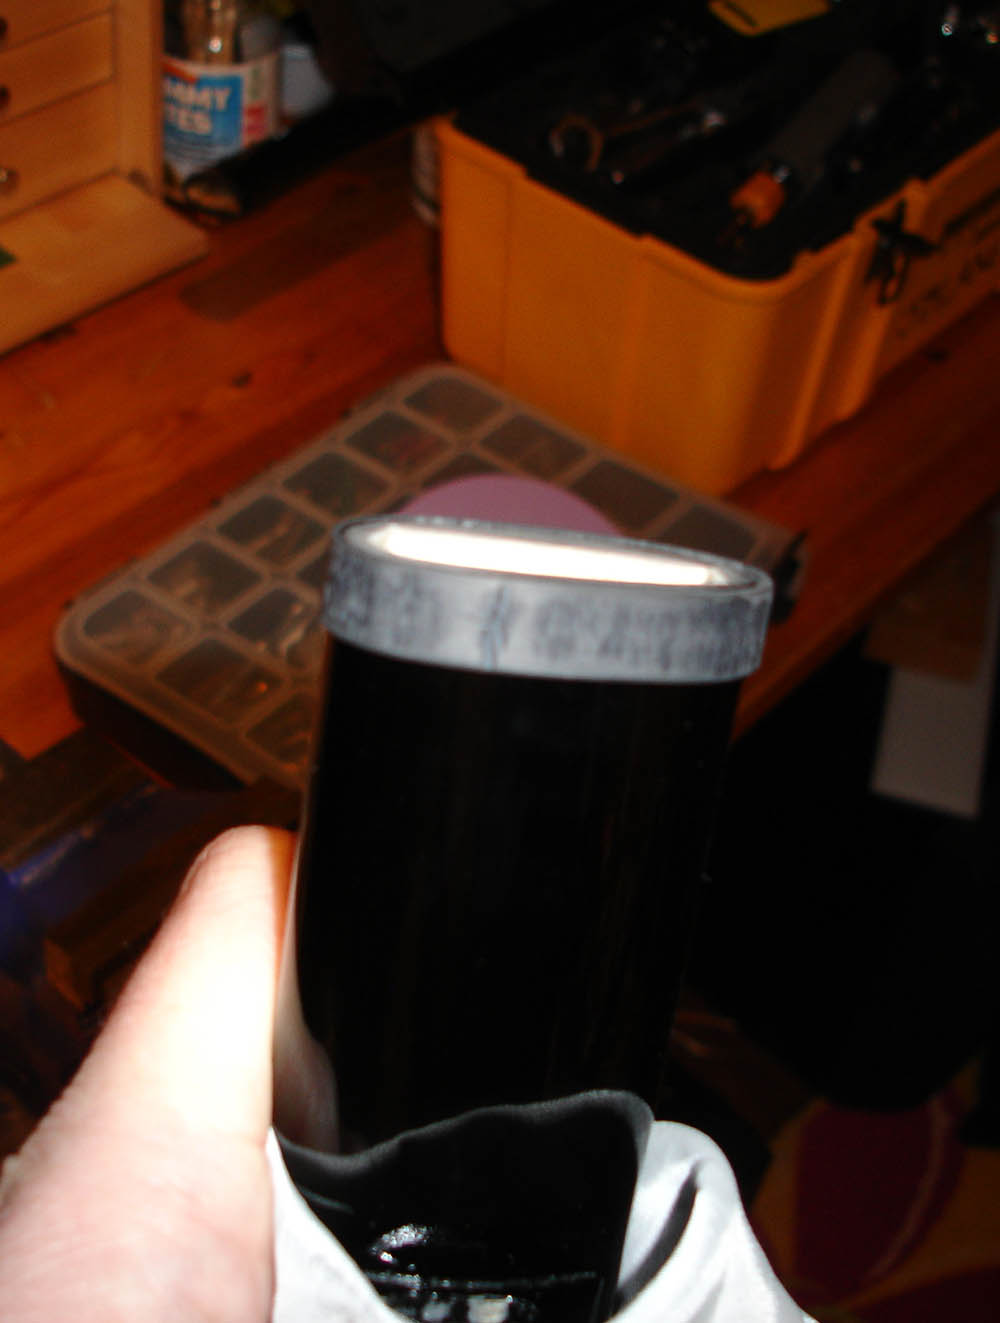
I've tested out using Gold Mylar tape for the stripes down the sides of
the saya. I'm 99% sure this is how the stripes were done in the films.
The Mylar looks great, sticks great, and look just like in the film.

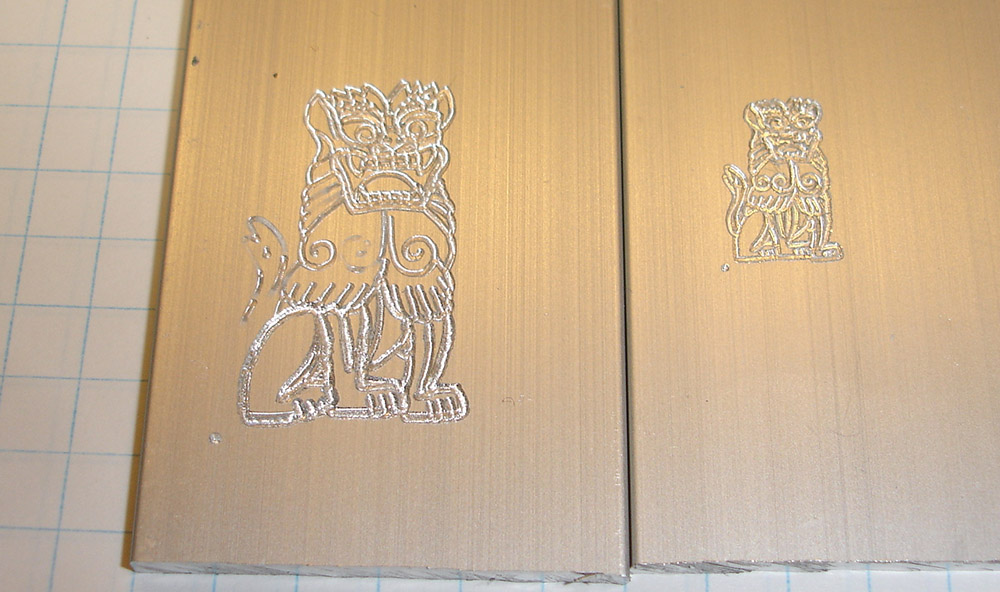
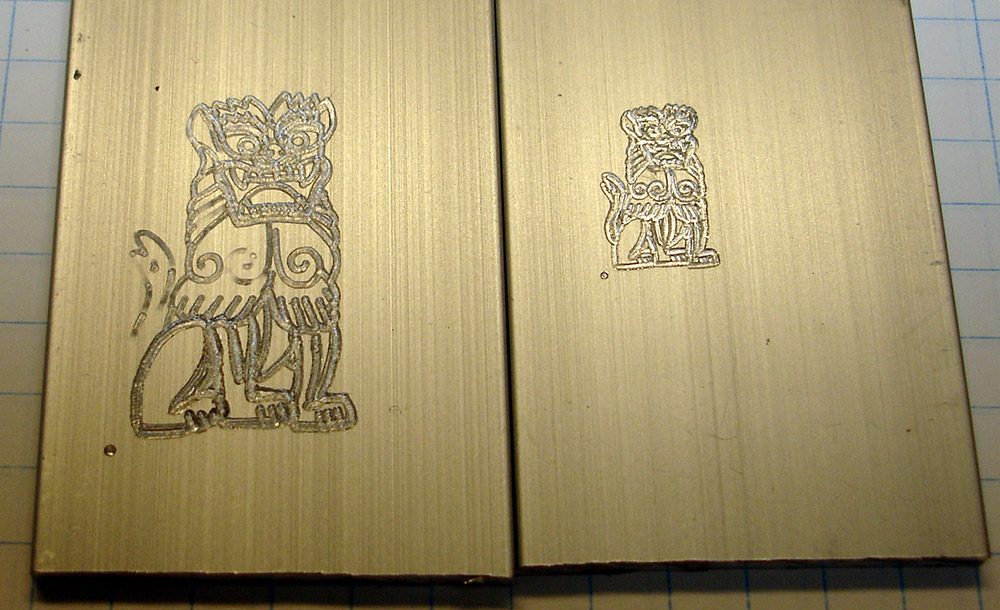
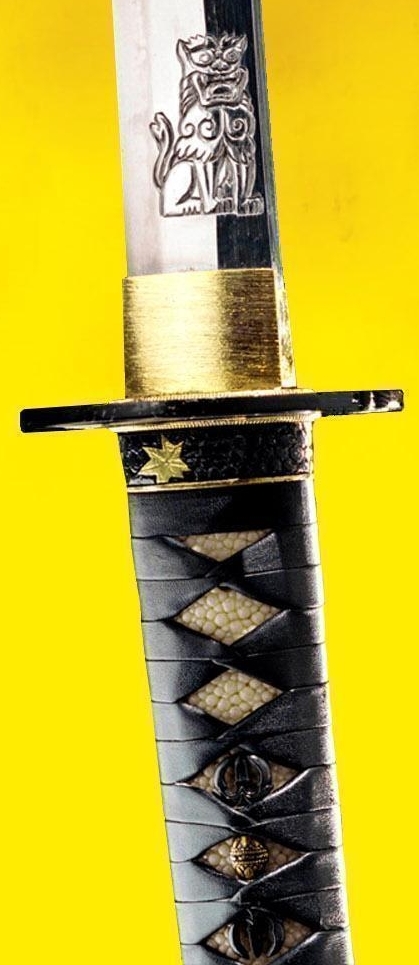
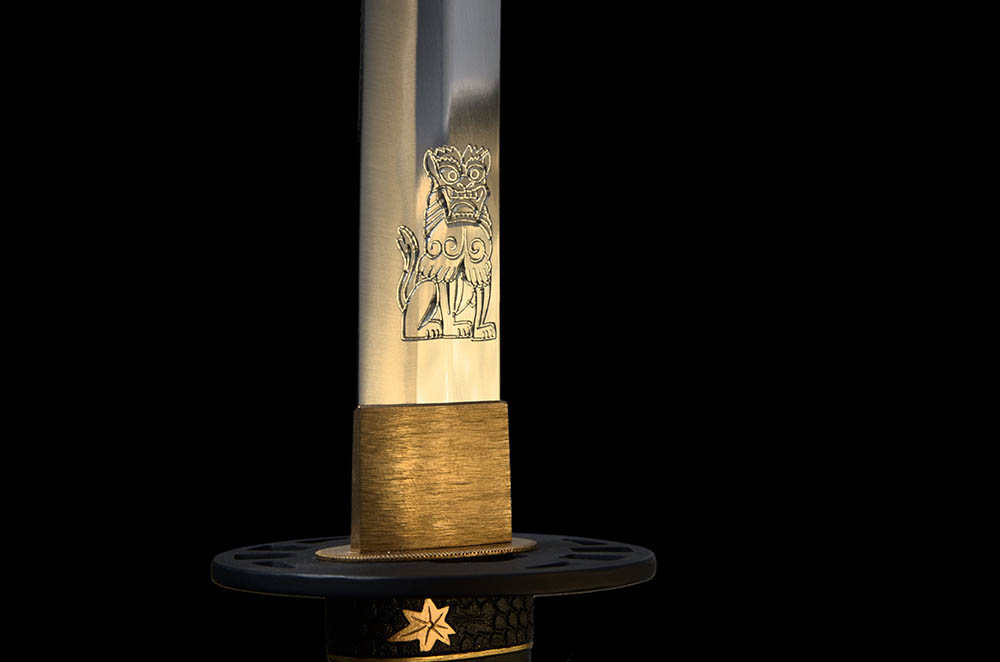
4. I've begun re-creating the artwork involved with the sword. These are the carvings I'll need a CNC for (not being a carver myself).
They are:
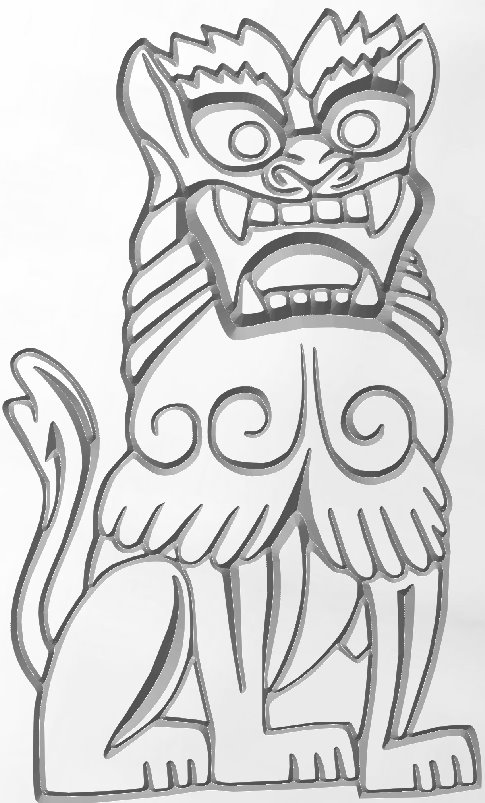
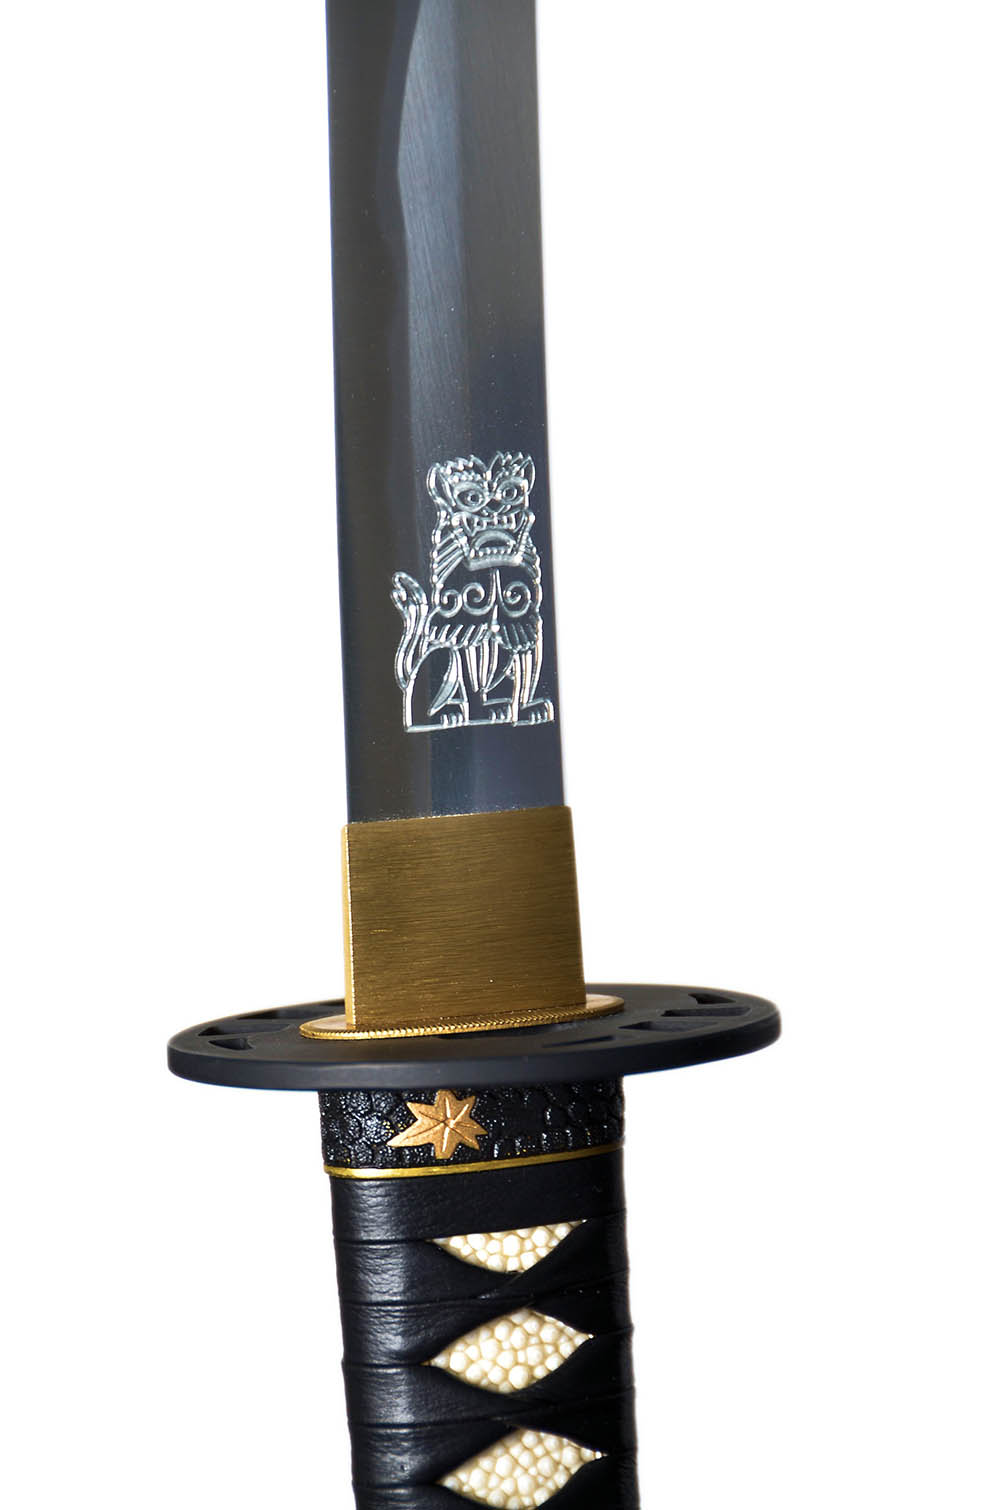
- the Lion
- the Foo-Dog and
- the Tri-foil leaf mon.
At this point the lion is ready to go, and I'm currently working on the foo-dog.
Here's a list of supplies I've ordered, and where from:
1. Blade/saya/habaki/sageo
Ordered
from Tozando Iaito, Japan. Blade is a 23.5 shaku (28") standard iaito
blade, with no bo-hi. Hamon pattern is "Ujishige" (an unlisted option).
Saya is kuroro, plain shiny black. Habaki is natural brass. Kissaki is
chu. Sageo is a silk Kincha, we'll see if it works out.
2. Fuchi/Kashira/KoJiri/Tsuba/Menuki/Seppa
Ordered
from Yamato Budogu. Fuchi/Kashira/Kojiri are called "Momoji" or Maple
Leaf. Antiqued brass (which I'll patinate). Tsuba is called "Hanzo",
Menuki are called "Kogosho". I'll need to gold-leaf the leaves on the
fuchi.
3. Mylar Gold Chrome tape, 3/4 inch. From HoopTapeCanada.com.
4. Leather handle wrapping (ito), from Fred Lohman Company. Best on market, 8mm, non-strech.
5. Grade 1 dried and scraped rayskin, and a set of gold-plated kashira ****odome from Namikawa Heibei. Beautiful skin.
6. Krylon gold-leafing pens. eBay.
7. One gold-filled 6mm brass bangle, rounded on outside, flat on inside. eBay.
8. Chunk of copper pipe. Home Depot.
Here are the dimensions I've come up with so far:
- Tsuka, 27.95cm including fittings
- Ito width 8mm
- Saya, 75.6cm
- Habaki, 2.54cm
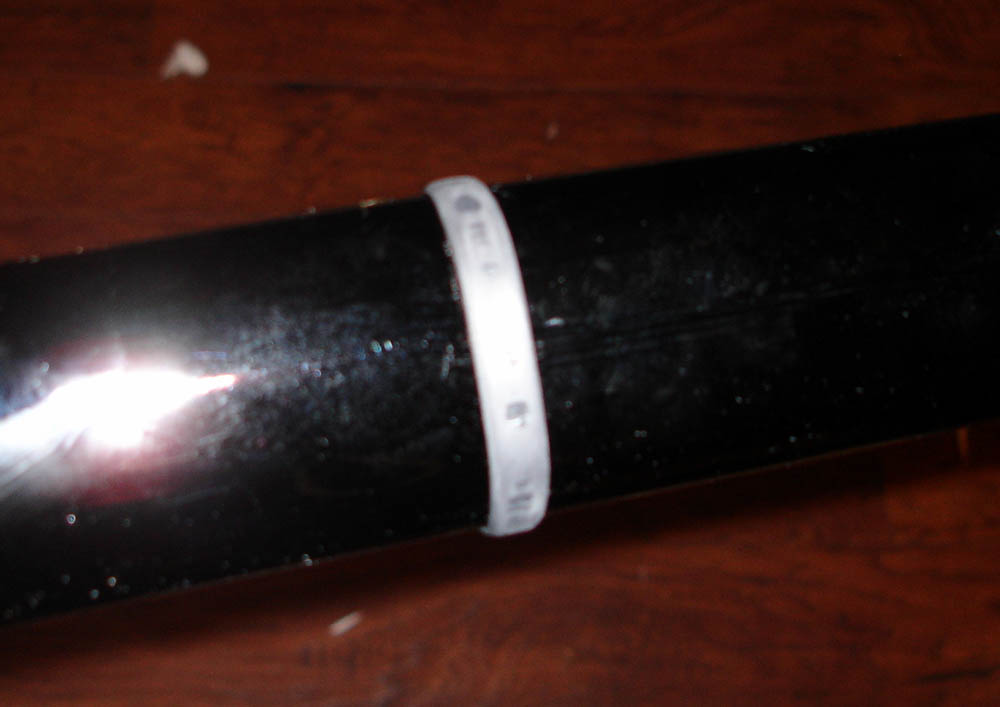
- Koiguchi Band, 1cm
- Blade Length, 71cm
- Gold Band, 6mm wide
- Distance from Koigouchi to Gold Band, 52.2cm
- Distance from Gold Band to Kojiri, 23.45cm
- Distance from Kurigata to Lion, 19.7cm
- Distance from Koiguchi to Kurigata, 8.2cm
- Distance from Koiguchi Band to Leaf Carving, 1.18cm
- Distance from Habaki to Foo Dog Carving, 6mm
- Dimensions of Leaf Carving, 2.5cm x 2.5 cm
- Dimensions of Foo Dog Carving, 1.9 cm x 3 cm
- Dimensions of Lion Carving, 2.9cm x 9.6cm
Well,
I think that's all for now. I'm waiting for the custom ordered parts to
come in from Japan, it should give me time to finish up the artwork.
HATTORI HANZO BUILD SWORD LOG: May 25, 2011
Fittings are in, and they're great!
Beautifully made, not a casting mark anywhere.
Dimensions are:
- Fuchi 40mmx24mmx12mm
- Kashira 39mmx18mmx14mm
I'm
hoping to not have too much trouble fitting the kojiri (once the saya
arrives), but I'm not feeling good about it - it's very skinny. Might
have to strip, sand, and repaint the whole saya...
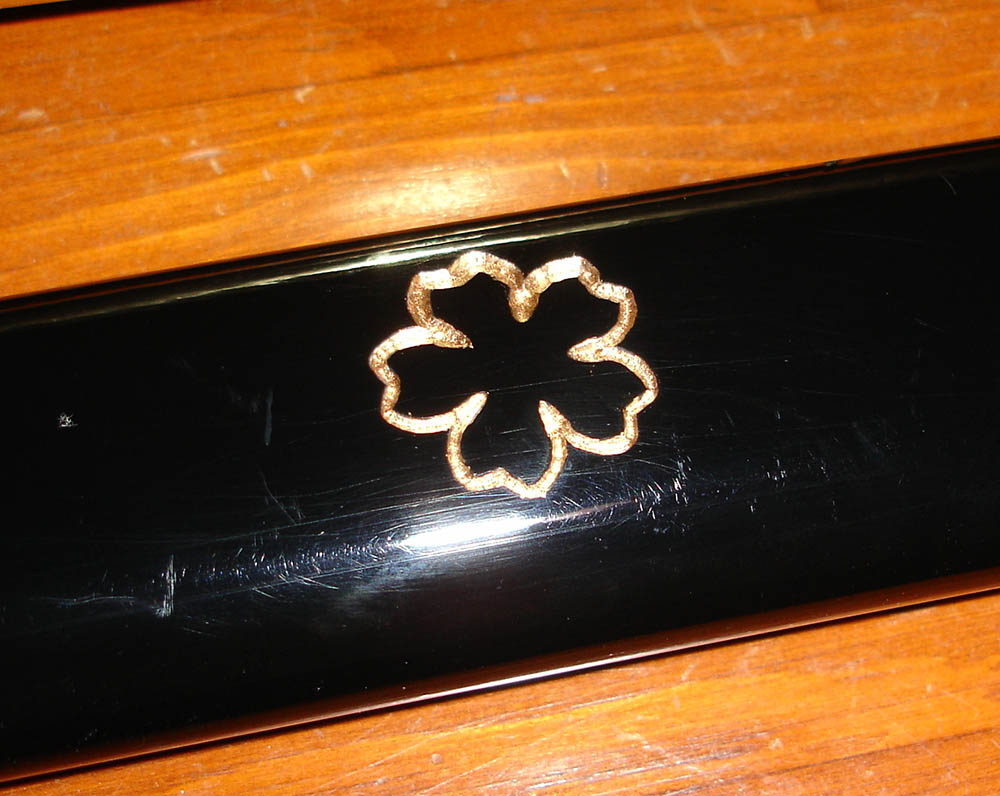
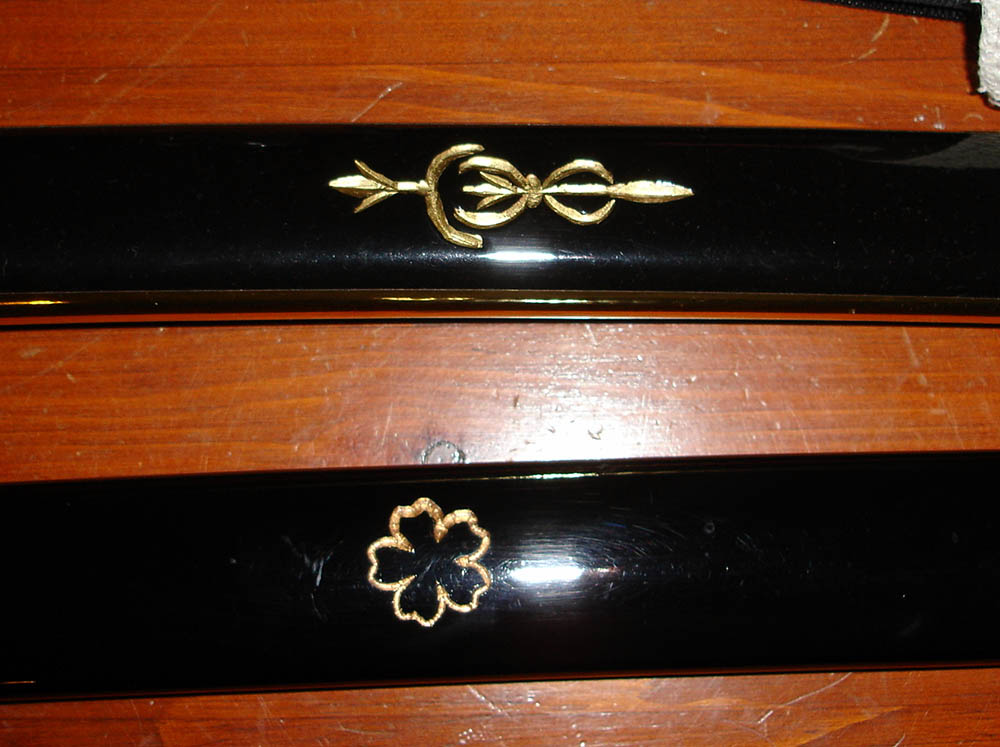
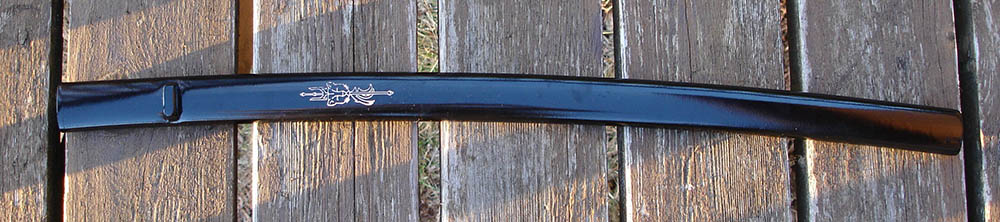
Btw, here the
Hanzo foo-dog I've come up with...as well as the saya leaf decoration.
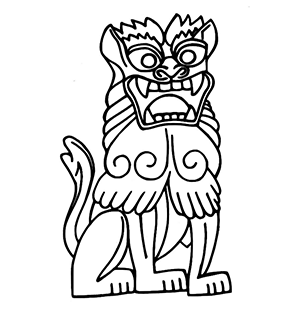

The leaf isn't exactly symmetrical, but the one the the film wasn't either. Hand-carved, I guess:)
HATTORI HANZO BUILD SWORD LOG: August 8, 2011
It's been a while, and there's been a bit of action, so an update is probably in order...
I'm
still waiting on the iaito blade from Tozando. They've been good about
it, but the first blade they made for me had a bo-hi. They caught the
mix-up, and started making another blade (with no bo-hi). It should be
shipping this week, finally:)
In the mean time, I've been...
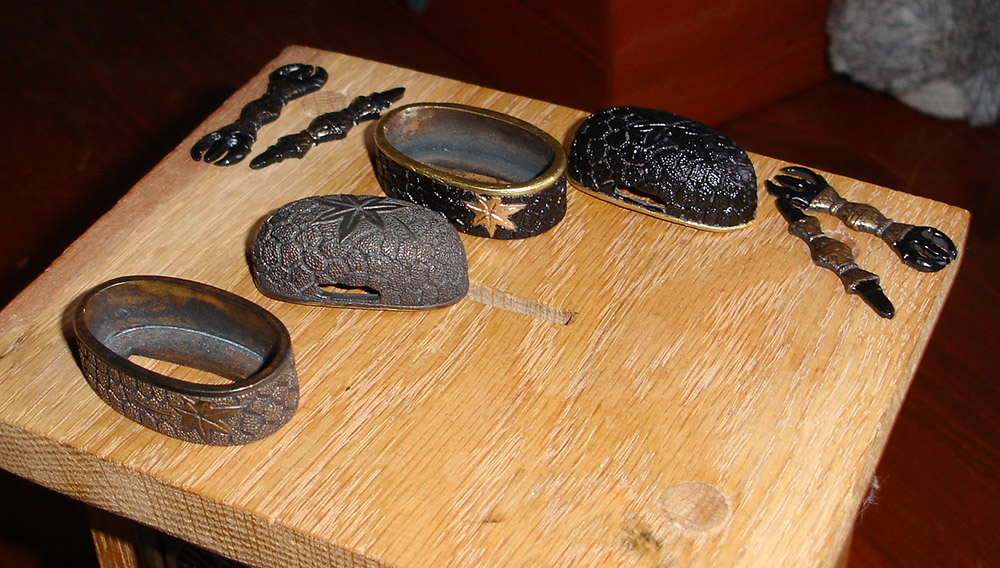
Getting
bronze casts made of the original fuchi/kashira that I ordered from
Yamato. Got 4 sets made, 1 for me, 1 for Adam, and a couple for a
couple of other guys working on their replicas. Casts turned out very
nice.
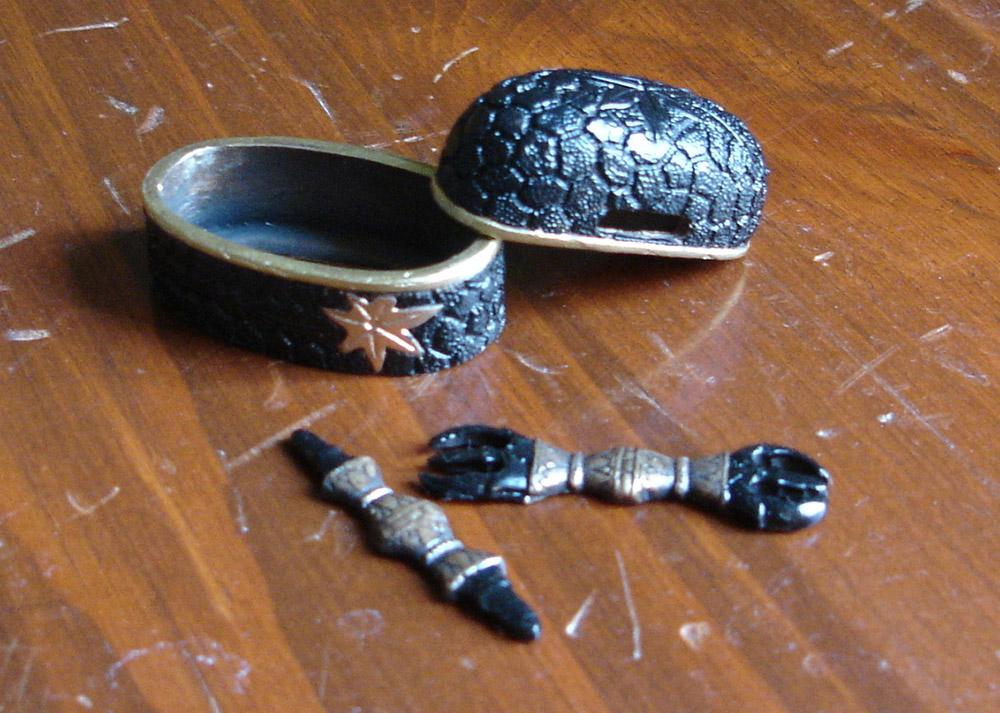 Original Fuchi, Kashira and Menuki from Yamato Budogu, Japan
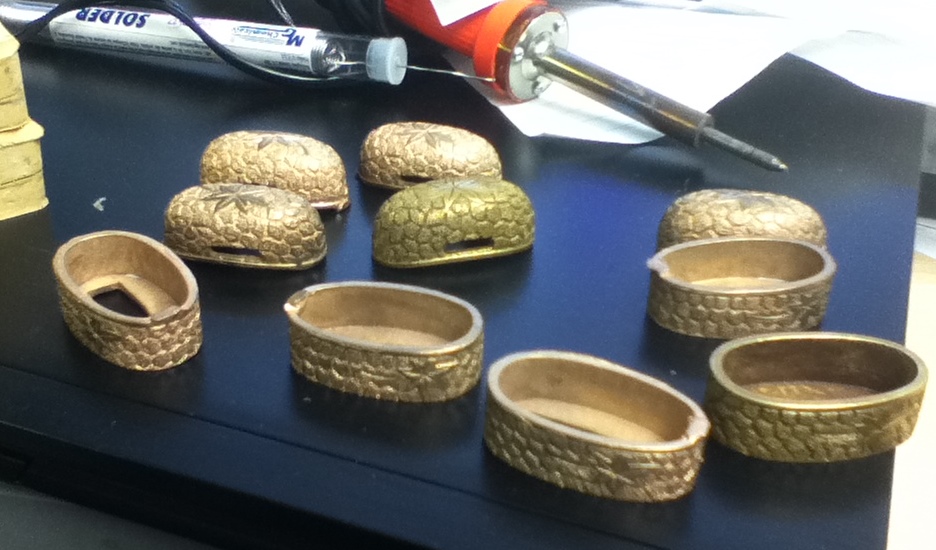
Tried blackening them, no luck. Finally resorted to enamel paint (I believe the original prop was painted in any case), and that worked out nicely. Dipped the fittings in Muriatic acid first, to give them a slight etch for good adhesion.
So, in addition to Adam's sword,
I've been working on refitting a blade that I already had as my
Bride's sword replica. Its a 28" no-hi clay-tempered blade, nicely
shaped, and very sharp. The tsuka was a bit sketchy, but since the
sword going to be for display and light handling, I figure it's ok.
Reworked
the tsuka shape, bringing the lines up, fitting the new bronze casts
parts. Added a bit of wood to add a little length under the fuchi (the
previous fittings were very thick). Swapped in a
different saya, fits nicely.
Cut/polished a
new buffalo horn kurigata for the new saya, glued it in. Filled in the
extra cut-out space on the edges of the kurigata.
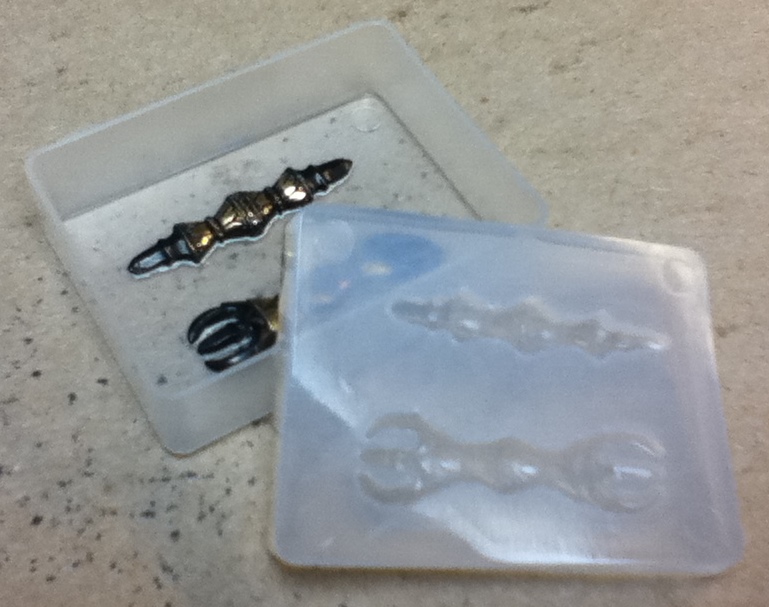
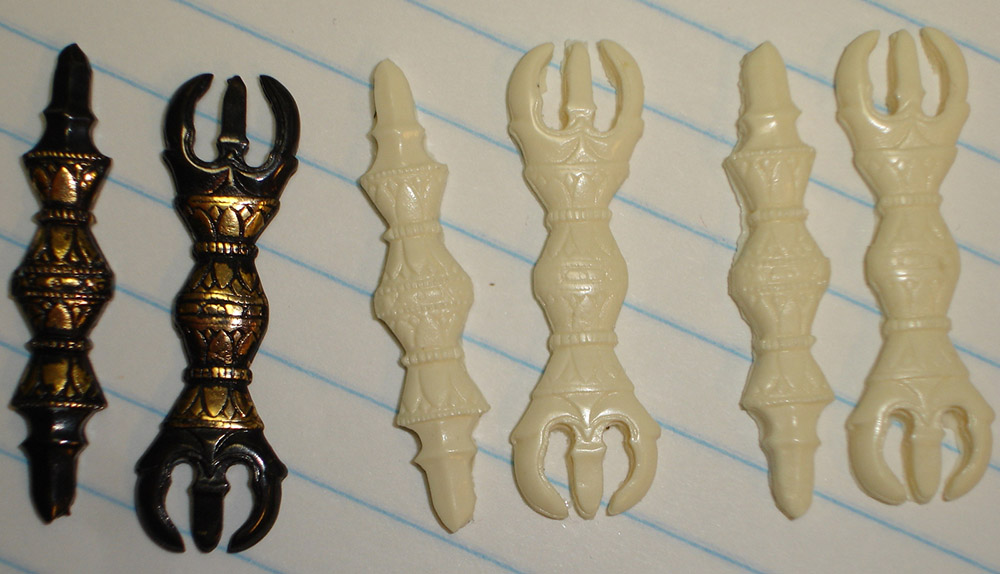
Made a silicone
cast of the original fuchi/kashira, then cast a few sets in
polyurethane casting resin. The detailing that the silicone keeps is
very cool. I'm not using these on my BS (I have a brass set), but I
just though it would be neat to be able to make them, if the need arose.
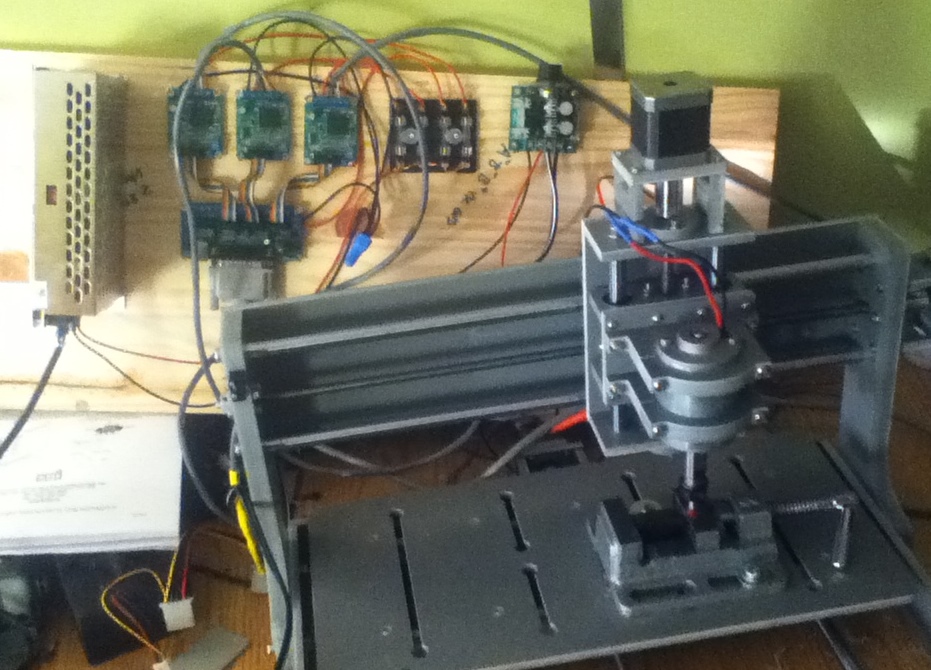
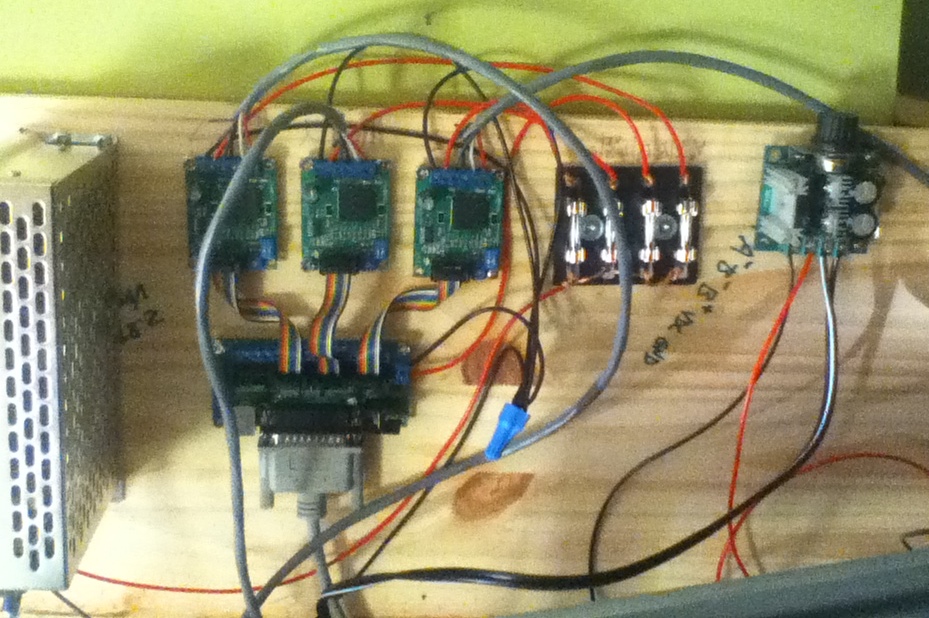
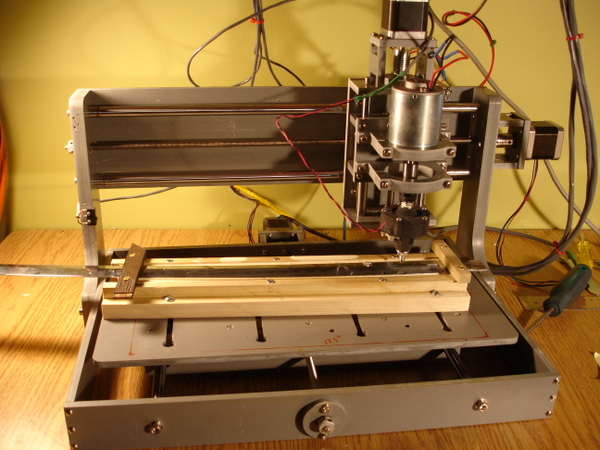
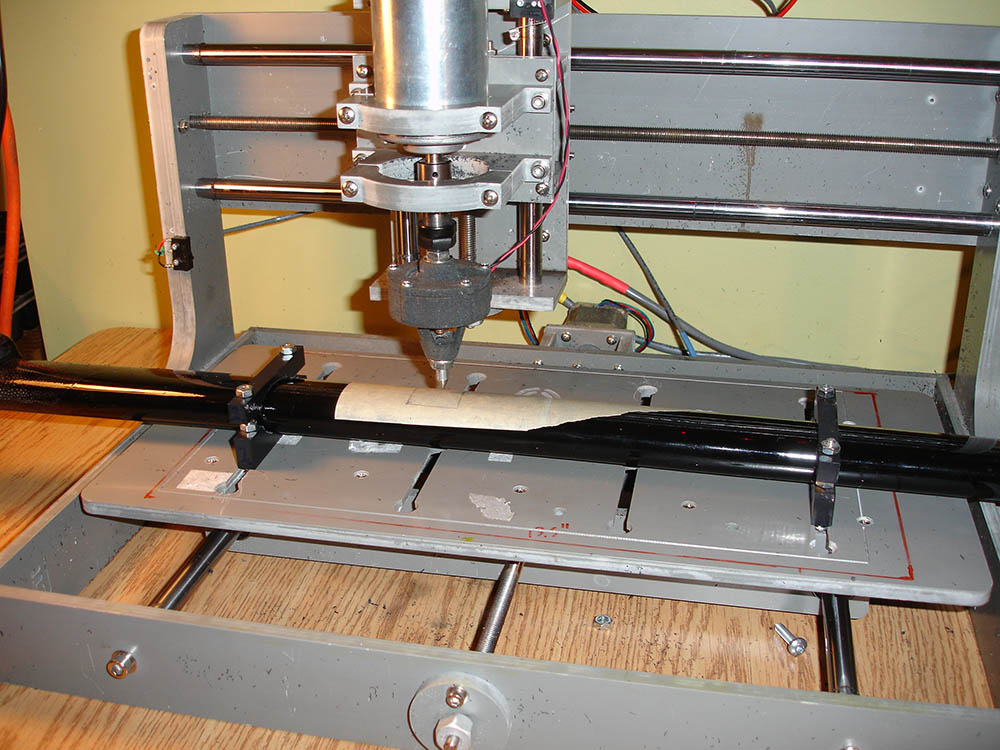
Oh,
and my CNC kit is in. I'm going to be using it to do the carvings on
the sayas, and also to engrave the foo-dog on the blades. I'm managed
to get it assembled, connected to a controller board from eBay, and
powered-up by a hot-wired PC ATX power supply (12v at 10a is a little
hard to find). Still waiting on my 32v 2a spindle power supply. I have
managed to get it talking to Mach3 (CNC controller software), and got
it to draw a little picture using a Sharpie yesterday, so everything
seems to be working fine so far. Next up on this front is mounting
limit/home switches on the CNC frame, and getting that input into my
computer/Mach3.
Well, that's about it for now - I'm currently
working on getting some tsuba blanks cut from 4.75mm steel, and as soon
as Adam's iaito comes in, I'll be working on getting that underway,
fitting the fittings, inlaying the rayskin, and doing the wrap...
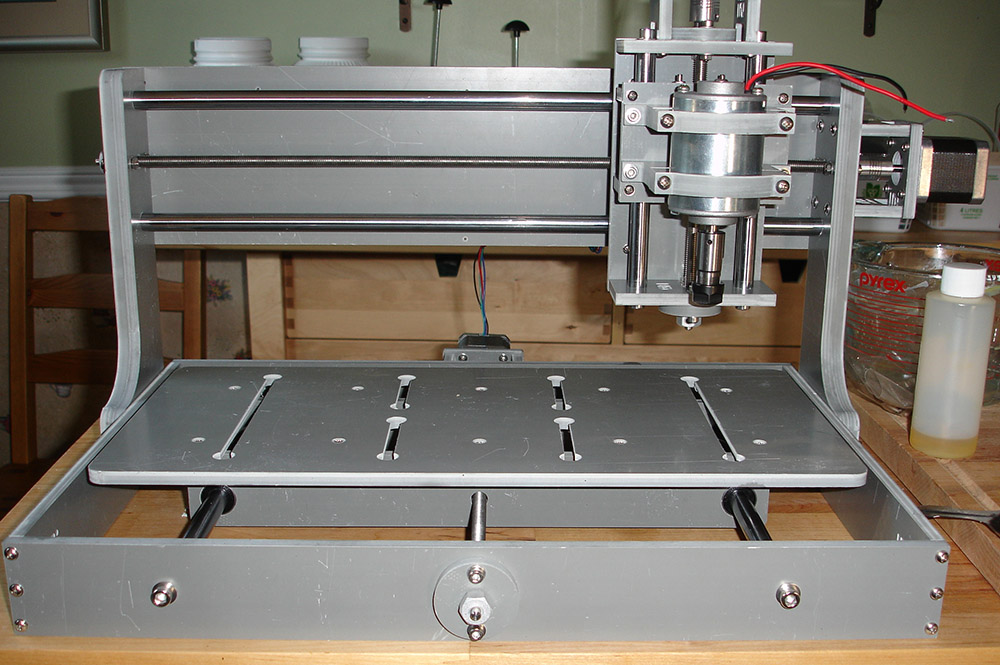 Home CNC Machine
HATTORI HANZO BUILD SWORD LOG: August 12, 2011
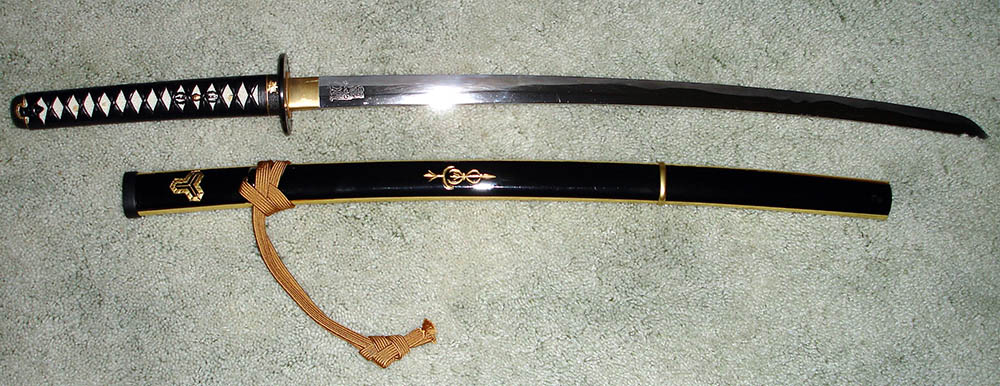
The blade/saya/habaki are in, and I am not unhappy:) Every time I look
at a Japanese iaito, I'm always impressed by the crisp, clean work that
the craftsmen do on these swords - whole different game compared to most
low cost Chinese swords. I know that's to be expected, but I've seen
$500 Chinese swords that don't have anywhere near the detailing of a
$500 Tozando.
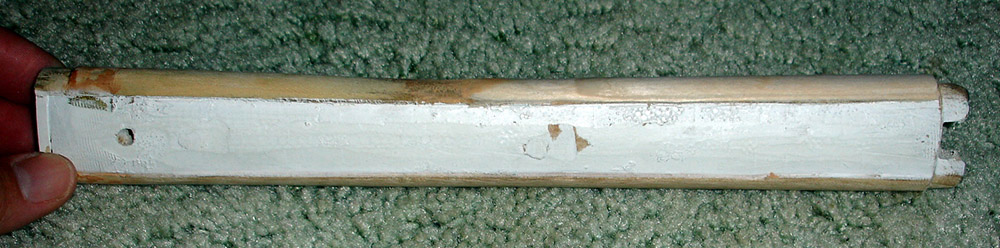
Tsuka is only 9", so I'm going to have to add a
couple of inches of poplar to it (glue and pins to secure it).
Koiguichi to kurigata distance is 8cm, just what I was looking for (as
per my calc's from movie stills).
The hamon is very nice, looks like a combination of acid etching and wirebrush. Crisp lines on the shinogi.
Now, I can finally get to some work, fitting the fittings, rayskin cutting, extending the tsuka...
HATTORI HANZO BUILD SWORD LOG: August 19, 2011
Quick update...
Added a bit of wood to the kashira end of the
tsuka on one side to bring the lines up - used some of the pre-glued
veneer they sell at Home Depot. Goes on easy with an iron, and works
well. I think I used spruce or poplar. Just a bit more sanding to go,
and then I can rayskin...
Also, tested out putting clear
coats over enamel paint... tried two different ways, and learned that a
spray satin urethane looks much nicer (and less glossy) than a
brush-applied "Model Masters" clear coat. Have to strip my fuchi down
now, repaint, and re-clear-coat (spray) it again...
HATTORI HANZO BUILD SWORD LOG: August 22, 2011
Click here for our tutorial on making a new perfect fitting tsuka core from scratch
Did some work this weekend on adding the extra 1 - 1.5" to Adam's
tsuka... The jig for drilling dowel holes my buddy lent me worked great
- angles lined up, holes lined up, everything fit nicely.
Just
a bit more work to go on the shaping, then a little chiseling, and
it'll be time to do a test wrap with the leather, and see where things
line up.
I haven't epoxied the extension into place yet, in case I screw up somewhere along the way... :)
 Jig for dowel holes
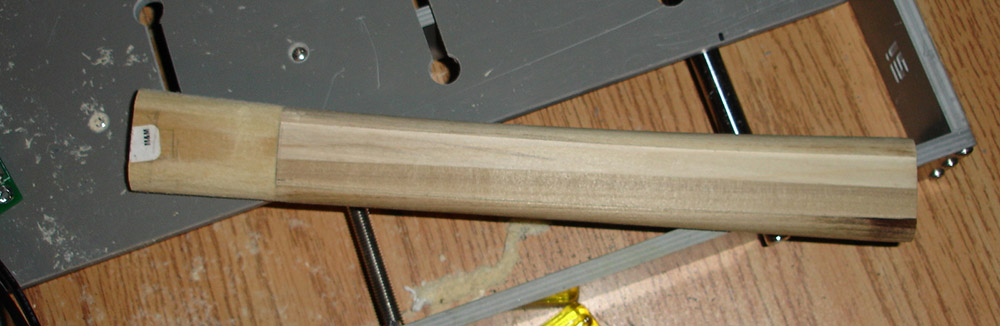 And the tsuka is extended
HATTORI HANZO BUILD SWORD LOG: August 25, 2011
Finally got around to running a test engraving in aluminum last night.
It wasn't a 100% success (scale problems, my aluminum wasn't flat, the
tip of my bit snapped off during the run), but it engraved! In
aluminum!:) Off to eBay to order more bits, and lower the feed rate on
my CNC:)
HATTORI HANZO BUILD SWORD LOG: August 29, 2011
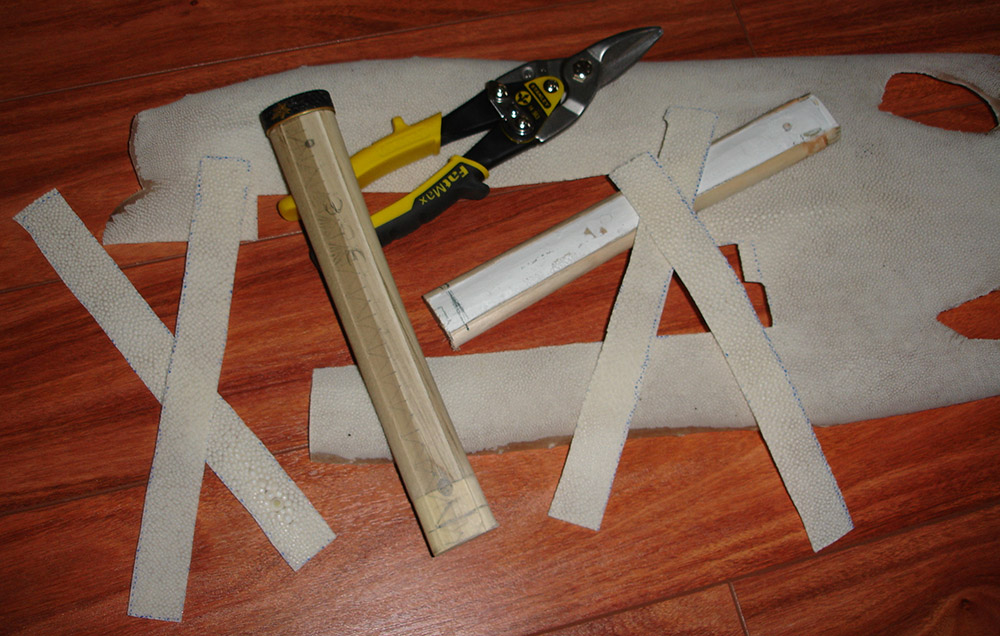
Finished up shaping the extension this weekend, got it glued in place.
Fitted the fuchi. Laid out the rayskin, and marked up the tsuka for the
wrap/node placement. My extension was a little long, so I had to trim
it back. I like to use metal snips for cutting rayskin. Much easier
than the kitchen shears I used to use:)
Next up is drilling! I'm
not looking forward to it - one chance to do it right. I think I'm
going to build a clamping bed out of polymer clay to hold the tang
properly during the drilling.
HATTORI HANZO BUILD SWORD LOG: September 8, 2011
Completed the painting of the fuchi leaves last night. Really makes a
difference using a nice brush instead of a 10 for a buck one from the
dollar store:) Also, a 5x loupe helps a lot.
Next up,
clear-coating the fuchis (fuch-i? what would be the plural here?:)) and
then drilling the nakago-ana - I think I'll use my drill-press vise for
that (since I now have one:))
HATTORI HANZO BUILD SWORD LOG: September 20, 2011
Not much time to do any work this week - but I did manage to get the
hole drilled through the tsuka/nakago. The Aluminum was much nicer to
work with than hardened steel (duh!:)). As usual, things were just a
smidge loose when the meukugi was inserted, so I tightened things up
with a very thin layer of wood on the end of the tsuka, under the fuchi.
Now everything is super tight. Did a lot of
clamping/measuring/leveling/clamping/leveling/measuring before I drilled
the hole, wanted to make sure everything would line up properly.
Next up, rayskin:) I love the smell of burning rayskin in the morning:)
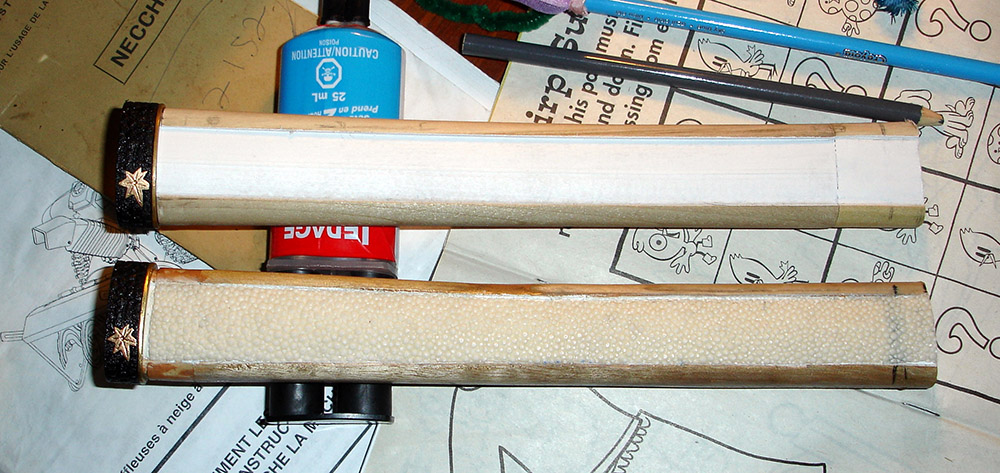
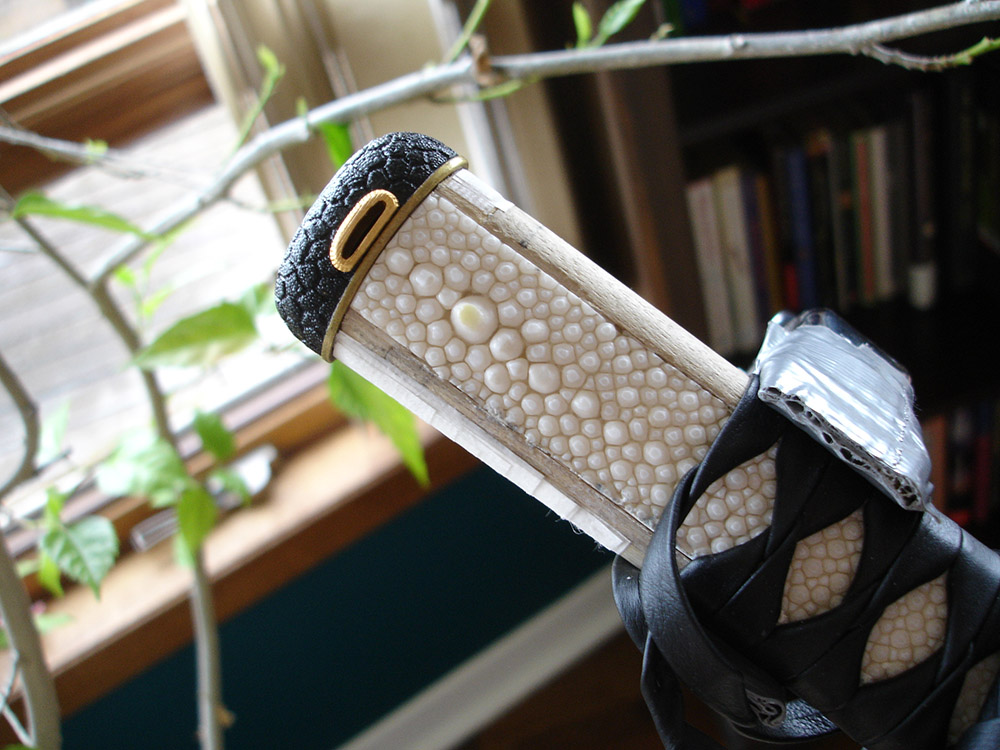
HATTORI HANZO BUILD SWORD LOG: September 27, 2011
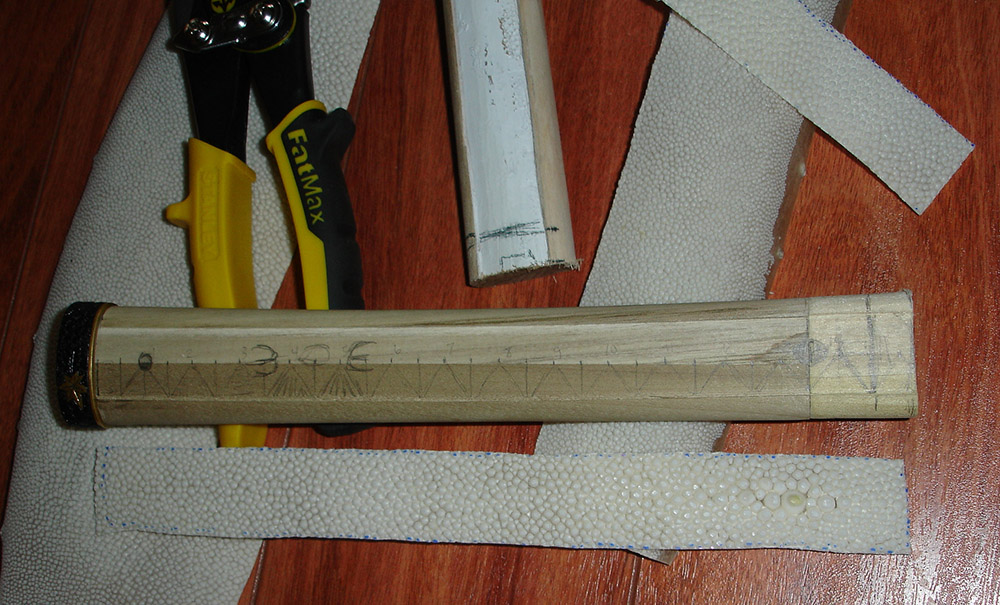
Rayskin is in place - used my belt sander to shape the strips to the
tsuka grooves, soaked them in water for about 2 mins, then applied VERY
LIGHT coating of 2-hour white marine epoxy to the grooves. Wrapped it
up in old ito, and let it sit overnight. Had a little extra epoxy at
spots along the edges of the rayskin, but it should be covered by the
ito in any case.
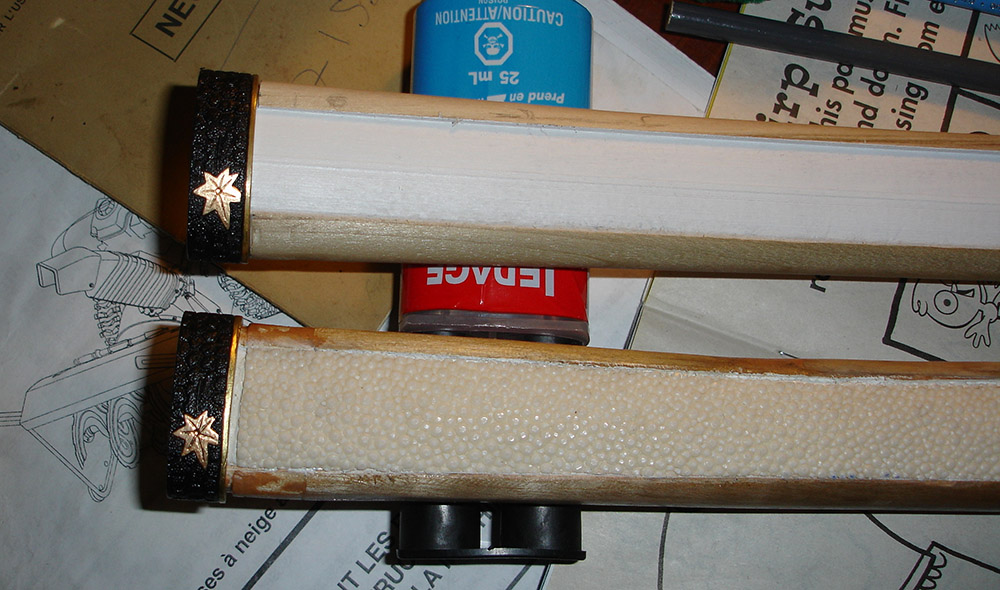
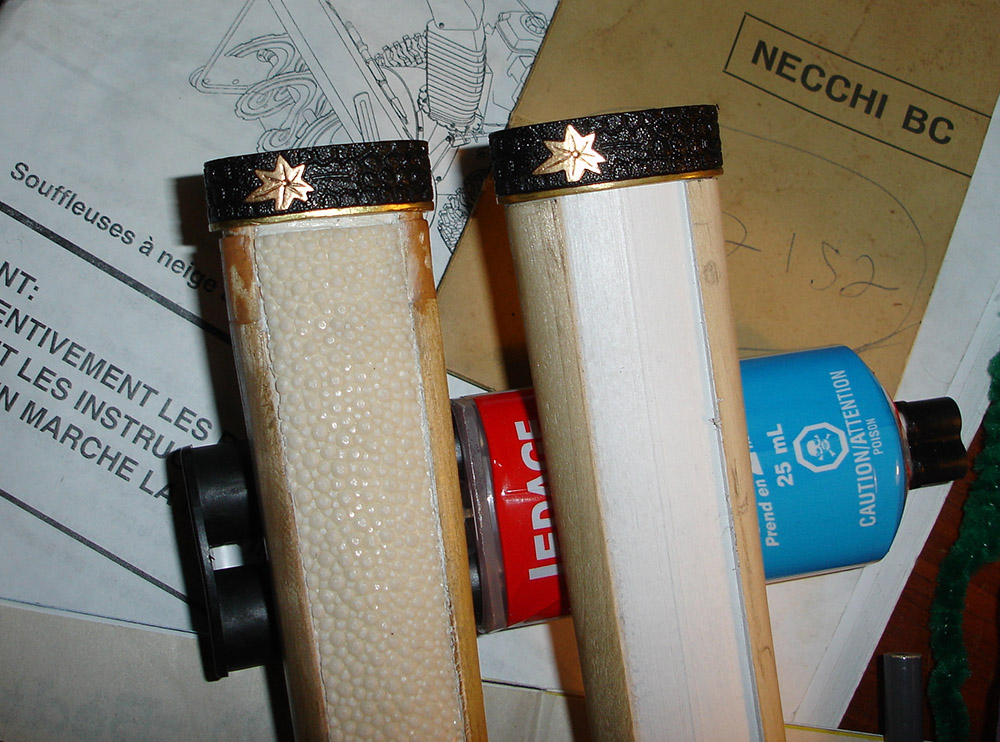
Lucked out, and the fuchi fitted right over the
rayskin (after a little sanding/filing). It's always tricky cutting the
rayskin to butt up against the edge of the fuchi, because a tiny error
means a gap. Much nicer going under. As a bonus, the fit between the
fuchi and tsuka is complete all the way around (if you catch my
meaning). The tsuka "fills" the fuchi completely.
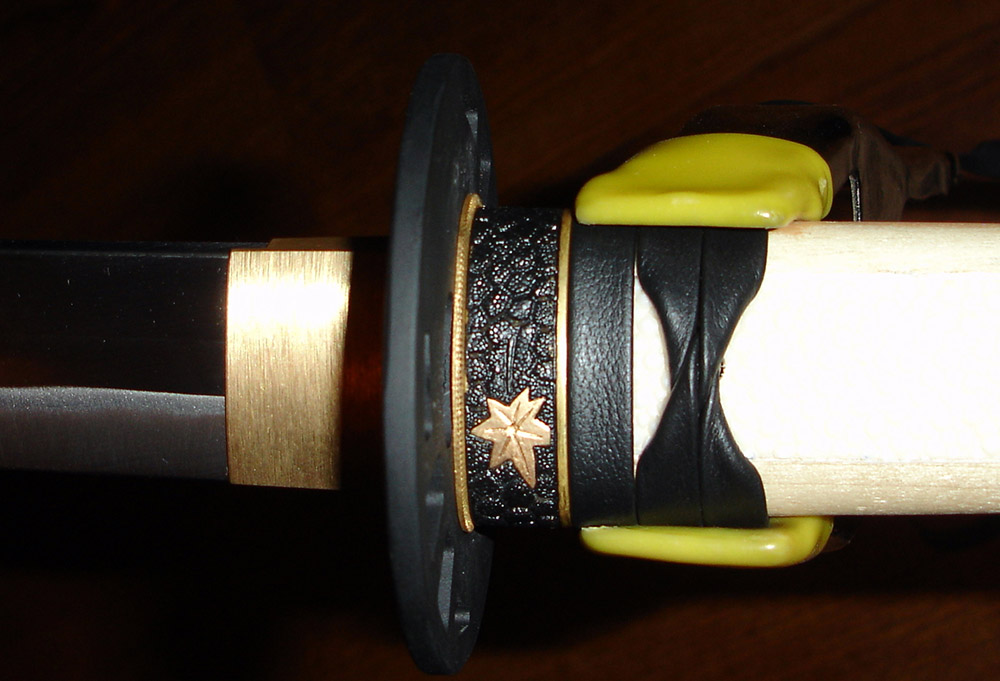
Also, finally
got to positively confirm that the mekugi-ana is going to be in the
right place on the tsuka, right under the first turn-over on the omote
side. Planning pays off, I guess:)
Next up, hishigami and wrapping!
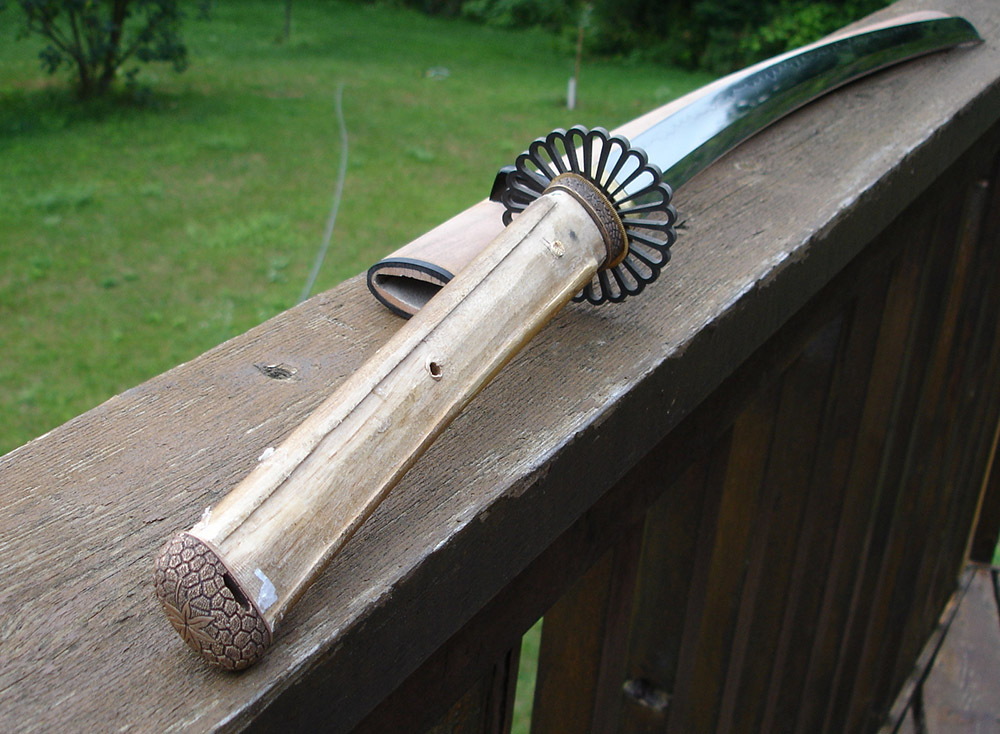
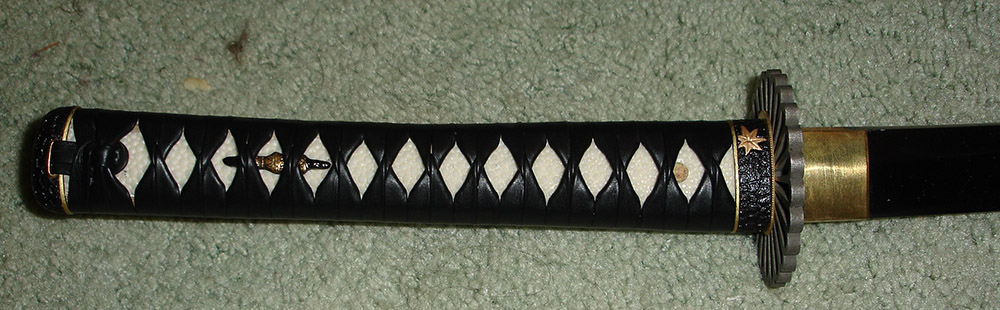
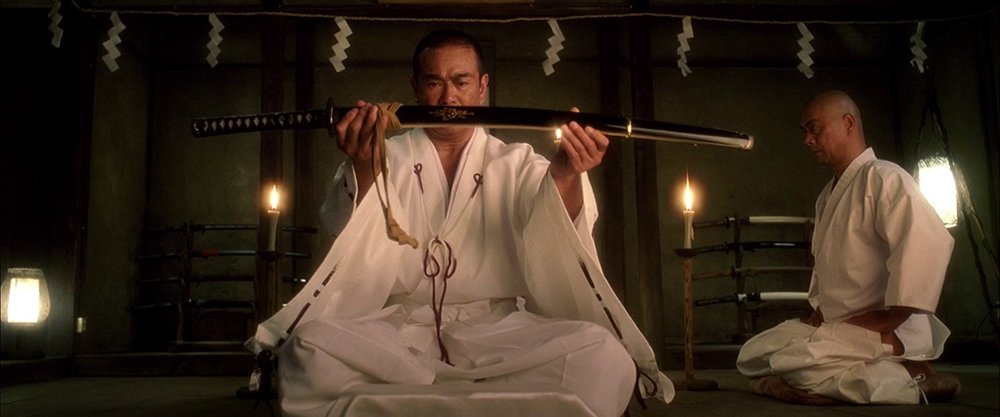
 This picture of the original sword confirmed where the menuki handle ornament should be
HATTORI HANZO BUILD SWORD LOG: October 25, 2011
Click here for our tutorial on wrapping a tsuka
Got sword B (my sword) wrapped up over last week. Lohman leather is
great stuff, hardly any stretch, and I didn't feel in danger of snapping
it ever during the wrap. Not even close, actually. In the past, I had
ordered some leather ito off eBay, and it snapped about half-way
through, and stretched like crazy. Very hard to get nice, tight
diamonds with. Used hishi-gami made from thin cardboard.
Wrap
went pretty smoothly. Had to cut down the tsuka slightly to get the
right number of cross-overs, and then had to add a few strips of rice
paper on one side towards the kashira to bring up the lines to match the
kashira's edges. That was about it for the tricky stuff. Oh, one more
thing, getting two strips of leather thought the small shitodome on the
kashira was no fun either:)
Next up, wrapping Adam's sword (once my thumbs are back to 100%):)
HATTORI HANZO BUILD SWORD LOG: November 2, 2011
Started working on wrapping Adam's sword last night. As I got towards
the end, however, my suspicions about incorrect emperor node placement
were confirmed - it was about 5mm off from where it should be. I'll
have to unwrap about half, cut the rayskin strip, remove 5mm (or so,
depending on kerf), glue it back down, and rewrap. More burning hair
smell soon:) I'll hide the new seam under a cross-over.
Just
wanted to say again - Lohman leather is great stuff. I'm wrapping as
tight as I can, my thumbs are killing me, but this leather is not
stretching at all, and I feel NO danger whatsoever of snapping it.

HATTORI HANZO BUILD SWORD LOG: November 4, 2011
Unwrapped half the handle, cut the raysking right under where a
cross-over will be. Managed to pry the rayskin off without damaging
either the tsuka or the rayskin. Sanded off about 5mm of rayskin from
the cut-off bit, and then epoxied it back in place. Did a test wrap,
and everything looks good now. Seam is hidden, and node is centered.
Hoping to have this thing done being wrapped by the end of the week-end.
HATTORI HANZO BUILD SWORD LOG: November 14, 2011
Finished up the wrap on Adam's sword this week-end, had to fit the
kashira and add a bit of rice-paper to bring up the edges of the tsuka
to make the lines workout (and get the leather to align with the sides
of the kashira).
I was about 3/4 through the end knots, had just
epoxied the first strand of ito in place on the omote side, when i
noticed (and I don't know how I missed this) that one of the cross-overs
was crossing in the wrong direction. Double-check. Triple-check. I
was a little sad for a while:)
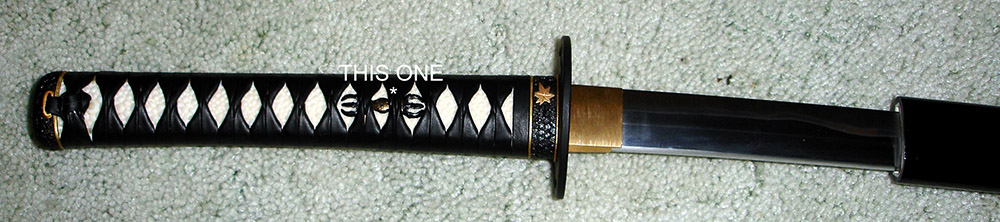
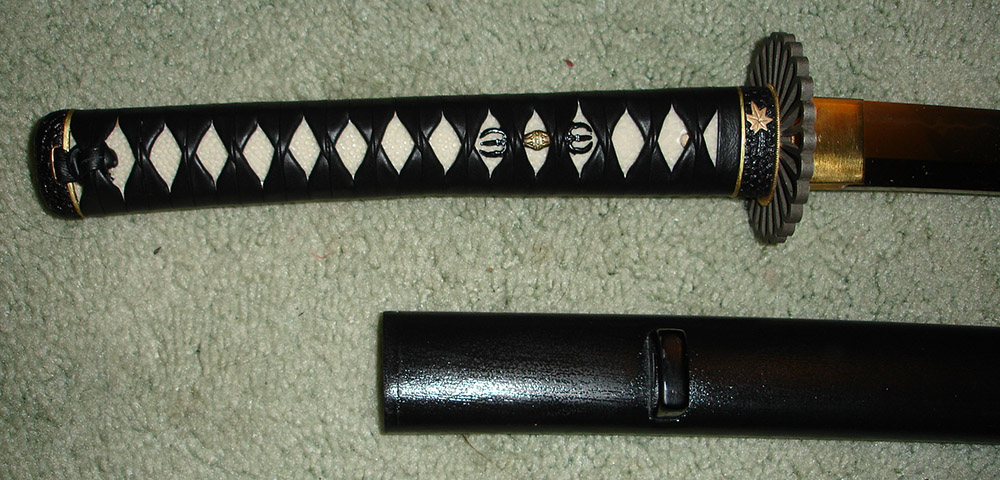
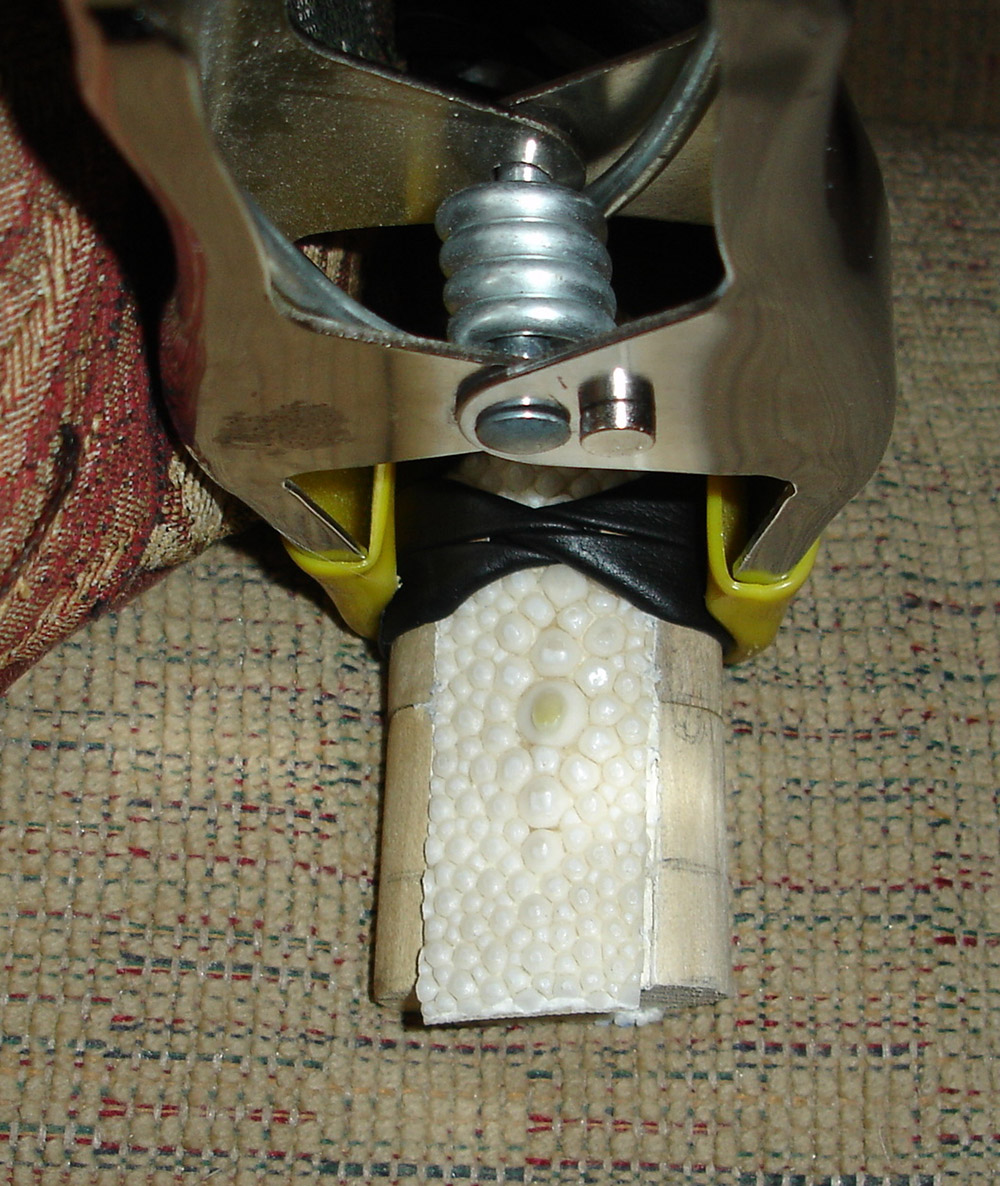
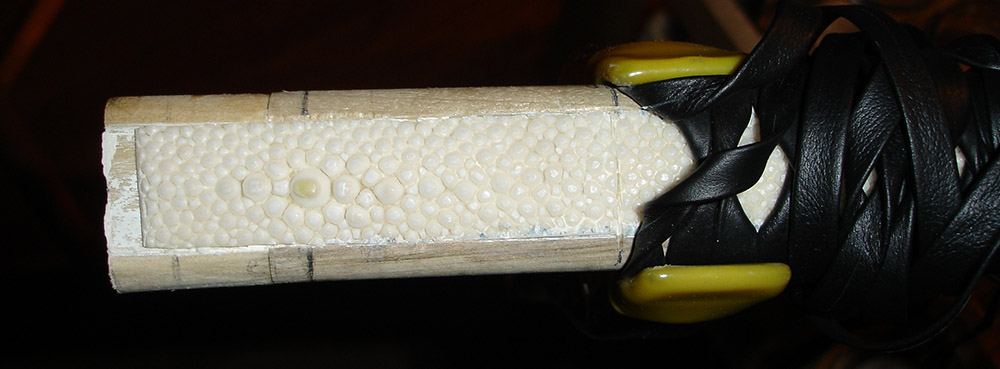
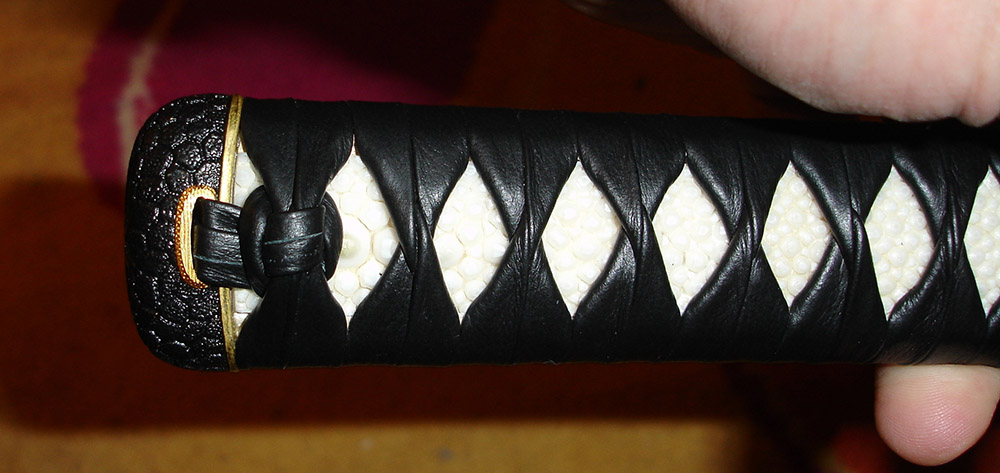
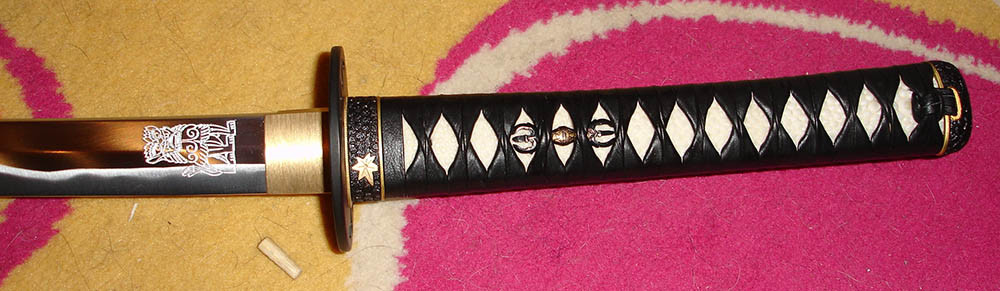
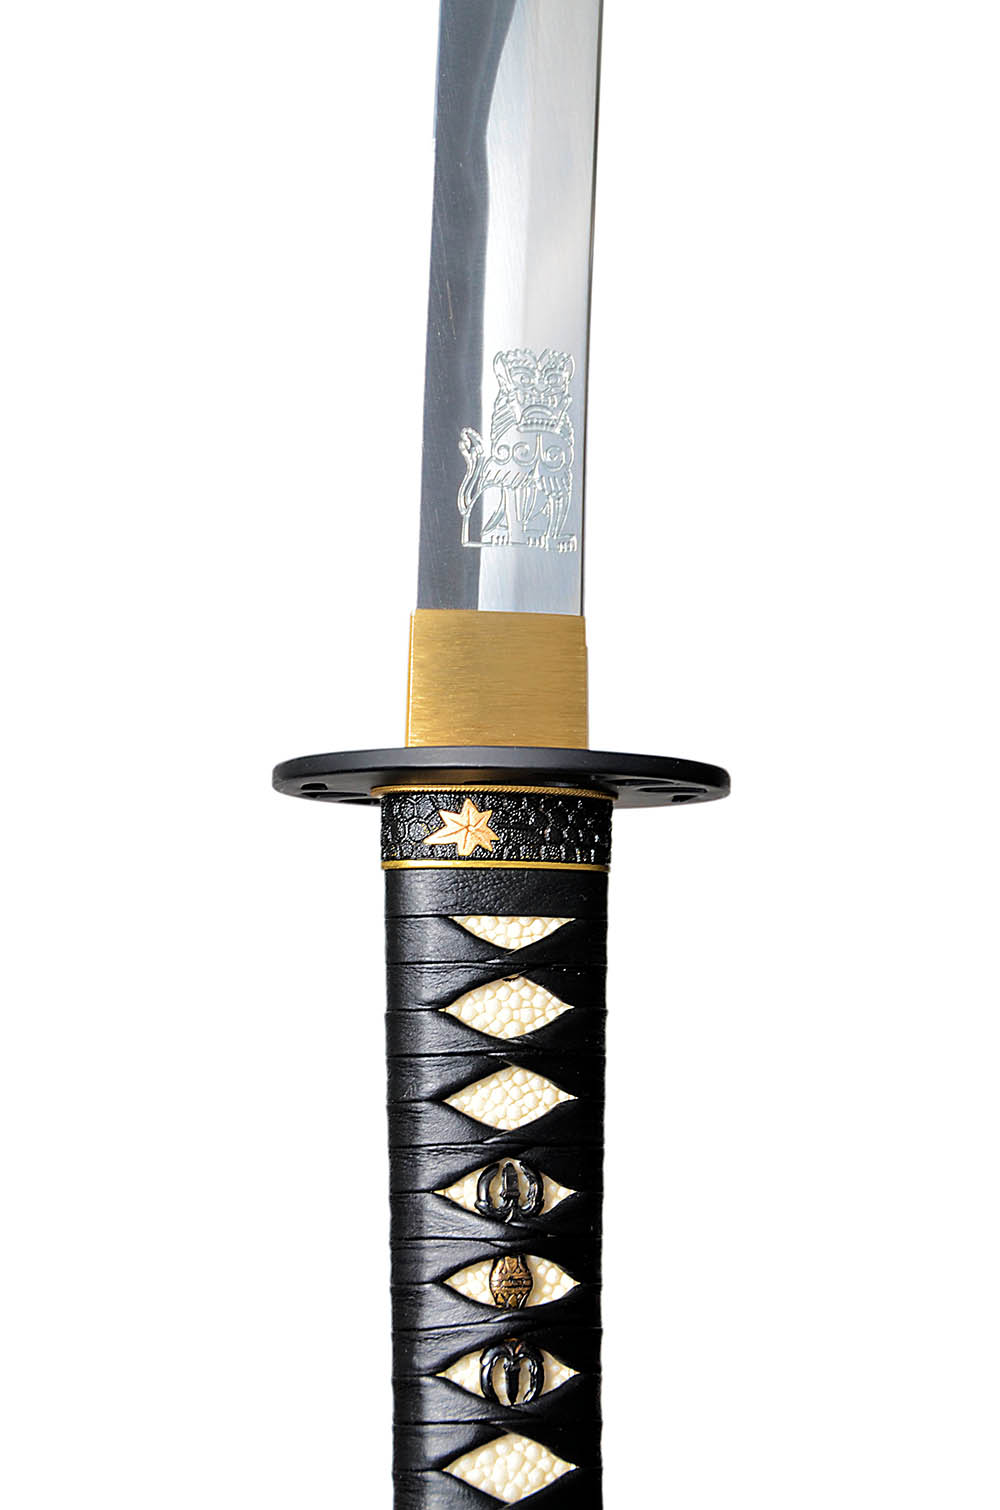
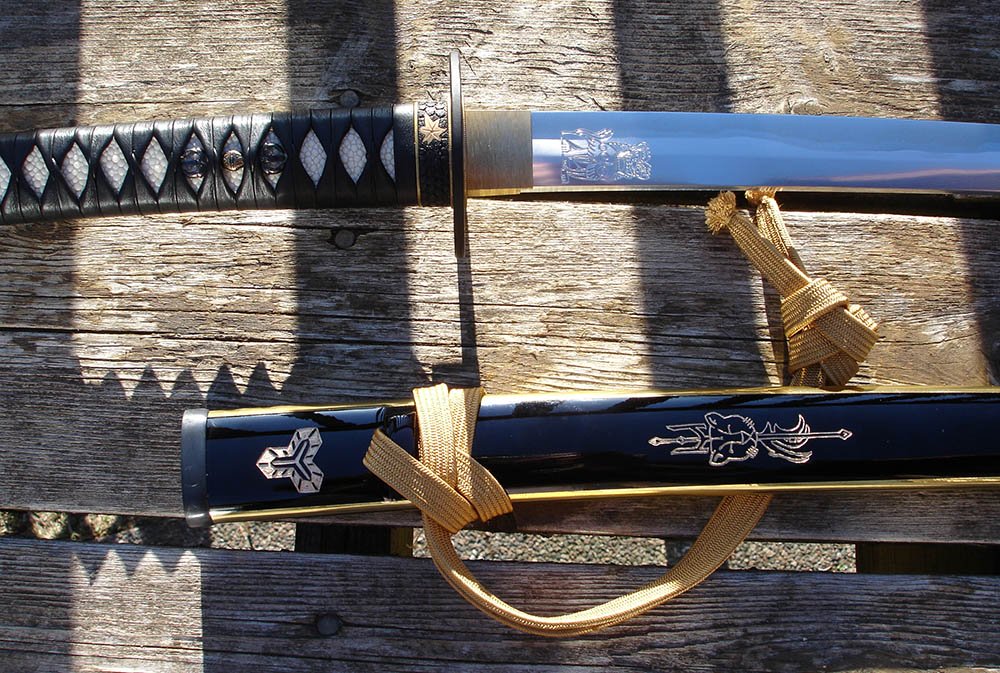
 Stunning Rayskin with huge and prominent Emperor Nodes
So, I'll be ordering some more ito
from Fred. In any case, when I finished tying the end knots, the
omote side one didn't come out as nicely as I would have liked, so it'll
be good to try again.
On another note, my new stepper motor
controllers for the CNC should be in this week, so I'll be able to do
some real tests on my CNC, and see how it does with the deep(er)
engraving that Adam wanted on the sword.
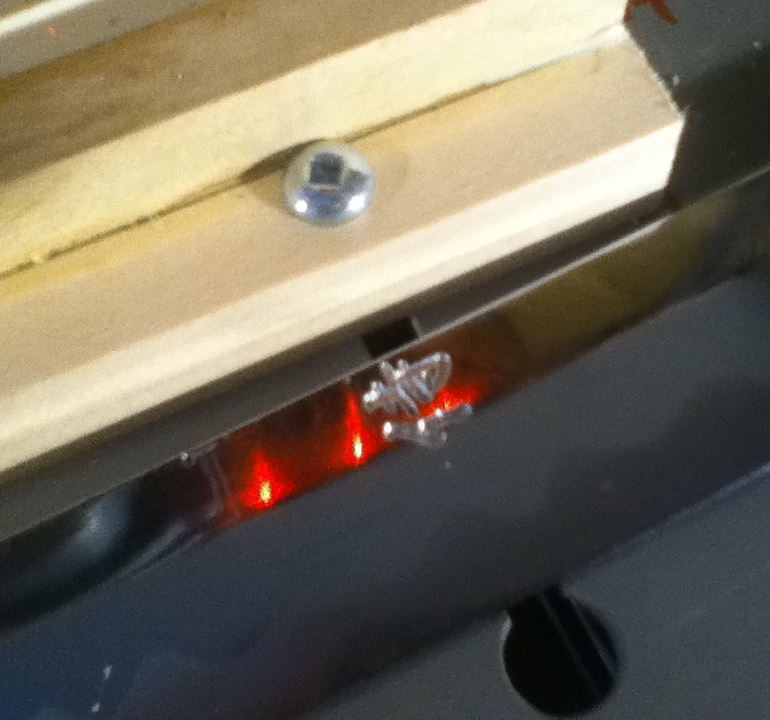
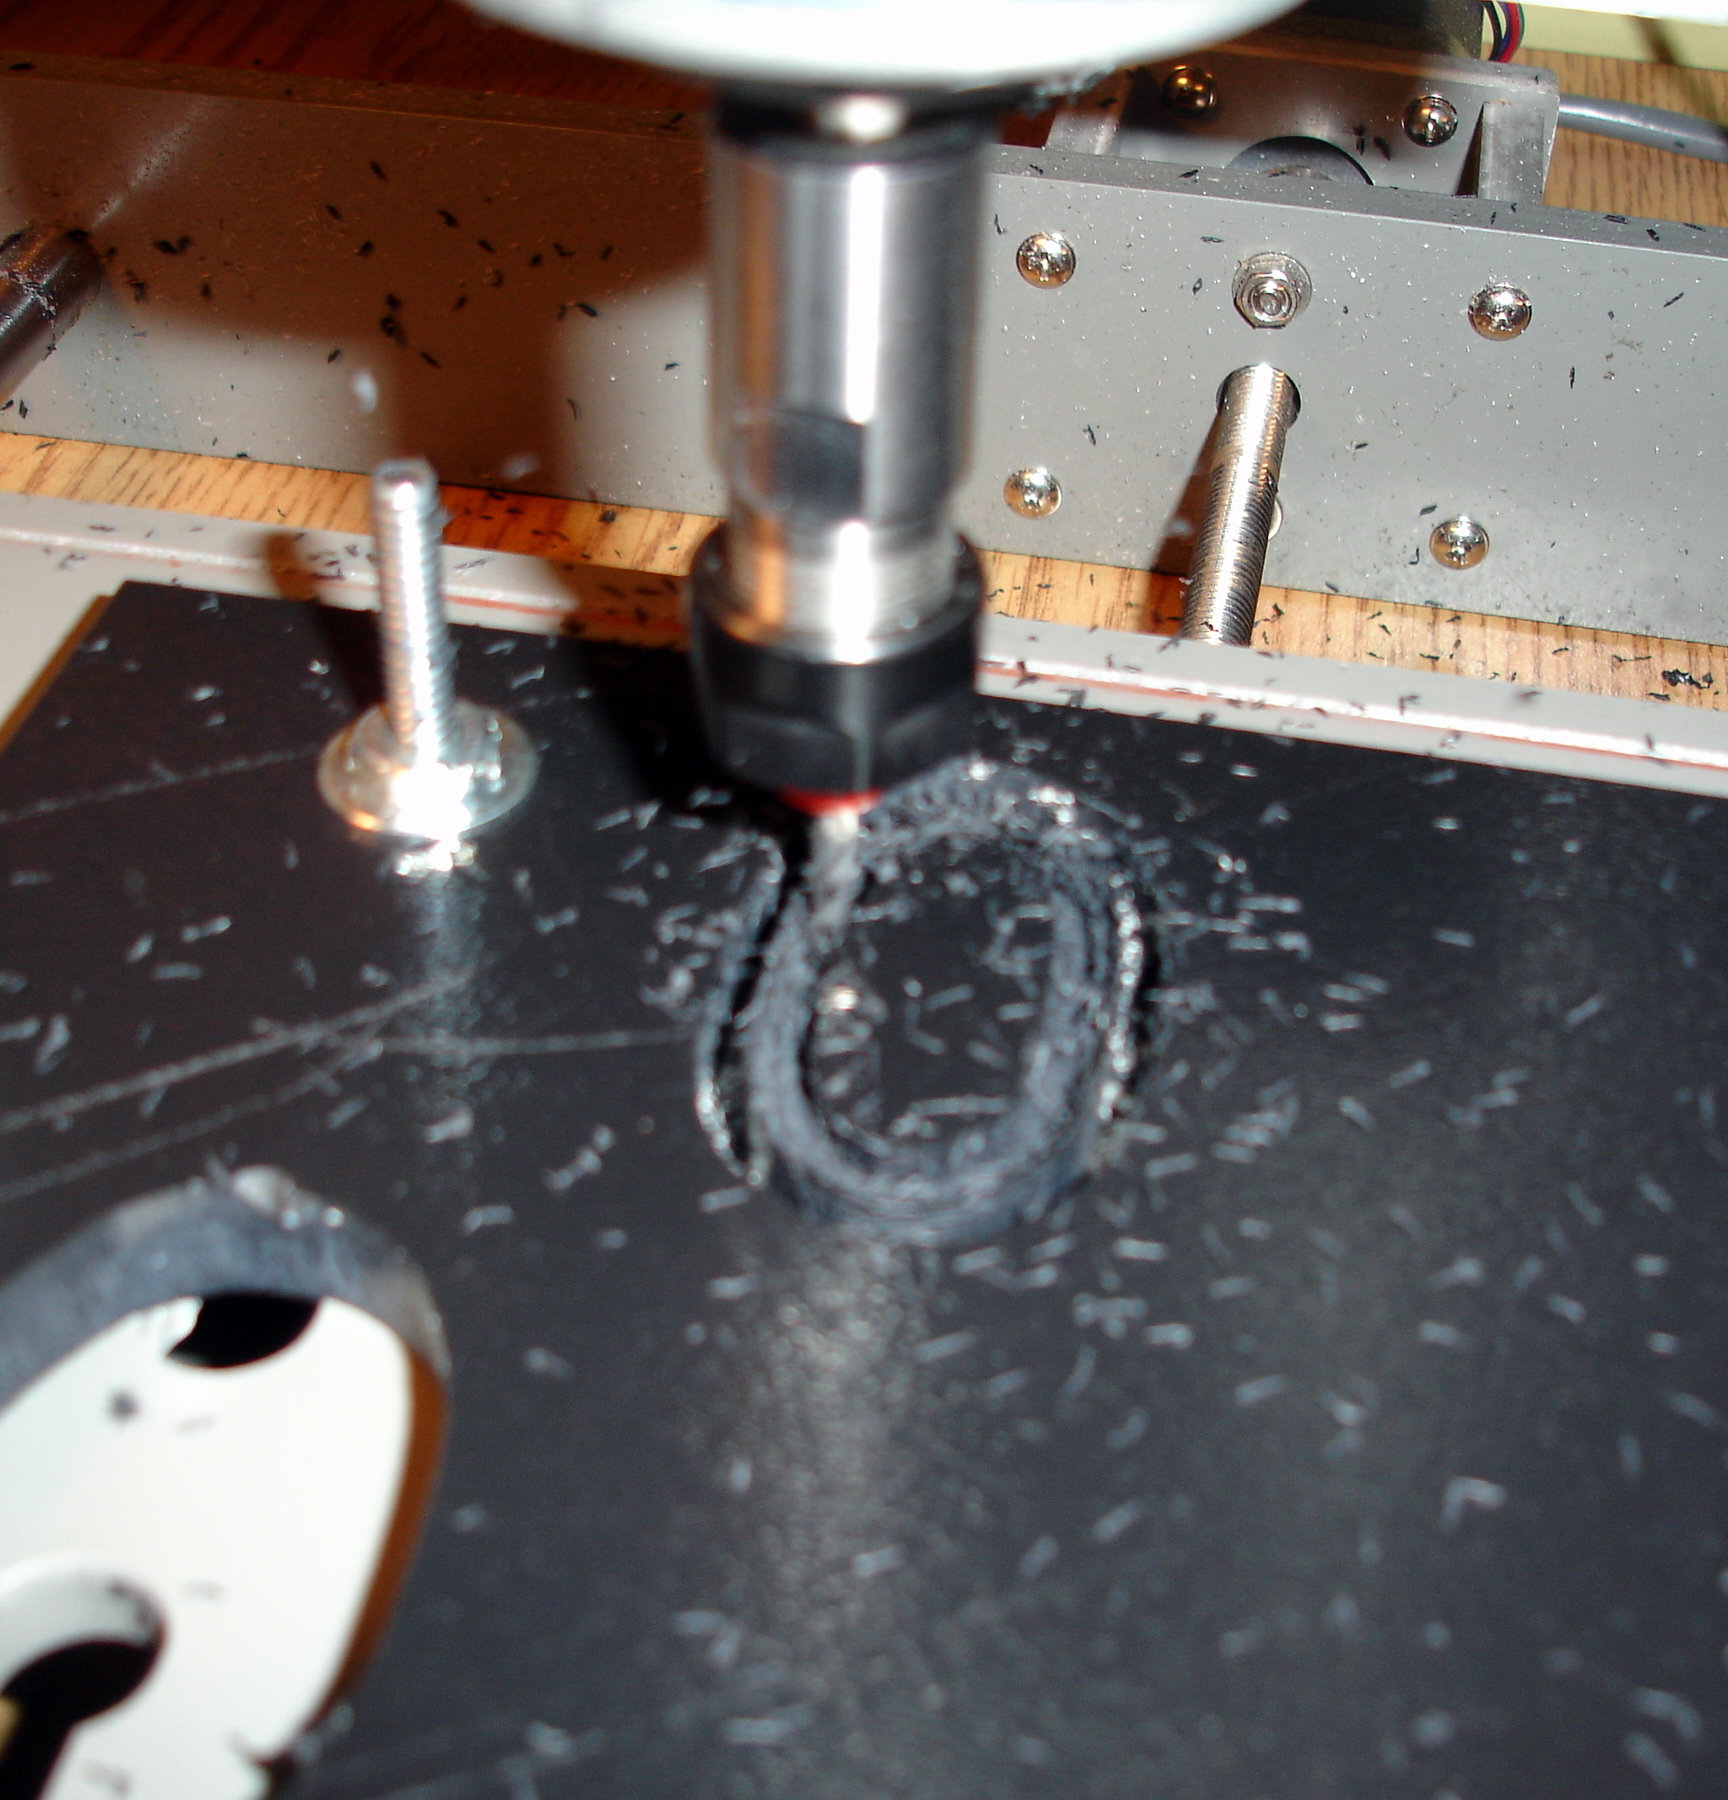
HATTORI HANZO BUILD SWORD LOG: November 21, 2011
CNC Success!
Got my new controllers wired up last night and ran
the system through a test run (about 2 hours to cut the foodog in
aluminum, with a very small incremental depth step (.001 inches in
think). System ran without a hitch for the entire duration! Finally!
Next up, tracking down some kind of manual 4th axis clamping system, and then I'll be good to go on my test iaito blade.

HATTORI HANZO BUILD SWORD LOG: December 5, 2011
Click here to learn an alternative to engraving a Katana that you can do at home
Finally got the CNC probing this weekend! It's been quite a learning
curve on this project, but I might finally be getting somewhere close to
actually engraving the foodog on the blade!
What makes this
engraving tricky is the shinogi ridge on the blade. If the blade were
flat, I'd be done already!:) But the blade has a ridge, and the saya
has a curve, and this makes things tricky.
So, my plan is to use a
digitizing probe, which the CNC moves up/down in a grid pattern,
gathering x,y,z points in a text file. I can then run these points
through a script in combination with my flat foodog carving g-code, and
out "should" pop a g-code foodog carving file that has the carving
"wrapped" around the blade, if you get my drift. I'll see how it goes,
and keep my eyes out for any distortion that might happen due to the
wrapping (I should be able to correct this by modifying the original
carving instructions). Should be pretty minimal, though - the blade is
ALMOST flat.
It was great just to see the thing actually run after working on this setup for so long:)
Next up, using the CNC to make some custom clamps to hold the blade in place for carving!
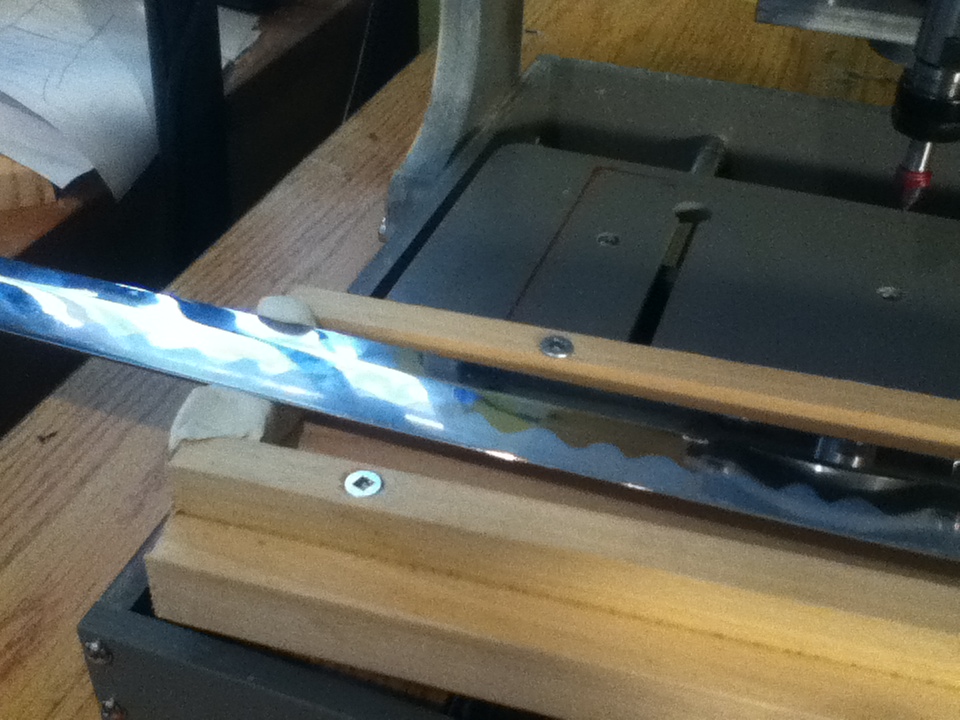
HATTORI HANZO BUILD SWORD LOG: December 25, 2011
So, the clamping of the blade had me stuck for quite a while... I
couldn't figure a way to properly secure a distal tapered curved blade,
with a shinogi. Designed a few different clamps, all were overly
complicated. Hard to engrave a blade that I can't properly clamp or
properly support.
Finally, came up with the "Pour-Clamp 2000"!:)
I built a small trough out of wood, put some modeling clay at each end,
and placed the blade (pre-lubricated so that the resin wouldn't stick)
in. Adjusted the angling/placement of the blade using the clay, and
when I was happy, mixed and poured in some poly resin. I tried to get
the level of resin up to the edges of the blade.
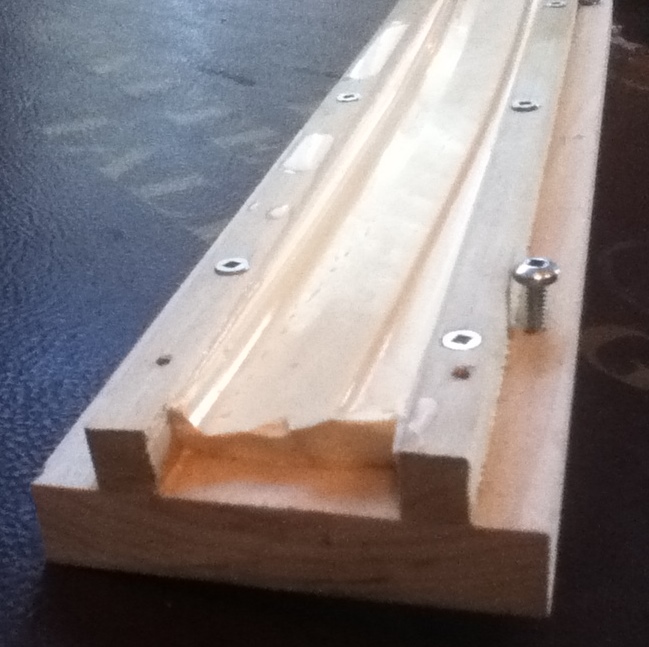
Half and hour
later, the resin had set. I popped the blade out, and there i had an
exact negative of the blade, perfect for clamping to. Ran a test
engraving, and the aluminum alloy machines fine - engraving came out OK
(not perfect, but OK). I still haven't run a probe job to get the
z-axis modifiers to properly "map" the image I'm trying to engrave to
the blade's surface. That's next.
HATTORI HANZO BUILD SWORD LOG: Jan 3, 2012
Well, I can deal with the distortion of the image ( i think it'll be
pretty minimal), but I'm still working on the code to merge z-axis probe
results with the generated g-code for the engraving, given a certain
start point. Hopefully this week...
Anyhoo, over the Christmas
holidays, I did manage to get the re-wrap done on Adam's sword. Had to
take the tsuka down to the wood (again), add a big more rice paper, trim
away about 3-4 mm of wood, reshape the end (again) to fit the kashira,
epoxy that on, and do the re-wrap with new pasteboard hishigami, but
it's done now, and I'm happy with the outcome. The end-knots came out
much better (thanks guys!), and I think the wrap is just a little
tighter than last time (or at least my thumbs say so).
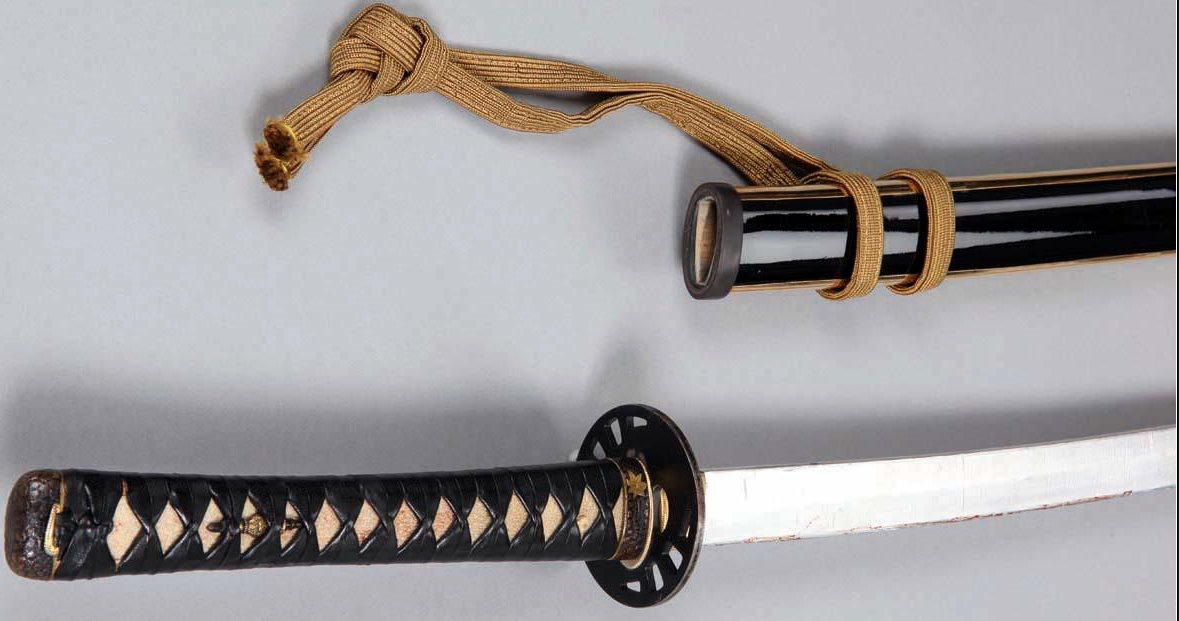
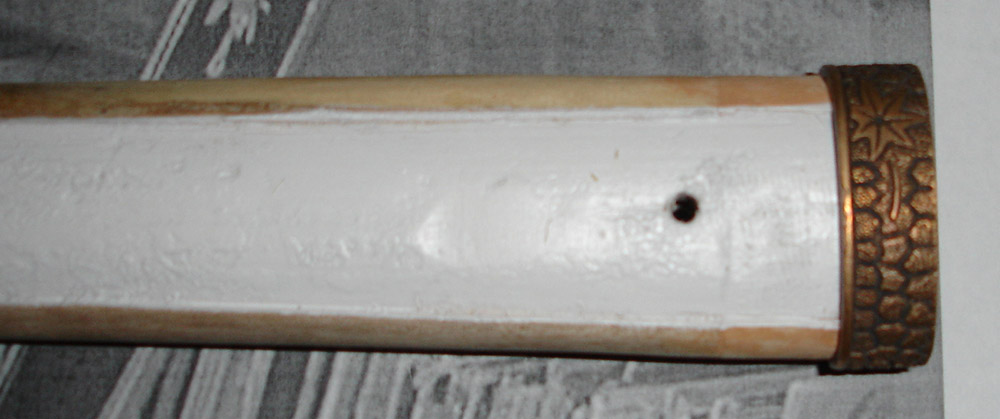
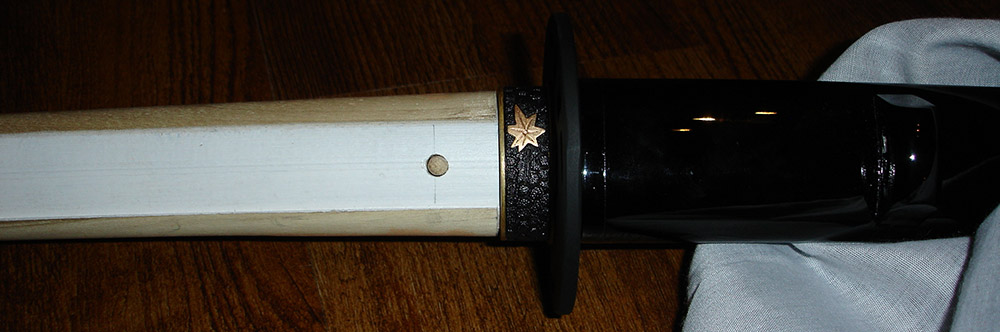
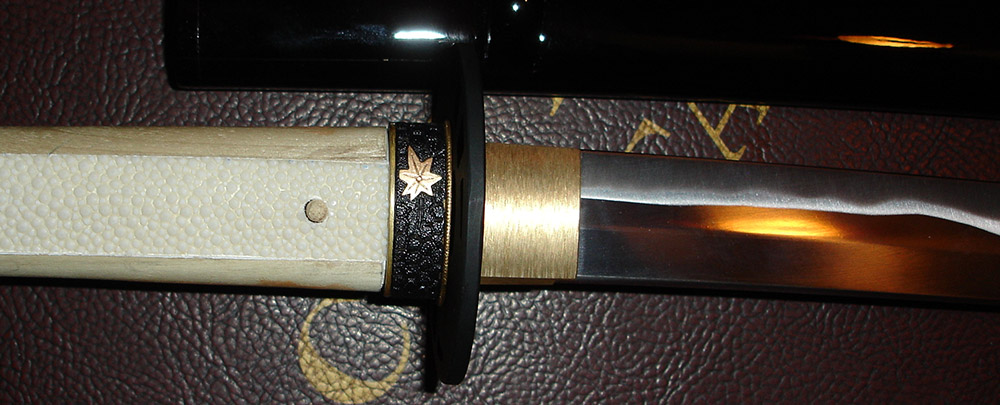
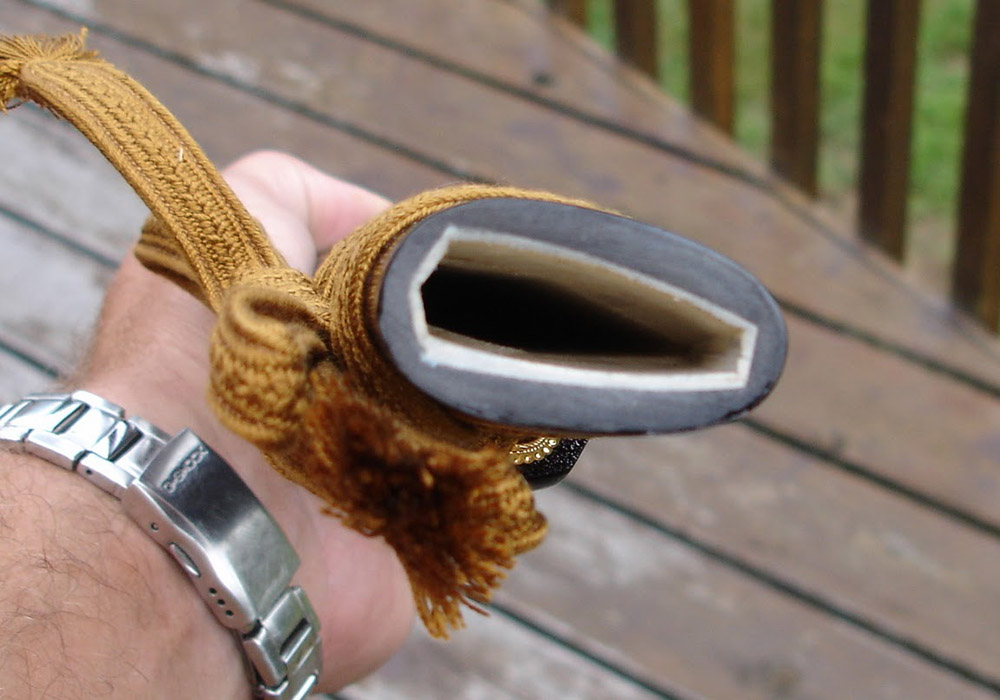
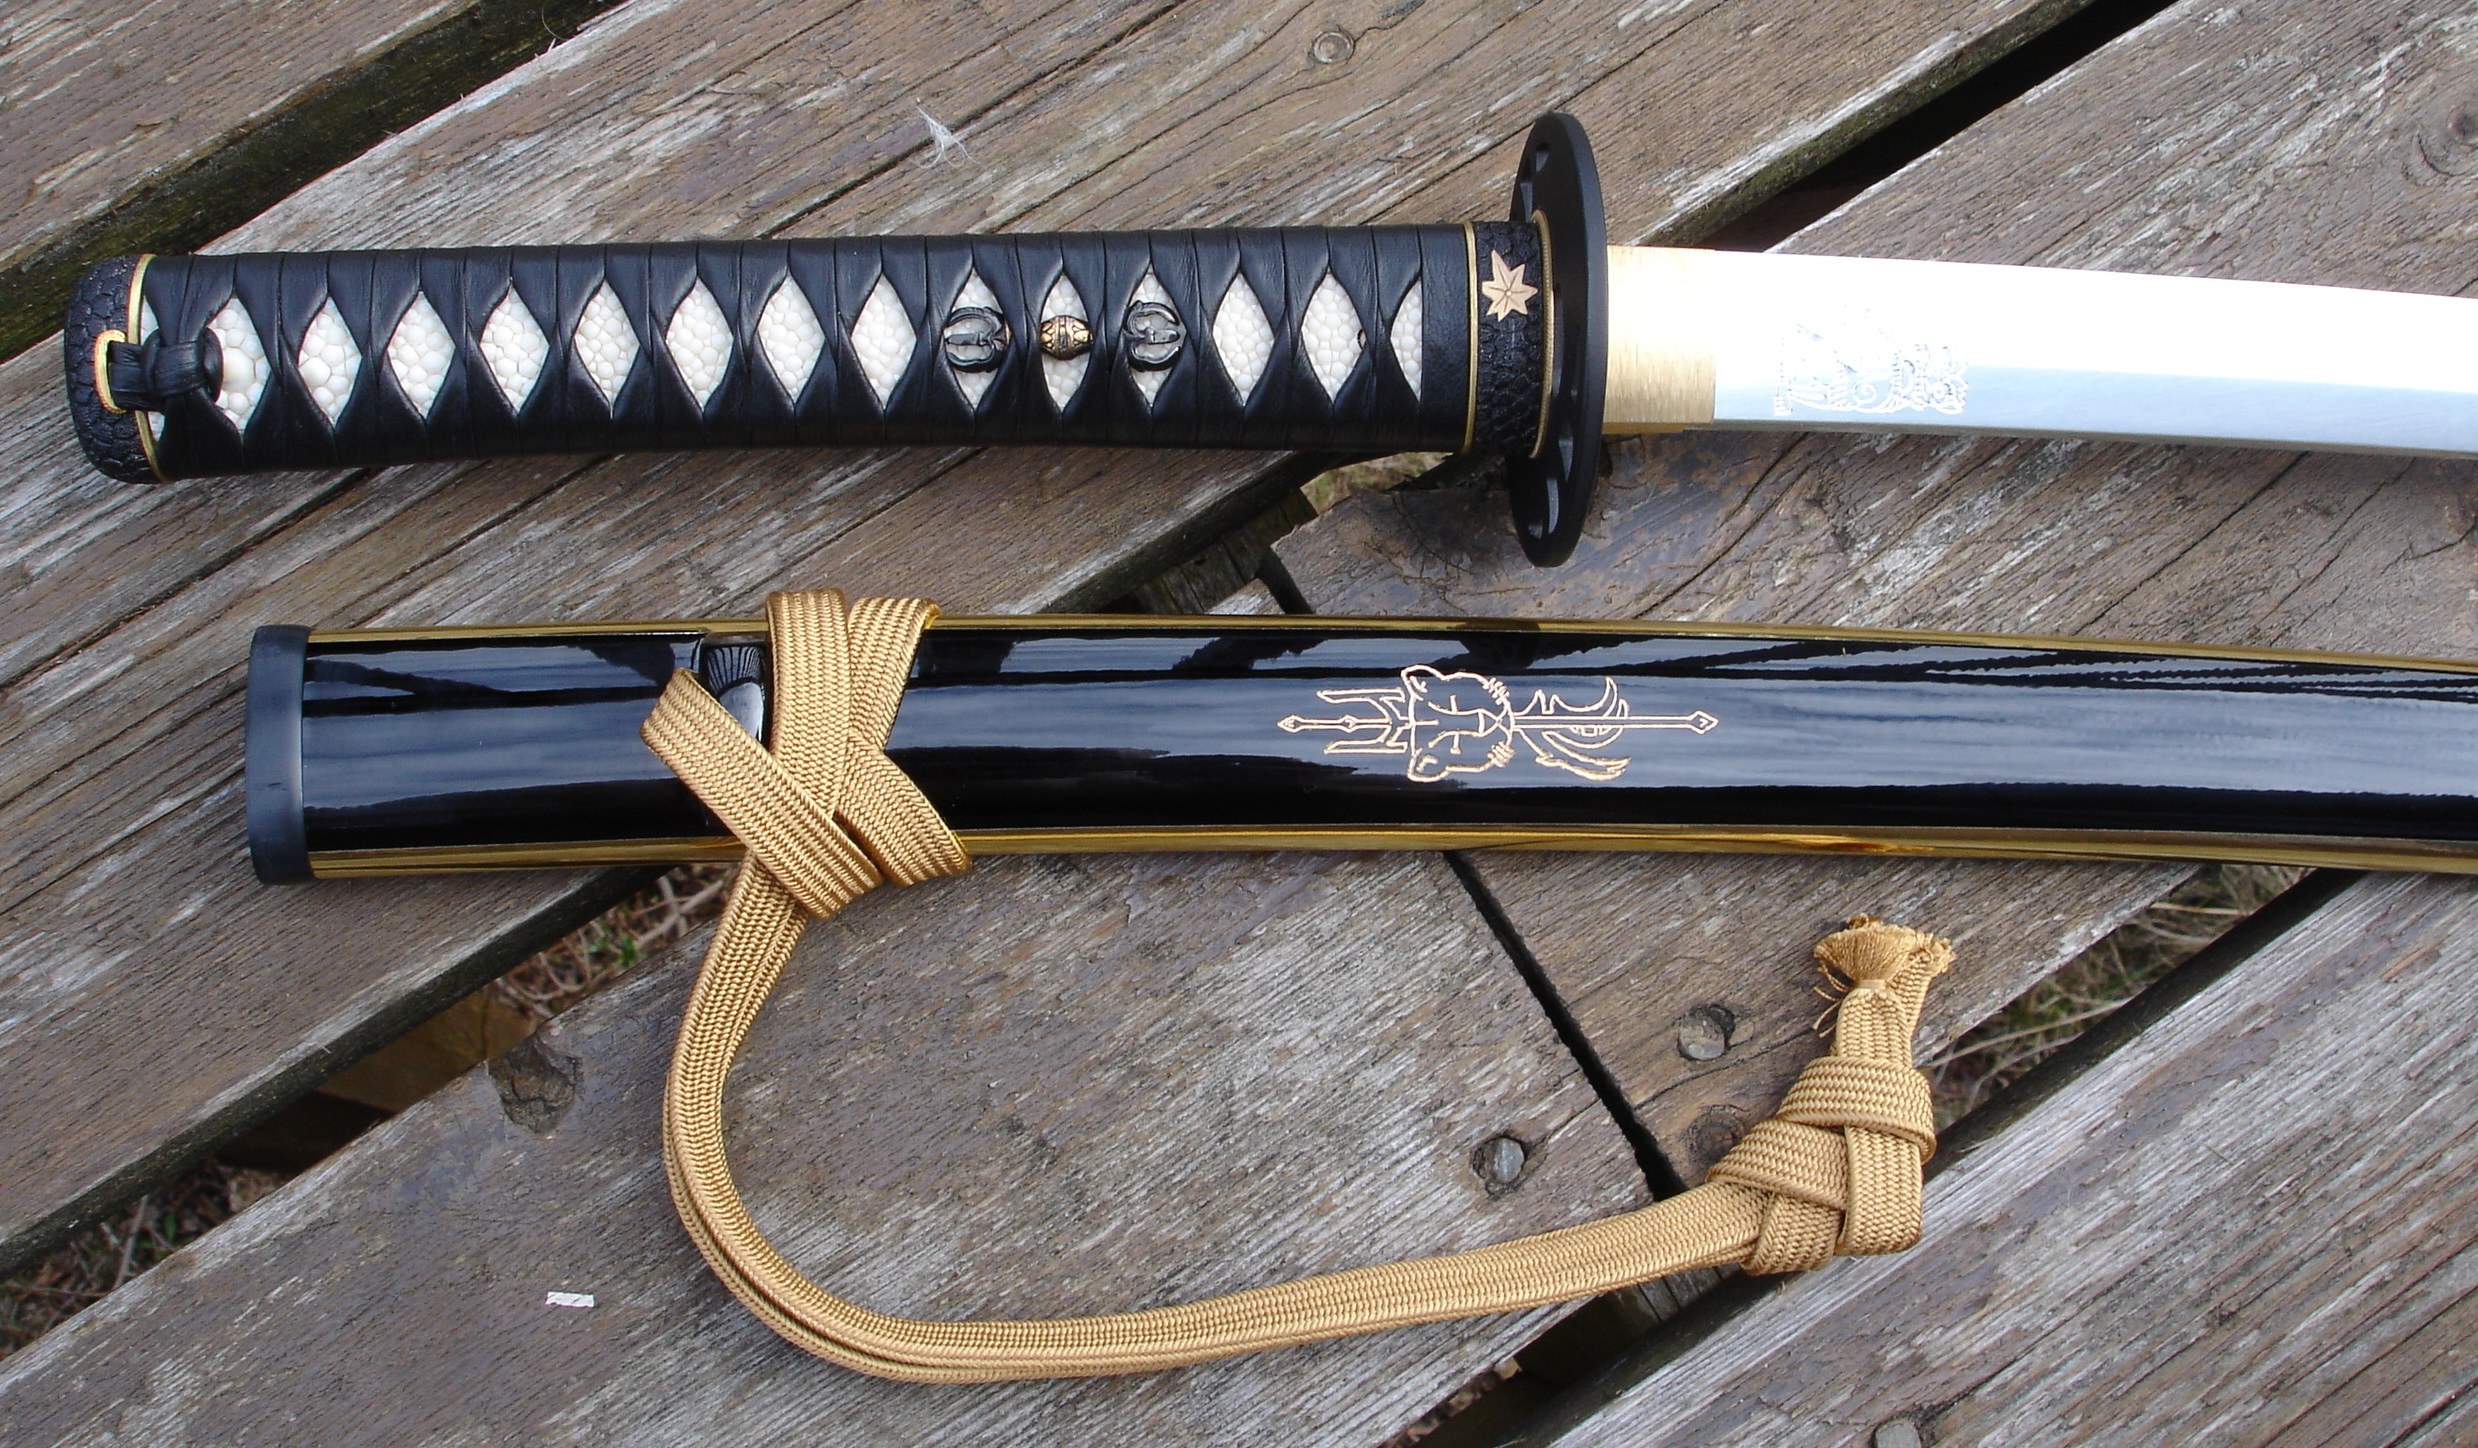
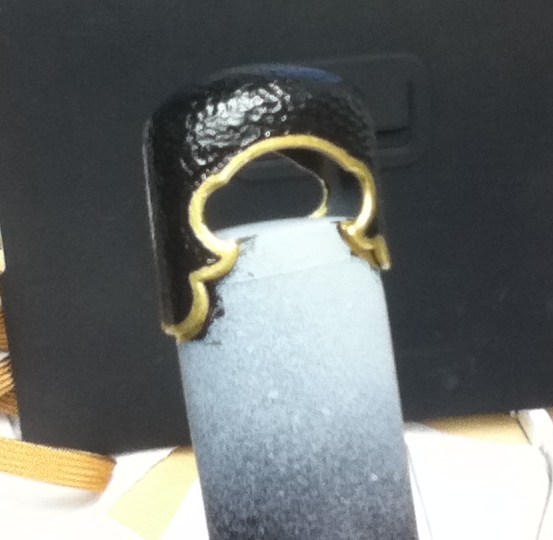
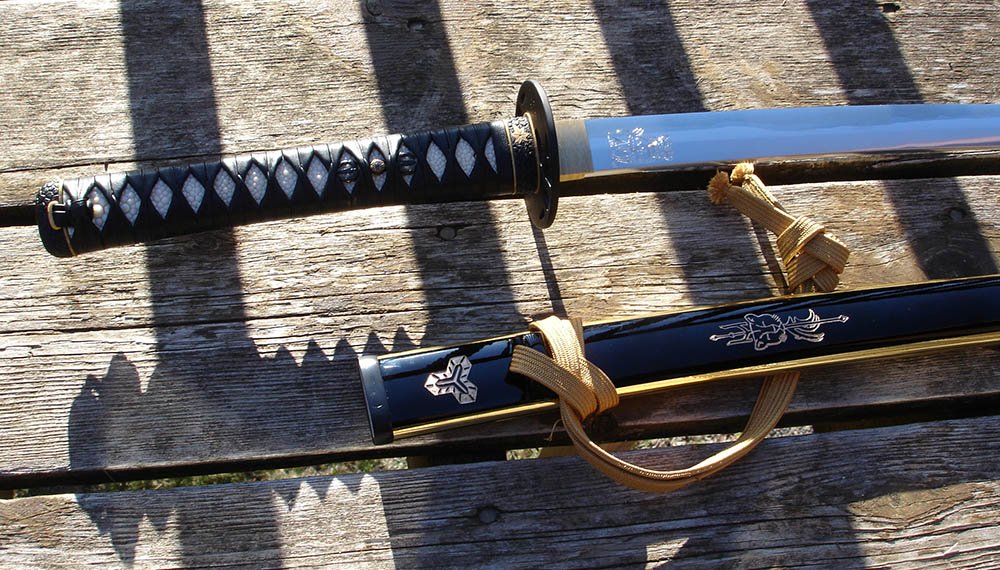
Check out this pic of the koigouchi of Adam's sword - I don't think I've
ever seen work this nice on anything but the Tozando iaito I've
handled.
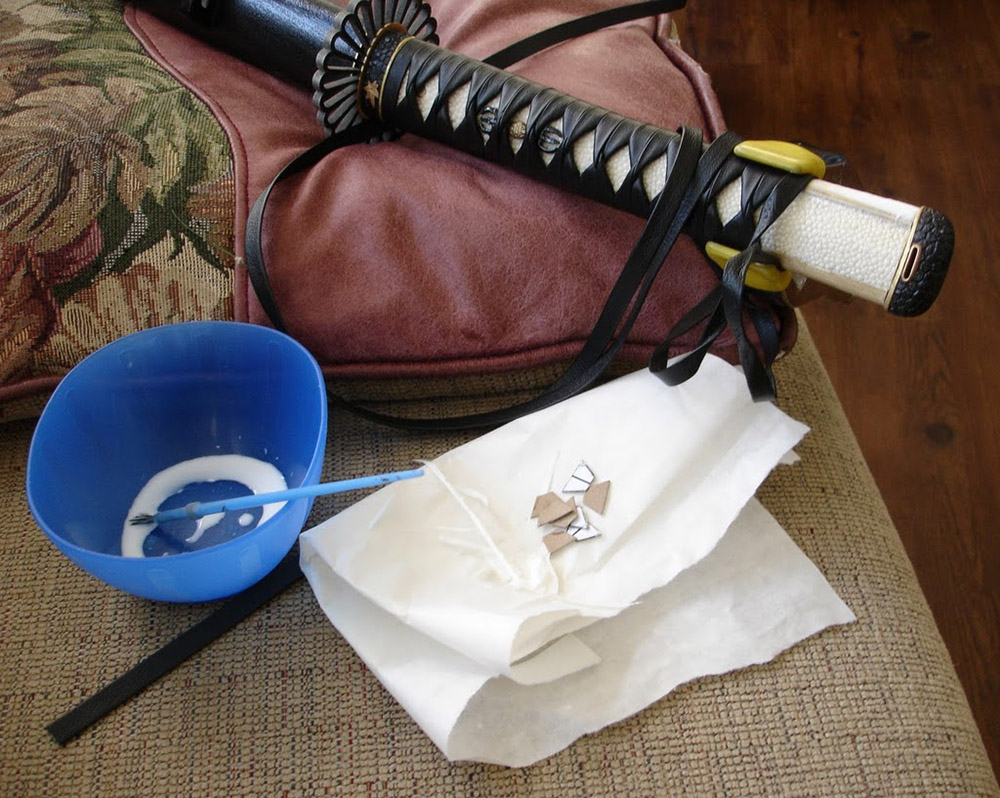
HATTORI HANZO BUILD SWORD LOG: January 10, 2012
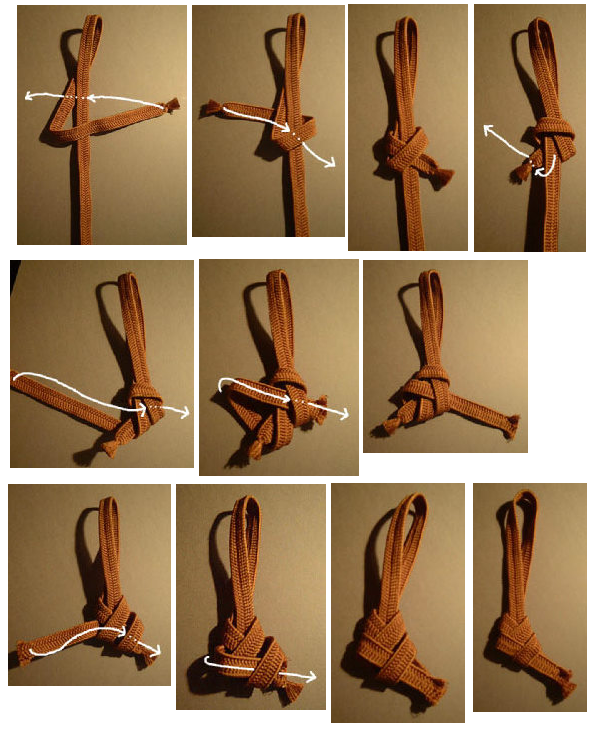
Did a little work on the sword yesterday, had to measure out how much
sageo is needed to tie the Myouga Musubi knot like on the original prop.
Turns out it takes about 120cm, or a wakizashi-sized sageo to do it.
I'll need to cut down my sageo and retie the ends. That length includes
the 'couple of times' around the saya like in the film.
There's a tutorial on how to tie the knot (usually used on tanto) here (found it from a link on the old SBG forum):
www.yk.rim.or.jp/~ryusui/myouga.html
I grabbed the pics and joined 'em together (in case the site goes away)...
Btw,
the sageo looks to me like a standard gold Kakucho one, with a couple
of lines of stitching added (I'm thinking it helps to hold the knot
together). I think I also see a spot on the sageo where the two sides
have been stiched together to help hold it in place.

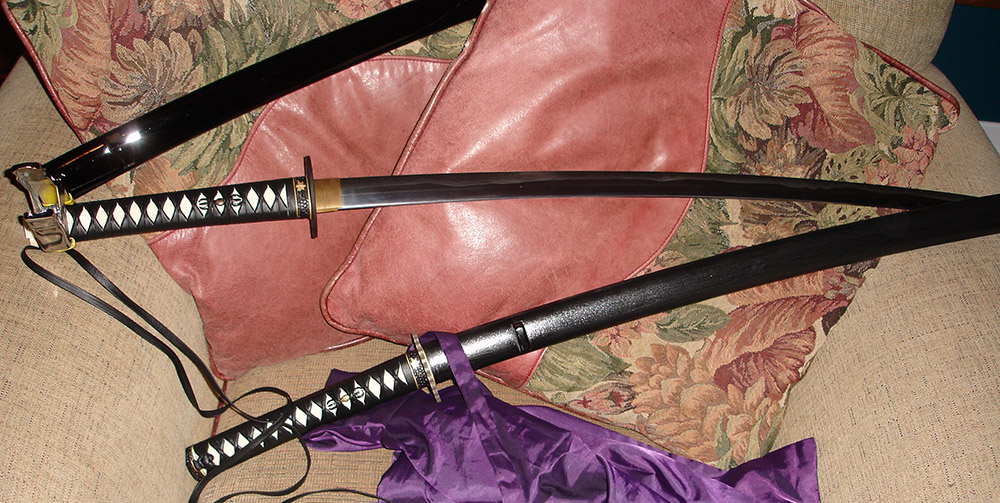
Comparison of the replica Hattori Hanzo Sword to the Movie Sword - Gallery
HATTORI HANZO BUILD SWORD LOG: January 11, 2012
Finally got to sit down last night a run a full 1" x 2" (or thereabouts) grid mapping of my test sword blade. Finally, things worked great!
Here's my process (in case anyone is interested):
- Move spindle up to being held with only the top bracket of the CNC.
- Mount the probe.
- Clamp down blade holding jig so that x-axis motion will move in a straight line along the back of the blade.
- Remove blade (trying to home with it in place is no fun, and not good for my machine).
- Home all.
- Replace blade in jig.
- Go to starting position of probing, measure area you need to probe.
- Choose "View -> Show Machine Position" in EMC2 to show the absolute starting probe position - write these down (we need them later).
- Copy gridprobe.ngc from the EMC2/Examples folder into your home directory.
- Edit gridprobe.ngc, setting the x/y-increment (1/32 of an inch in this case), and the number of x/y steps (75/37 respectively).
- Save your modified gridprobe.ngc. I may write a script to auto-generate probing scripts at some point.
- Load the gridprobe.ngc you just modified into EMC2
- Get your z-axis with 5mm or so of the blade.
- Touch-off all axis.
- Lower the run speed so that if anything goes wrong, you have time to stop it before things break.
- Start job. Verify things are working fine.
- Increase run speed to max.
Lotta
steps, but it works for me. Now that I have those probe results, I'm
writing a script to take those, the probe start position, the engraving
start position, and the input engraving gcode and then output a modified
engraving gcode that will wrap the carving onto the blade, if you get
my drift.
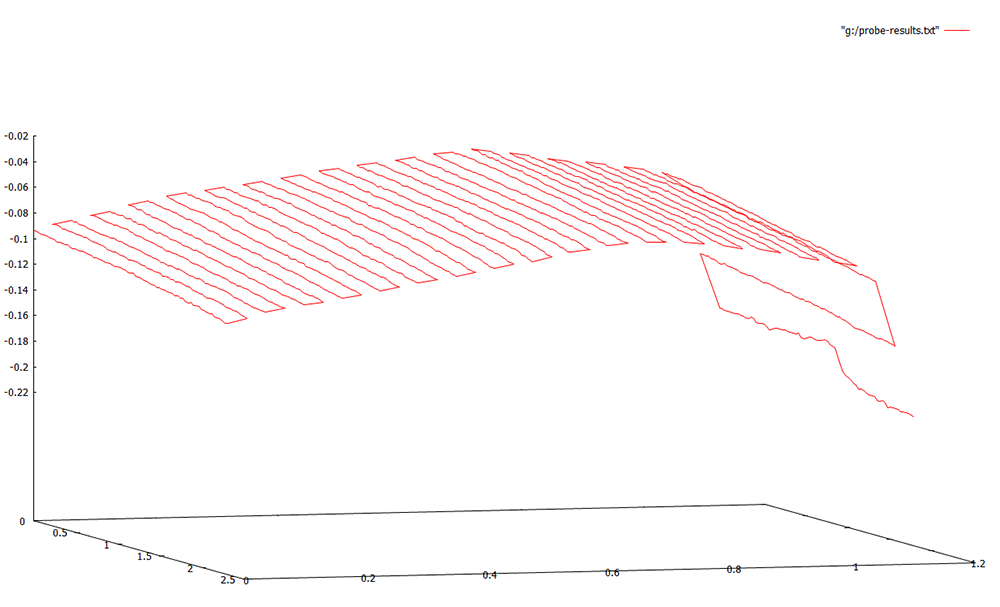
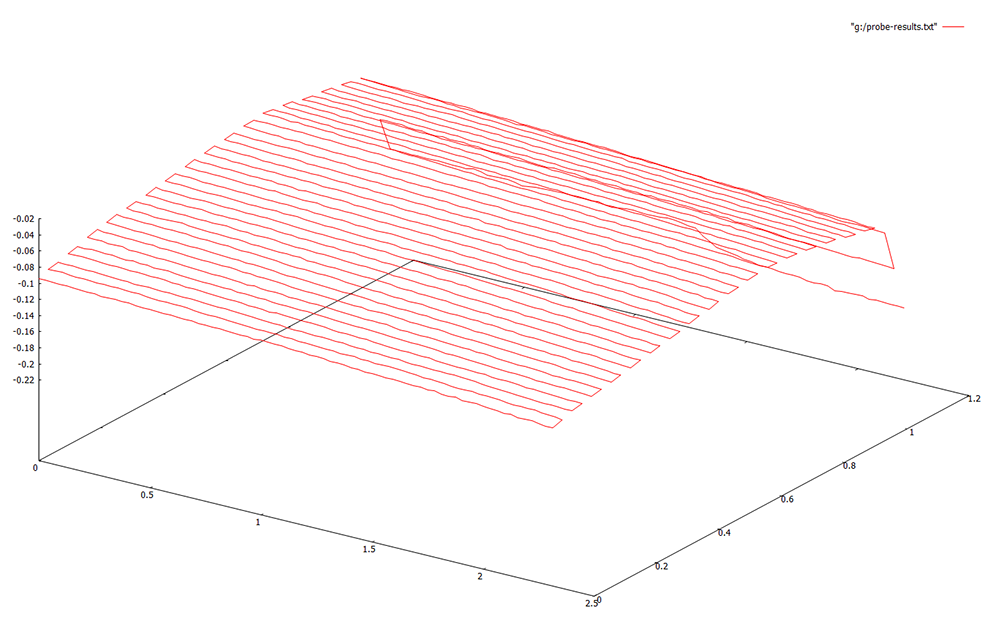
Job took just over 3 hours to run, probing 75x37 times
(2775 times), at about 4 seconds per probing. I ran the output through
gnuplot (free, easy, and it works). I tried a couple of other programs,
but they made the process harder than I think it should have been.
Anyway, gnuplot kicked out these images with only one command.
splot "g:/probe-results.txt" using 1:2:3 with lines
Next up, finishing up my script, and hoping things work out:)
HATTORI HANZO BUILD SWORD LOG: Jan 23, 2012
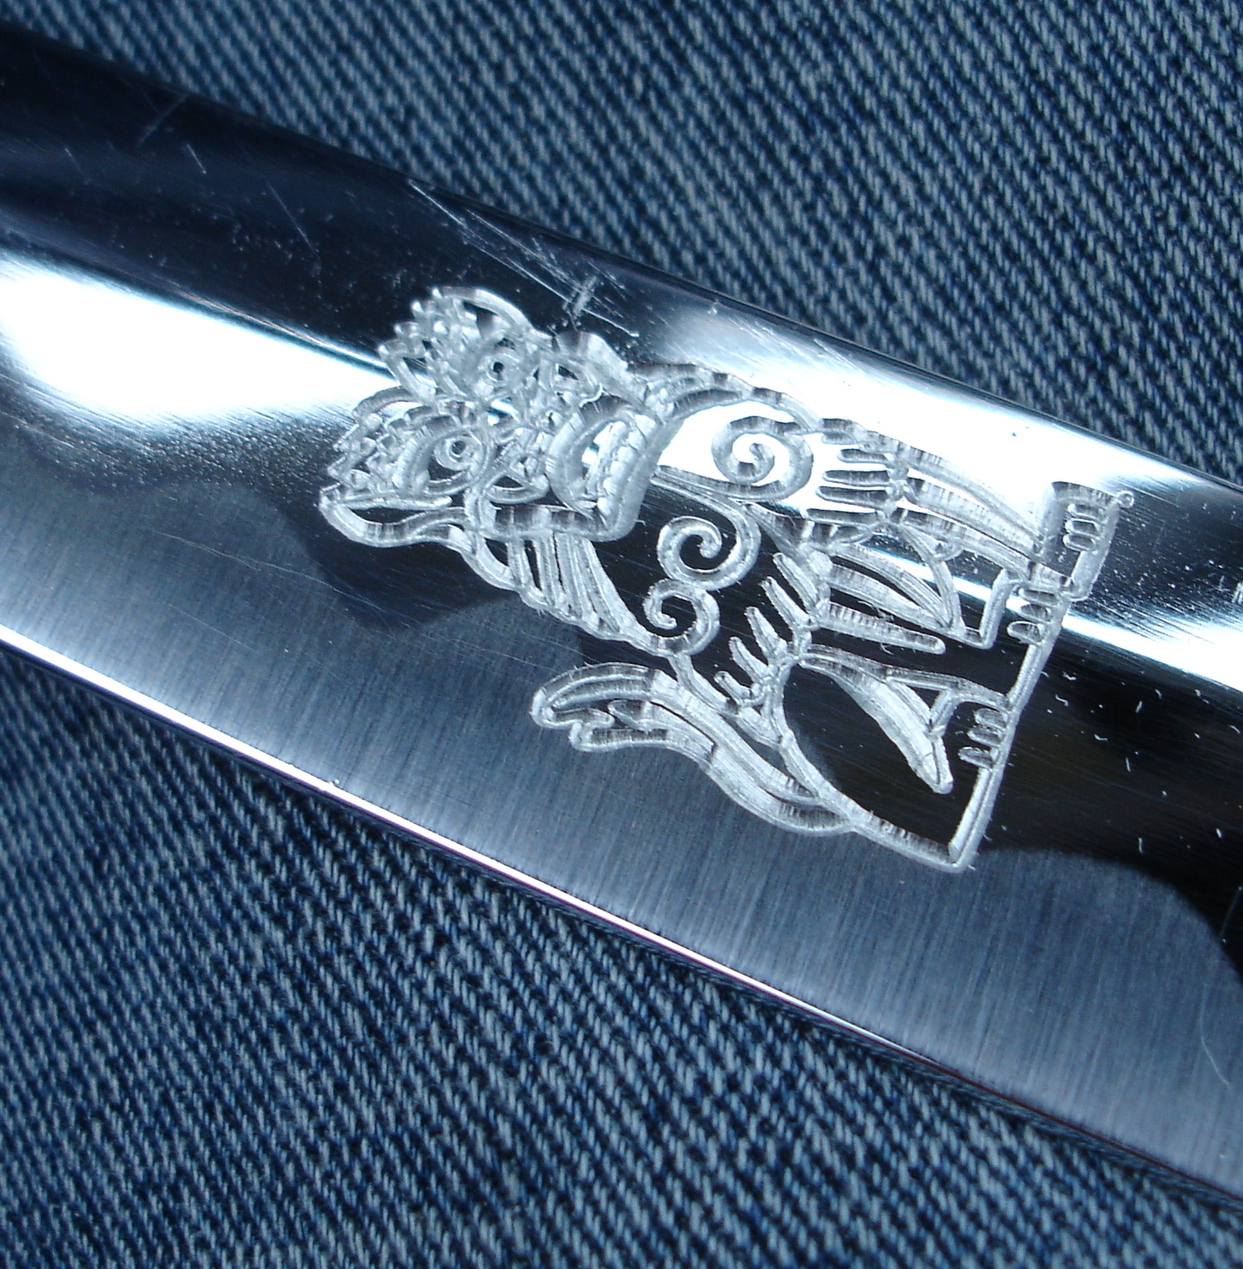
Engraving success!
Finally worked out the last (obvious) bug in
my code, and managed to combine the probe-collected point grid of the
blade surface with the engraving instructions for the foo-dog! Takes
about 3 hours for the probe run, and about 2 more for the cutting, but
it works! Finally!:)
If you look close, you can see marks that
the probe has left on the blade (in a very nice grid pattern). In my
next test, I'm going to protect the blade with gool 'ol tape during the
probing.
Check out the difference between run 1 and run 2 - that's the difference the 'wrapping' makes. Everything else was the same.
Next up, more testing:)

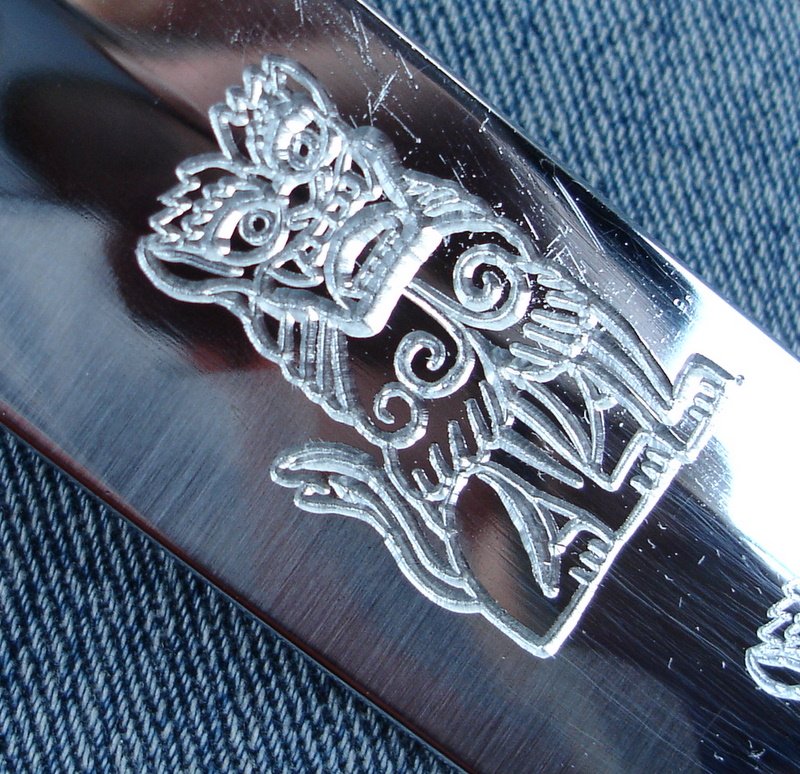
HATTORI HANZO BUILD SWORD LOG: January 25, 2012
Did some more tests, trying a few more tricks to get the cuts cleaner,
and I think I've come up with the magic recipe: half speed (13 in/min),
1/4 v-bit cutter (not the 1/8 inch I was using), and lots of silicone
spray on the work. I'm happy with the final results, and if Adam says
it's a go, next up is doing his sword (only took about a year:)).
HATTORI HANZO BUILD SWORD LOG: February 5, 2012
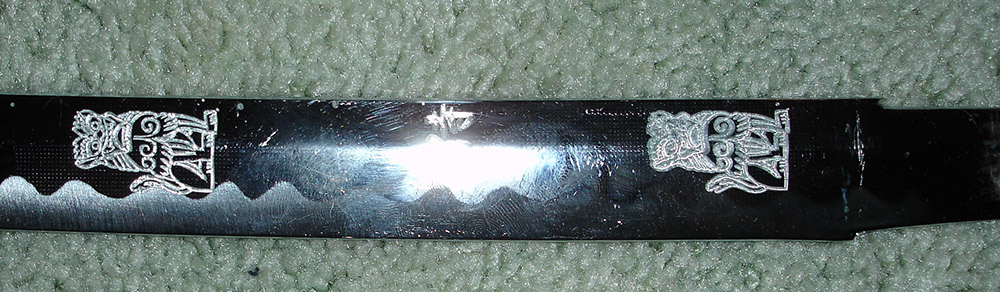
Got a good night's sleep and engraved Adam's sword yesterday. Went
without a hitch (had already run through all the hitches in the test
runs). The sword part of the sword is finally done!
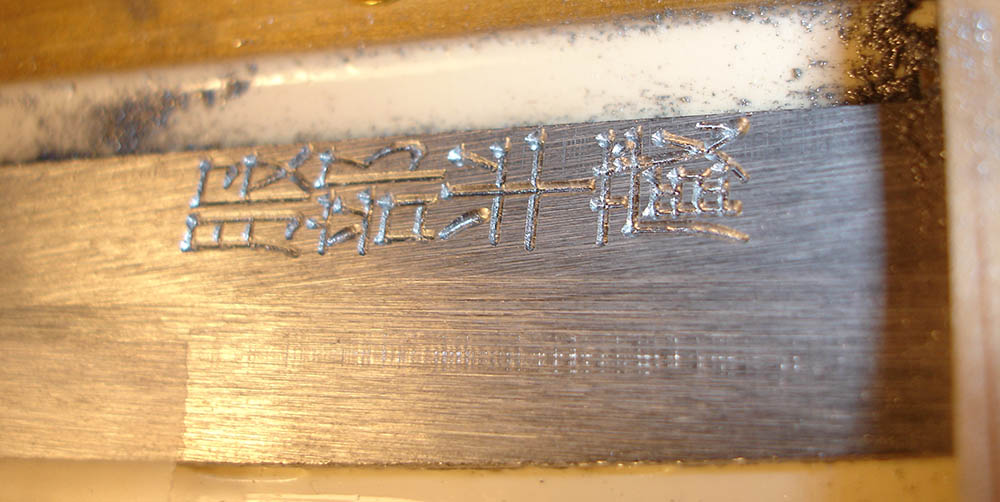
Also
added a 'Hattori Hanzo' mei to the nakago as bit of a test run before I
ran the foodog job. It went fine, so I went ahead with the dog. I figure
Hanzo would have signed his sword, even though they didn't show it in
the films.
Next up, all the saya work

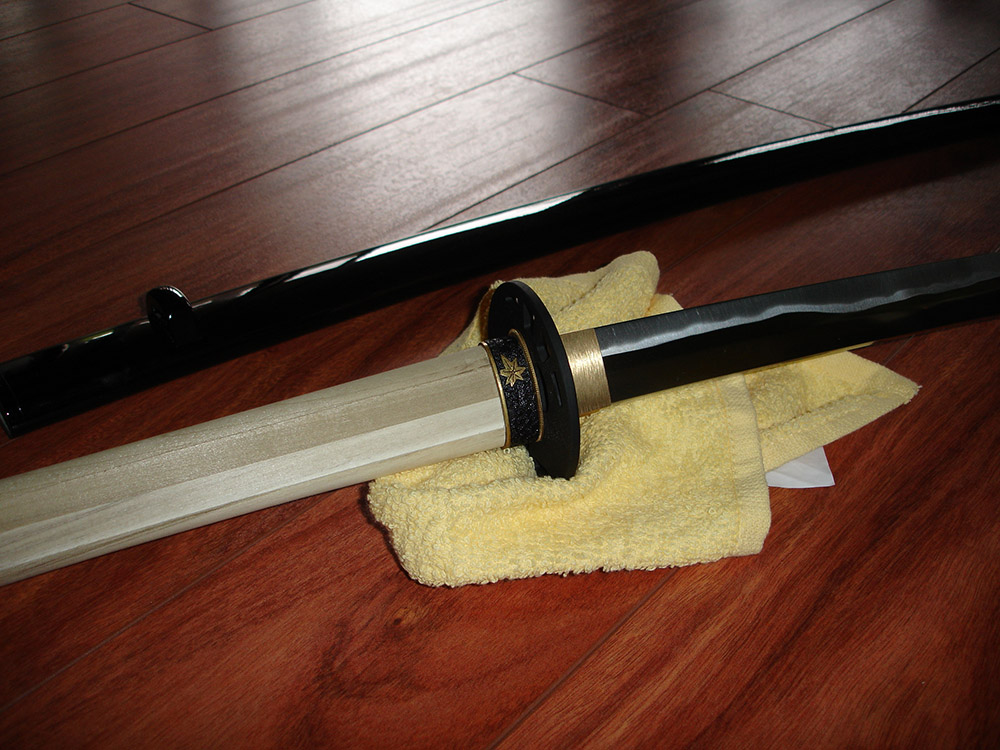
HATTORI HANZO BUILD SWORD LOG: February 9, 2012
Some quick glamour shots by my buddy Andre, taken here in cube land:)
HATTORI HANZO BUILD SWORD LOG: February 12, 2012
Cut the saya reinforcement rings (semegane?) out of 3/8 ABS this
week-end. Used a contour gauge to get the profile of the saya,
transferred it to cardboard, did some minor correction with tape, traced
that on my daughter's Wacom, imported that into my CAD, got the sizing
correct, and then cut it out. Both rings fit first time!
A bit
more sanding, and then a coat of primer, and some top coat (one is
black, the other gold). I don't even think I'll need to glue 'em in
place, they fit so nicely (and it'll be a tighter fit with the Mylar
tape in place anyway).

HATTORI HANZO BUILD SWORD LOG: February 19, 2012
Finished up the semegane this weekend, and managed to get them into
place over the mylar tape. No glue needed, the fit is very tight (and
was frustrating to get in place over that tape!).
Put 4 light
coats of Krylon Premium gold on the semegane, but I didn't use any paint
on the koigouchi band, just sanded, wet sanded, and then polished with
Mothers"
Next up, the carvings!


HATTORI HANZO BUILD SWORD LOG: February 28, 2012
While waiting for some endmills to come in for Adam's sword, milled,
filed and finished the semegane' for my Masahiro-based replica, and tied
the sageo properly... might have a line on a kojiri that'll
work...here's hoping:)
HATTORI HANZO BUILD SWORD LOG: March 6, 2012
Finally got around to building clamps to hold my saya to the work table
of my CNC this weekend. Added a layer of silicone caulking to the
inside surfaces of them to keep them from marking up the saya. Seems to
be working fine.
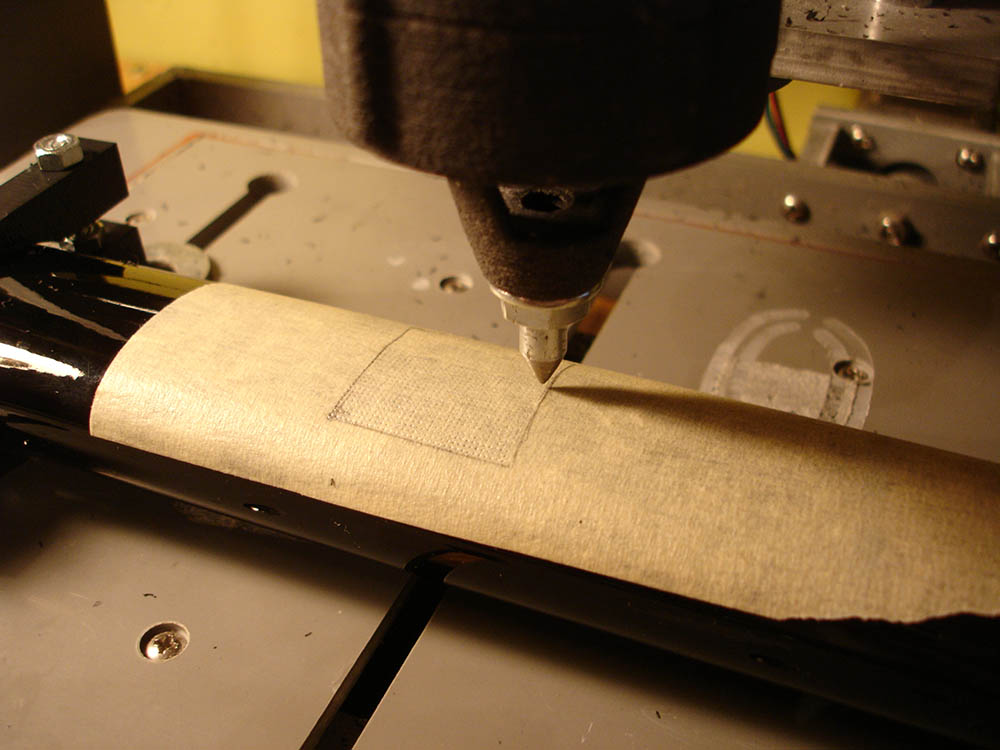
Ran my first test on my test saya last night, I'd say it went about 80% good.
Three problems were apparent right away:
- One layer of masking tape is not enough to protect the saya finish from the probe tip. I'll try two next time.
- My 'curvalation' of the sakura to the saya surface was not exactly correct, and this was more apparent in the sections of the cut that fell on the deepest curve. I'm doing planar interpolation, so this was probably expected - my program thinks it's on a flat surface, not a curve. I'll try upping the probe scan resolution to 1/64" and see if that's enough of a fix.
- There was some kind of clear coat /
lacquer finish on top of the saya paint. It cut OK, but chipped/peeled
slightly in spots. I have no idea how to fix this, other than try to
touch it up after the work.
Next up, more testing:)
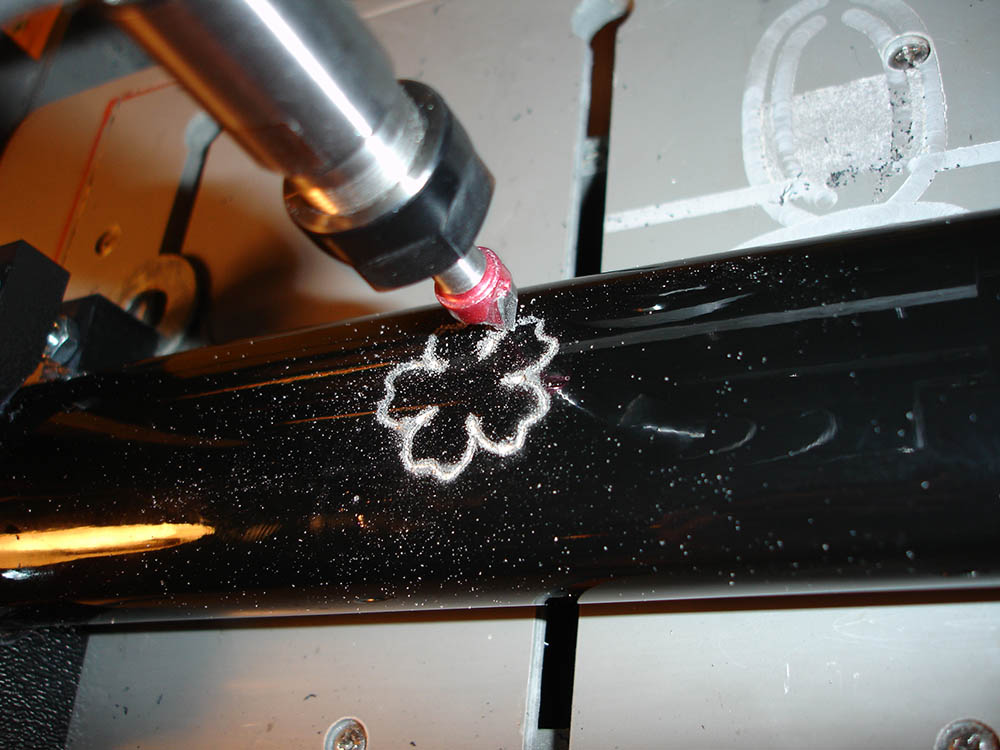
HATTORI HANZO BUILD SWORD LOG: March 8, 2012
Did another test last night, used GADj, electrical tape for saya
protection during the probe run, increased probe resolution to 50/inch,
and used no tape for the cutting, and things worked great. The saya was
not exactly evenly slanted, so the sakura cuts are a little wider on on
side, but everything else worked fine. Painted it up with a little
gold enamel.
By the way, poked at the clear-coat on my huawei
saya with my fingernail, and it chips like crazy. Just not very well
done, I guess. The masahiro paint saya works fine, though.
Next up, finish up the lioness art, and try that!:)
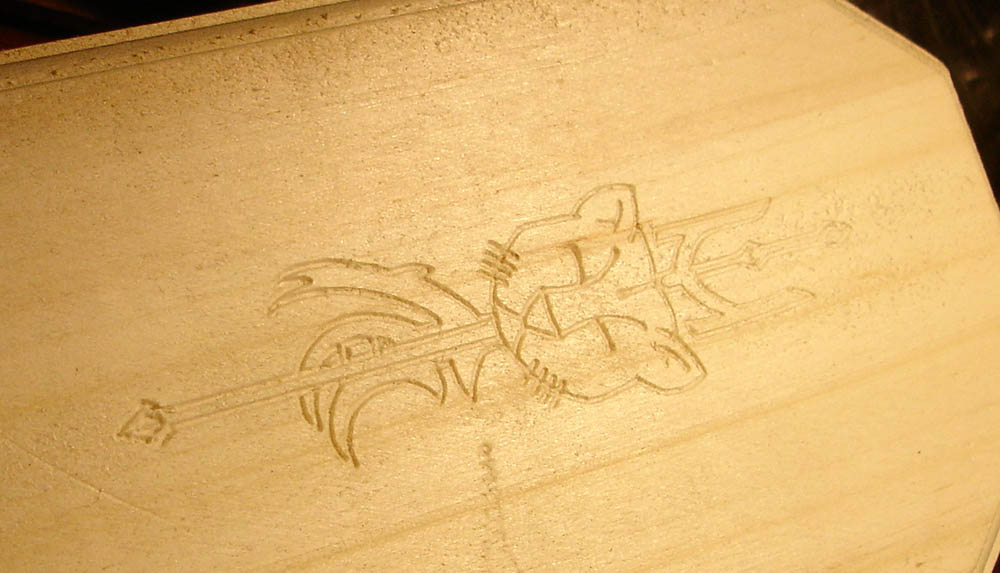
HATTORI HANZO BUILD SWORD LOG: March 20, 2012
Did some more work on the lioness saya carving - I've been reworking
the artwork, making guesses and compromises (there aren't many reference
pics to work from). Ran a test on my test saya last night and the cut
was way too deep. Something must have gone wrong during the probe phase
(which took 5 hours or so). The cut itself only takes 5-10 minutes.
My test cut on flat wood went fine.
I'll run another test tonight and hopefully get some better results.
HATTORI HANZO BUILD SWORD LOG: March 23, 2012
Ran another test last night, set the start point for the carving at
upper right (instead of lower left), and things went fine. I noticed my
probe left marks on my test saya, even through 1 layer of electrical
tape and 3 layers of masking tape. I'm trying 4 layers of masking tape
on the next run:)
I'll make some slight tweaks to the art (make a
bit more space between a few of the lines where things ran together),
but otherwise, I think it's looking good at this point. Gonna be tricky
to paint such tiny lines, though:) I'll also up the points/inch of the
probe run to 30 from 20, you can see a little bit of skipping on the
left side extremities of the lioness.
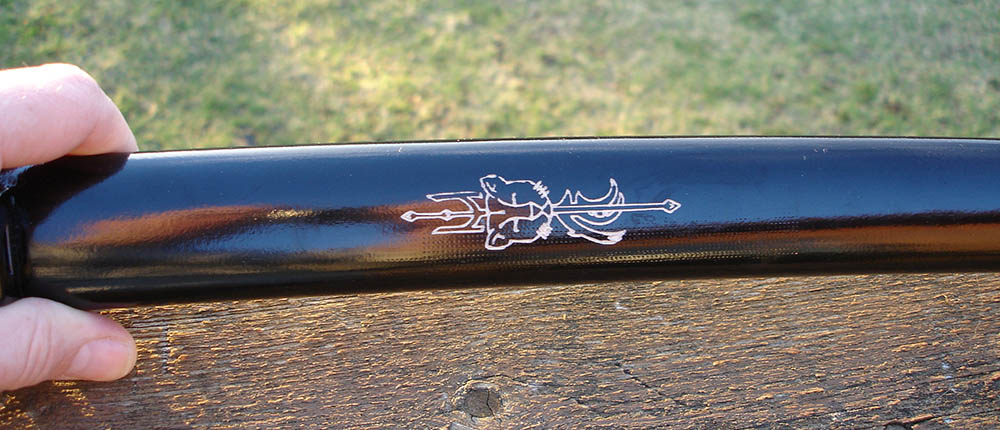
HATTORI HANZO BUILD SWORD LOG: March 26, 2012
The lioness is done!:)
Easily my least favorite part of the whole job, trying to paint < 1mm lines while peering through a eye loupe.
But
it's done, and I think it looks pretty good. Paint chipped in one
area, but not badly, and maybe it just makes it look more
"hand-crafted":)
Next up, the kojiri and the leaf kamon.
HATTORI HANZO BUILD SWORD LOG: March 27, 2012
I feel like I'm pulling for the finish line. I'm supposed to meet Adam
in Montreal Friday at his "Mythbusters Live" show and do the hand over.
Everything is coming together, but I'm still feeling rushed (after
working on this for over a year:)).
Anyhow, got two exciting
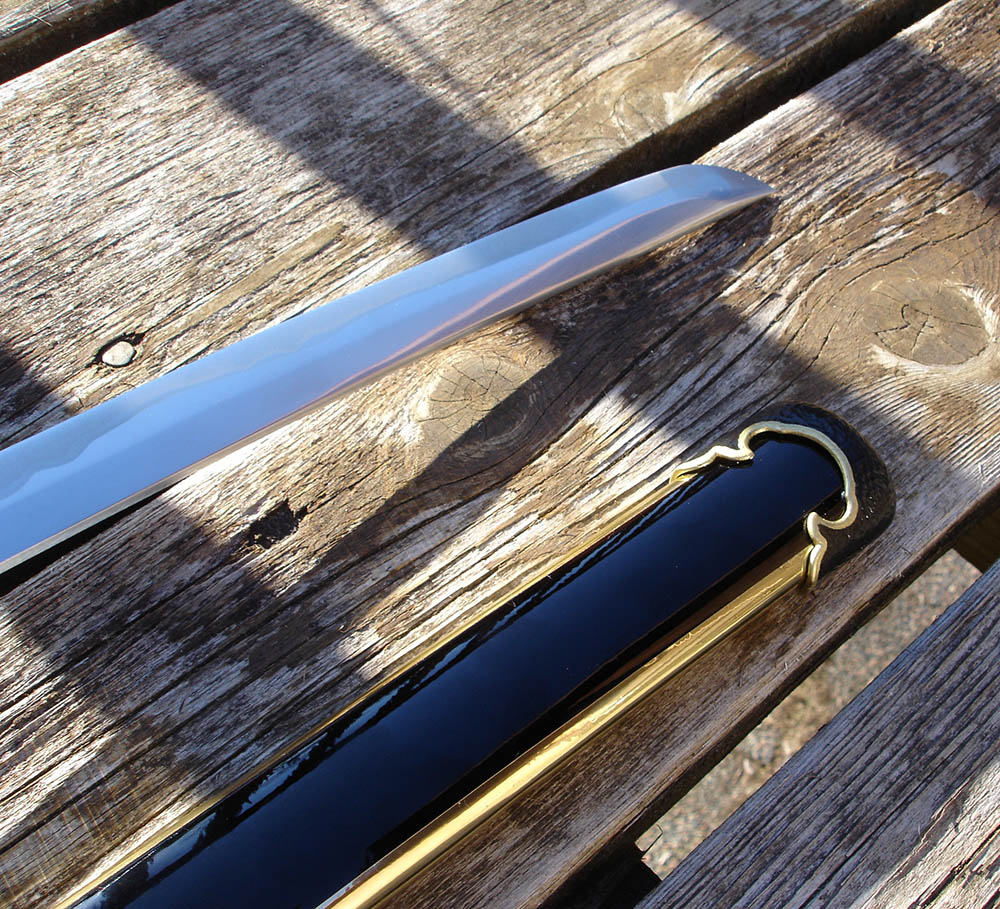
presents yesterday. Number one was my Shinobiya order from about a
month ago. Blade looks great, and the saya is just what I ordered, but
the exciting part is the kojiri! They fit great on Adam's saya! The
original one I ordered is tiny, and there would be no way I could get it
to fit (without making a new saya, I suppose). This one looks very
close to that one, similar texture, similar scallops, similar overall
design, and it fits! Woohoo!:) Plus I had ordered an extra one, and it
fits my PC Meijin very nicely.
Started painting it up, spray
primer + model enamels (same as the fuchi/kashira). I'll clear-coat it
tonight with my semi-gloss (or satin finish, I forget), epoxy it on, and
that'll be done!
Only outstanding issues are the sageo (got to
add decorative stitching, my wife's offered (well, not really offered)
to help), and the leaf kamon. I'm still waiting on the endmills to come
in. If they're not in by tomorrow, I'll use a 1/16 dremel bit I've
got, but I'd prefer the endmills. I'll test the dremel tonight.
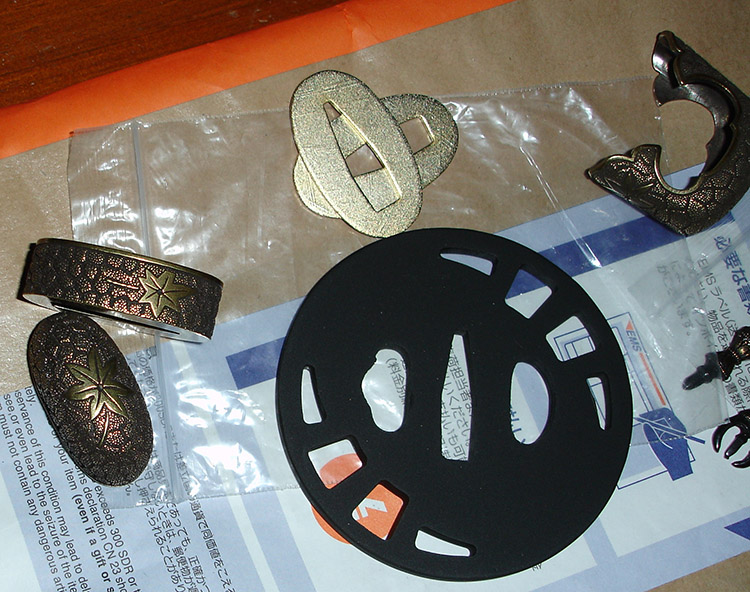
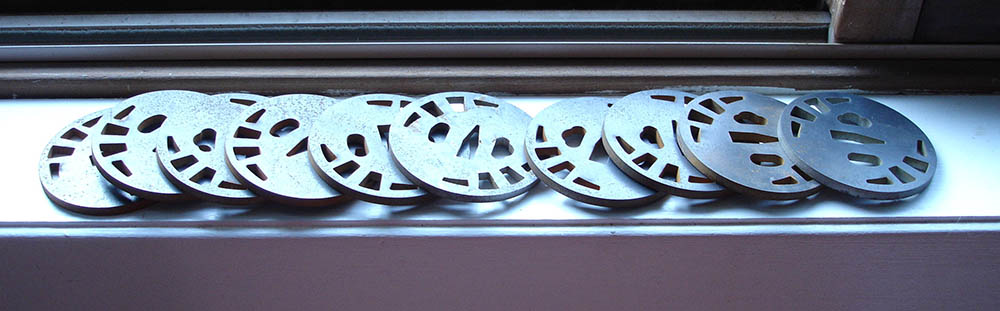
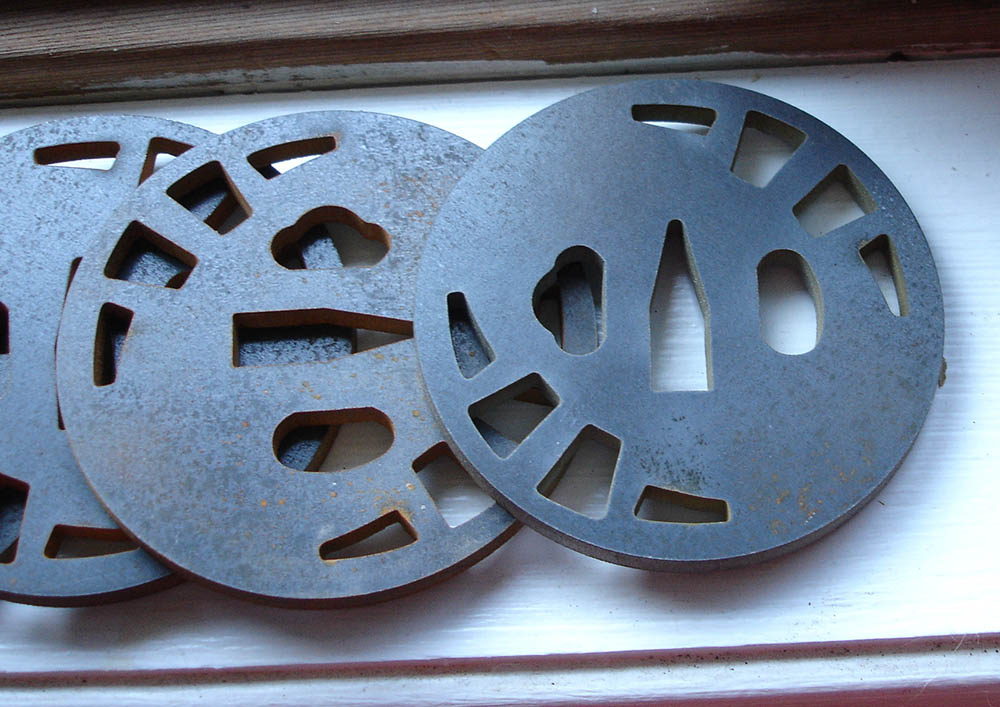
Oh
year, second present was one I picked up at a waterjet place in town.
Got them to make a number of "Hanzo" tsubas for me. Yamato is currently
charging $140 each for these guys, and I couldn't stomach that for such
a simple tsuba design. So I CAD'ed a similar design up, mailed it over
to Ian at Virtucom, and he cut me out a bunch. They came out
beautifully. I'll just need to clean/prime/and paint 'em up.
Anyhow, suppose I should go do some real work:)
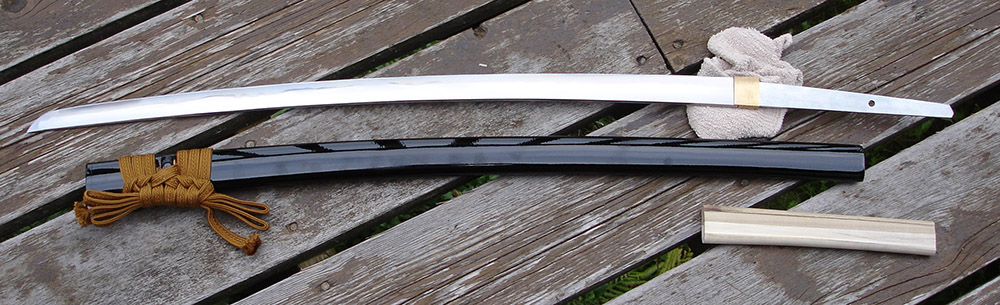
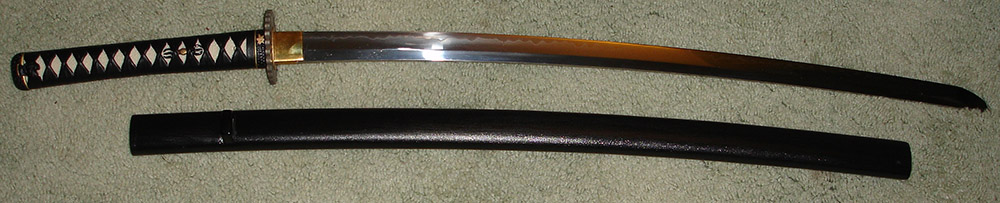
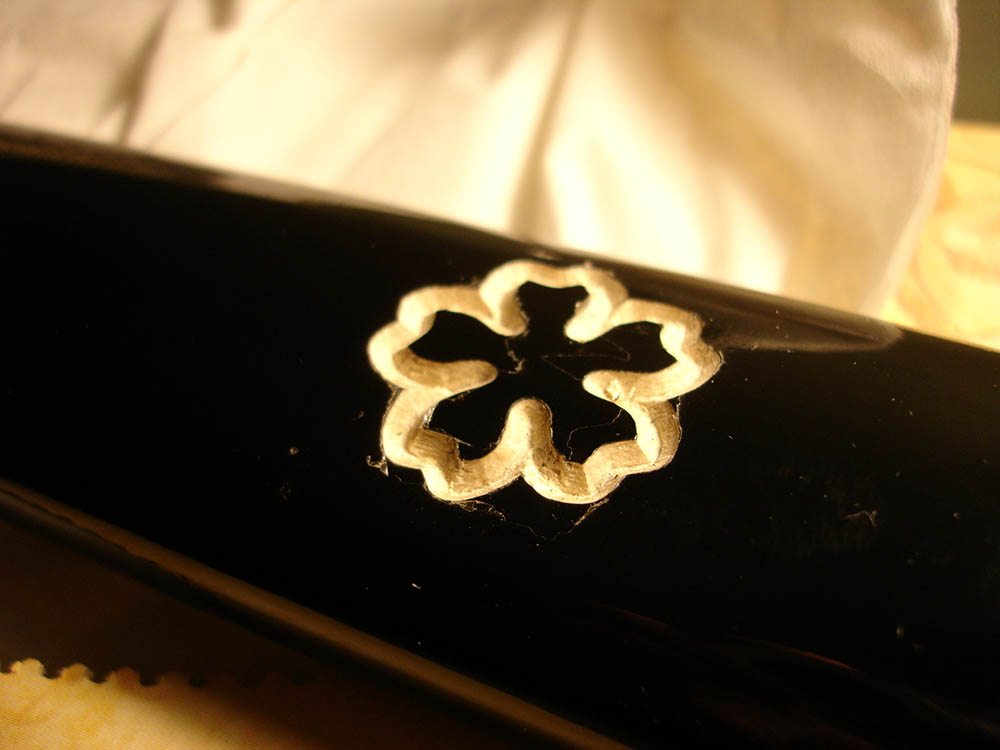
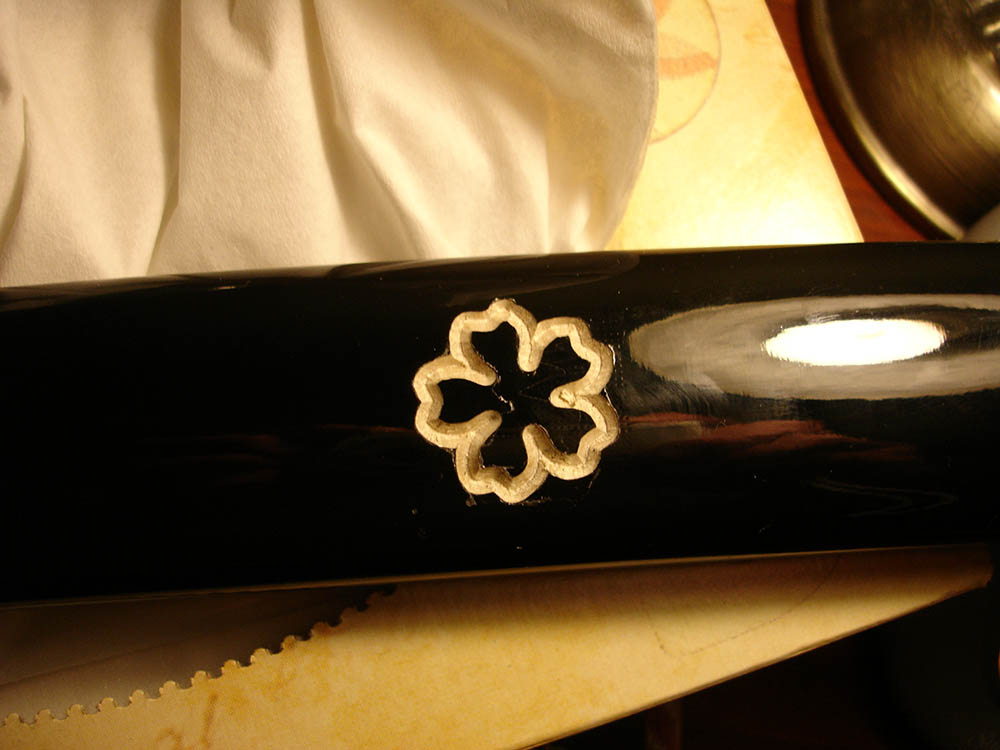
HATTORI HANZO BUILD SWORD LOG: March 29, 2012
Finished it up late last night (well, around 11PM, that's late for
me:)). Carved/painted the leaf (painting, once again not much fun).
Epoxied on the completed kojiri. Tied the sageo (that the missus had
added the barely-visable extra stitching to) on this morning, so it's
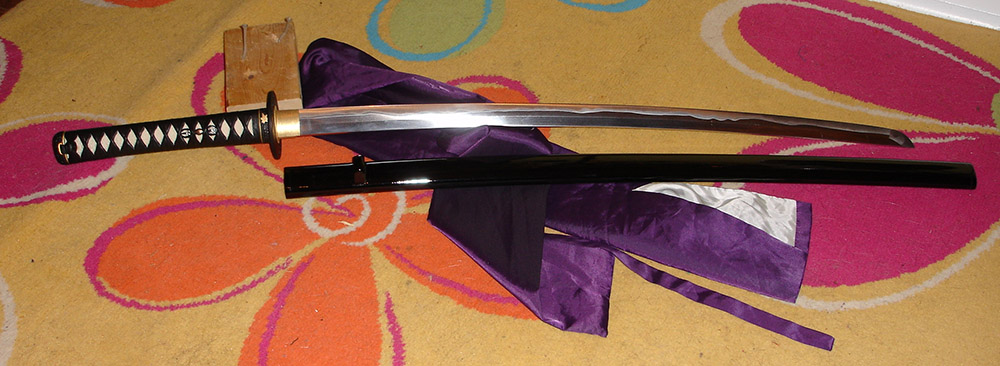
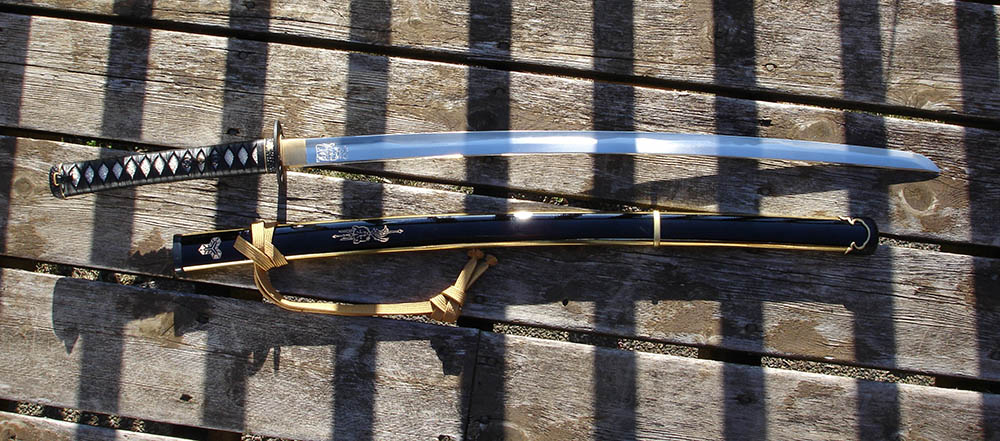
not in these pics. I'll take some more pics today in natural light.
Long project, finally done!:)
HATTORI HANZO BUILD SWORD LOG: March 31, 2012
The final update!:)
Delivered the sword yesterday, Adam seemed
very happy with it (as he pushed up his glasses and put his nose about
an inch from the saya, inspecting the carvings:)). Shook my hand about 4
times:) Said the 'painting is perfect', which I guess coming from Adam
is a great compliment! Adam and Jamie are both nice guys, it was fun
meeting them (and the kids loved it).
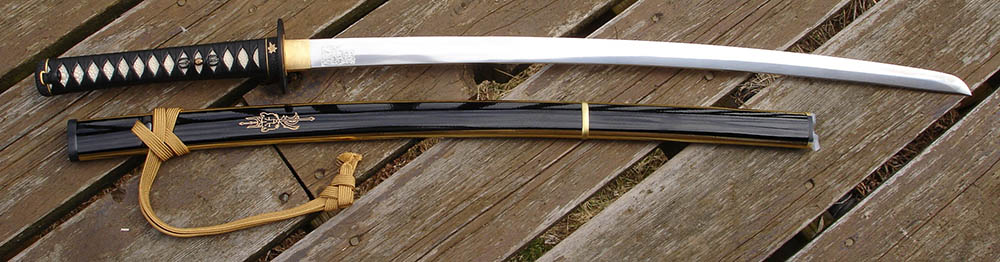
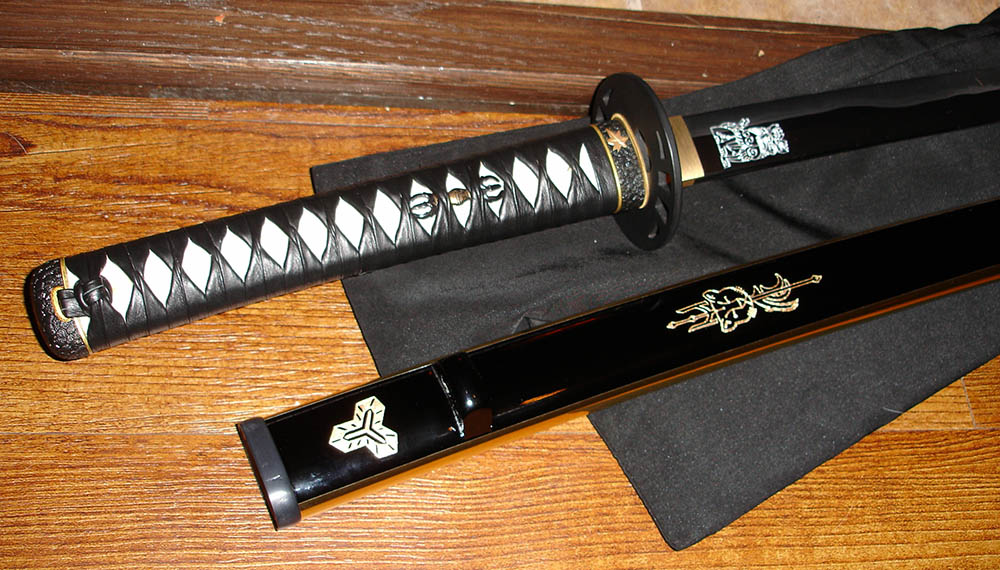
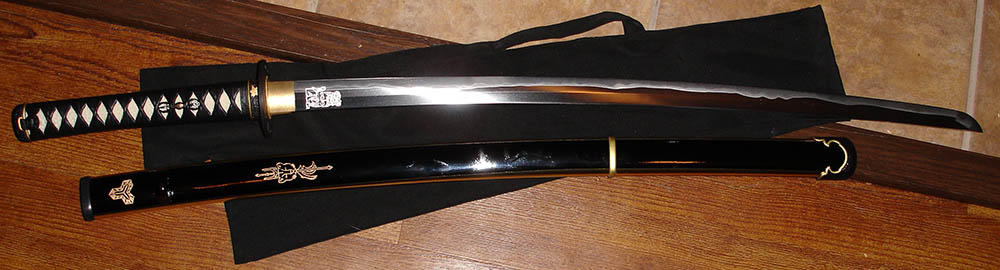
Anyhow, here's a few pics
of the final sword, and one of me hangin' with the dudes in the green
room. By the way, that's me in the middle with the egg-shaped head:)
Addendum
Was just watching a video about the importance of Making, and what's that I see over Adam's shoulder? My baby:) Nice feeling.
Thanks,
jason
Further Resources
It isn't really possible to provide tutorials on all the various techniques used to make the Hattori Hanzo sword, and indeed I don't imagine many of you have a CNC machine at home to do engravings - but here is a clever way to etch an engraving into steel using an simple electro-chemical technique..
A full tutorial on how to wrap a tsuka with hishigami is provided here, and an alternative wrap style - the battle wrap - is detailed here.
To learn how to carve a tsuka core from scratch this article offers an easy to follow step by step guide. The same principles can be used to create a saya. To make your own unique brass tsuba, a simple tutorial is provided here.
Techniques on polishing and sharpening a Japanese sword are given here - and this article shows you the main ways to bring out the detail of a Katana's hamon temper line.
If you want to learn how to sword fight like the Bride, well, click here
And finally, here is a page on the best Kill Bill Hattori Hanzo Sword on the market, a $99 sword by Masahiro that was the same model that Jason customized, along with the changes he made to it, that got Adam's attention in the first place.
Thanks for reading.
I hope you enjoyed reading the Hattori Hanzo Sword Build Log as much as we did. To return to Free Sword Customization Tutorials from Hattori Hanzo Sword Build, click here
Buying Swords Online Can Be DANGEROUS!
Find the Best Swords in the:

Popular & Recommended ARTICLES


The ONLY true free online magazine for sword enthusiasts. Delivered once a month on the 1st day of the month, no filler and no BS, just the latest sword news & info delivered straight to your inbox.
VISIT OUR SPONSORS:


