Recent Articles
-
Christmas Sword Buying Guide 2025
Dec 03, 25 10:53 PM


Easiest ways to bring out a hamon line
There are many ways to bring out a hamon line to make it 'pop' if it is a bit subtle - from the traditional way which takes day after day (after day) of polishing by hand using hazuya and jizuya polishing stones (and is a skill that takes a Japanese Toshigi 10 years to master), to modern hybrid polishing techniques, doing an acid or a lemon etch to bring out the hamon line details and quite a few more tricks and techniques - many of which we will cover here.
But first, let's quickly take a look at the hamon in a bit more detail to understand exactly what we are bringing out..
QUICK JUMP MENU
Two main styles - Hadori and Classical hamon
Traditional Japanese Method (hardest way)
Acid Etching with lemon or vinegar (easy way)
Acid Etching with Ferric Chloride (easier way)
The EASIEST WAY - Red Iron Oxide
Can you really polish a hamon away? And what is it anyway..
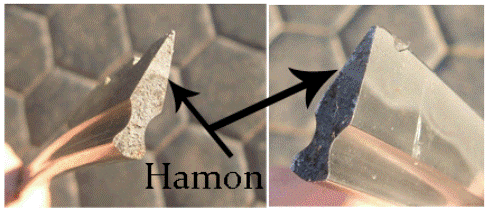
Okay, to keep it simple - the hamon is a visual by product of a traditional technique called differential hardening - the spine of the blade is clayed while leaving the edge exposed, heated up until it is red hot for a few minutes and then rapidly cooled.
The exposed edge of course will cool much faster than the spine, creating a very hard edge and flexible spine - and the hamon is the demarcation point between the two levels of hardness now in the steel.
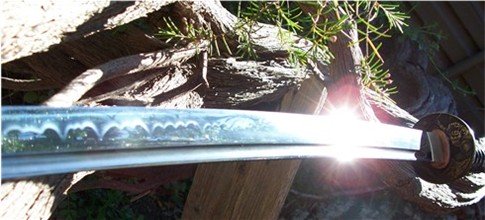
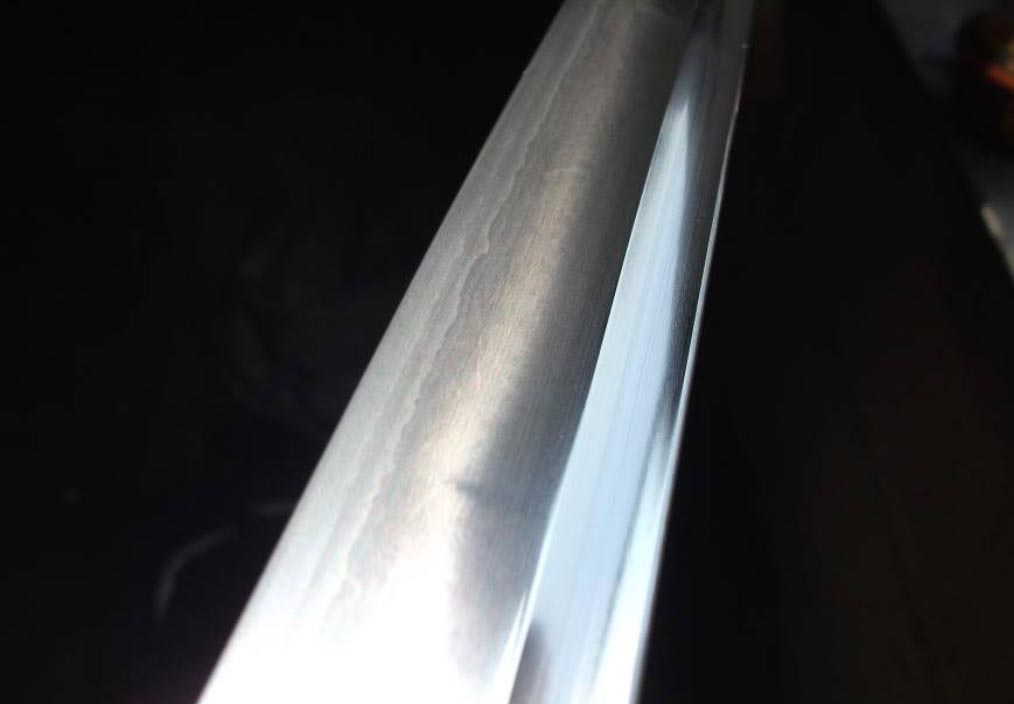
The thing is, it's not easy to see - and unless you bring out the hamon line somehow, it remains 'buried' in the steel. This is why it is possible if you just polish up a Katana without paying any attention to the hamon you will obscure it - but a real hamon is still there waiting to come out..
 Here we broke a sword in half to look inside and see the hamon. Notice how it soaks through the entire section? So if you do obscure it with a bad polish, it is waiting for you to bring out the hamon again using any of the techniques explained a little later
Two main styes used to bring out the hamon line - Hadori and Classical Hamon
Don't worry, we are going to get to the 'how to' soon enough - but so that you know - there are two ways that bring out the hamon line. The first one results in a whiteish/milky hamon against a darker spine called 'hadori' - if you look very closely at hadori hamon you will see the 'real' hamon beneath it - and this technique is created by acid etching the blade.
The other more traditional style, the classical style, results in a more subtle, more natural and usually darker colored hamon on a steel background and is sometimes called a 'real' hamon. You can see more examples on this page from the information section of a Nihonto seller in Japan called 'Usagiya'.
 Hadori Polish Hamon
 'Real' Hamon
The ONLY way to cretae a 'real' hamon is via the painstaking process involving Japanese water stones - and polishing with..
Japanese Water Stones
The classical way to bring out a hamon line, the use of Japanese polishing stones, is Asa Mae Shigoto Dewa Nai (not a task to accomplish before breakfast) which is an old Japanese expression meaning something that will take a looong time..
And learning how to do it, that will take even longer.. In fact, it usually takes 5 years for an apprentice to become a swordsmith in Japan, but for a polisher, it takes 10..
That's how tricky it is to learn how to polish a hamon using the traditional method..
As such, there is no way we can cover how to learn this in an online article. The best attempt I have seen is again on the Usagiya site here but there are two big reasons why it is not a good idea to just mess around with the techniques and treat them too lightly..
The first reason is that it simply takes too long to learn how to do it properly. One SBG member, benvk, who is himself who is studying the arts of hand polishing a hamon puts it like this:
"I can categorically say that if you want learn how to polish these things correctly, be prepared to sacrifice a hell of a lot of time and effort. These are not easy skills or techniques to learn and I can only guarantee you frustration and heartache all the way down the line.
I'm still very much a novice in this area and some days, the frustration is so bad that I just want to snap the blade I'm polishing in half! But, I'm stubborn (you have to be) and I know that one of these days, it will all come together in the way I want it to. It might take years but I'm in for the long haul."
But the second reason is more pragmatic - because modern steels are so hard that they are almost impossible to do this way - the imperfect nature of tamahagane means that the stones tend to 'bite' into it easier, while with modern steels they tend to glide over the surface and take even longer to do and require different techniques than what is used traditionally!
Hybrid Polishing
One modern method of polishing a Japanese blade to bring out the hamon line is called 'Hybrid Polishing' - below is a video which explains the basics of this much easier and more modern approach vs the traditional on two home made differentially hardened knives.
Hybrid polishing, as the name suggests, involves polishing and sharpening the blade first using the techniques outlined on this page of our site about hand sharpening (polishing and sharpening are the same process and usually happen at the same time)
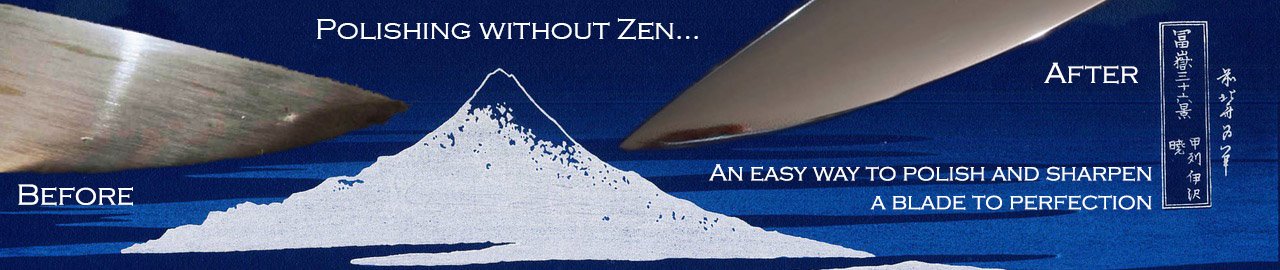
Another short cut approach to the first stage of hybrid polishing is explained in our article - 'Polishing without the Zen'.
And the second stage is to acid etch the blade using lemon or vinegar, hence the name 'hybrid polish'. You can find more information this technique at the bottom of the page under 'more resources' - but, this article is called the EASIEST way to bring out a hamon line - and in many cases the first stage of the hybrid polish is not necessary.
So let's jump straight to the main methods used to bring out a hamon by casual sword enthusiasts - stuff that we CAN show you how to do in not in days or weeks, but in minutes and hours..
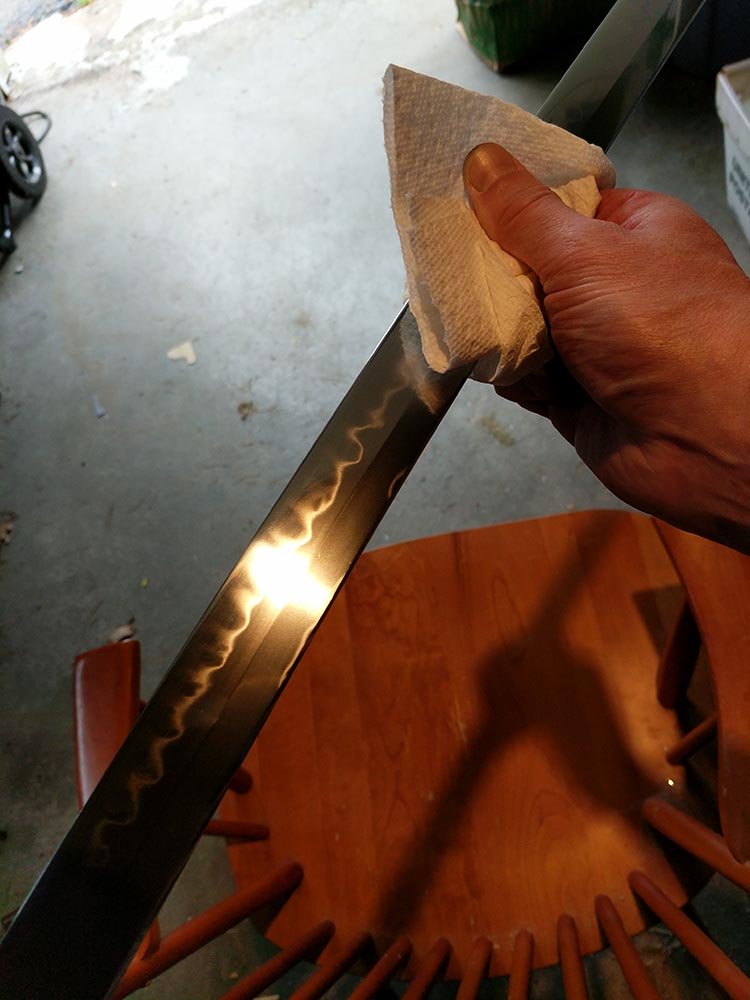
Acid Etching Technique - Vinegar or Lemon..
The most common way that most Western sword collectors use to bring out a hamon line is via an acidic etch. This is not as nontraditional as it sounds, as Japanese polishing stones are also mildly acidic - but it certainly is easier.
Here is a quick DIY instructional on this method by SBG member Slav.
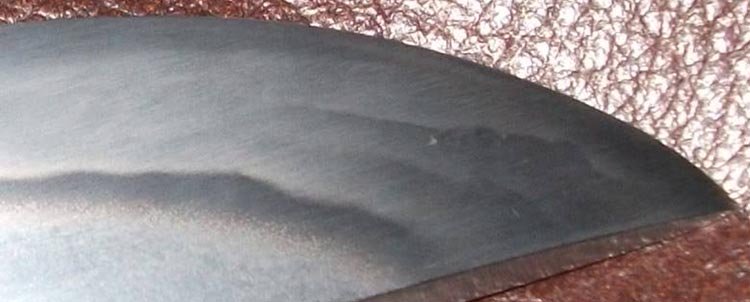
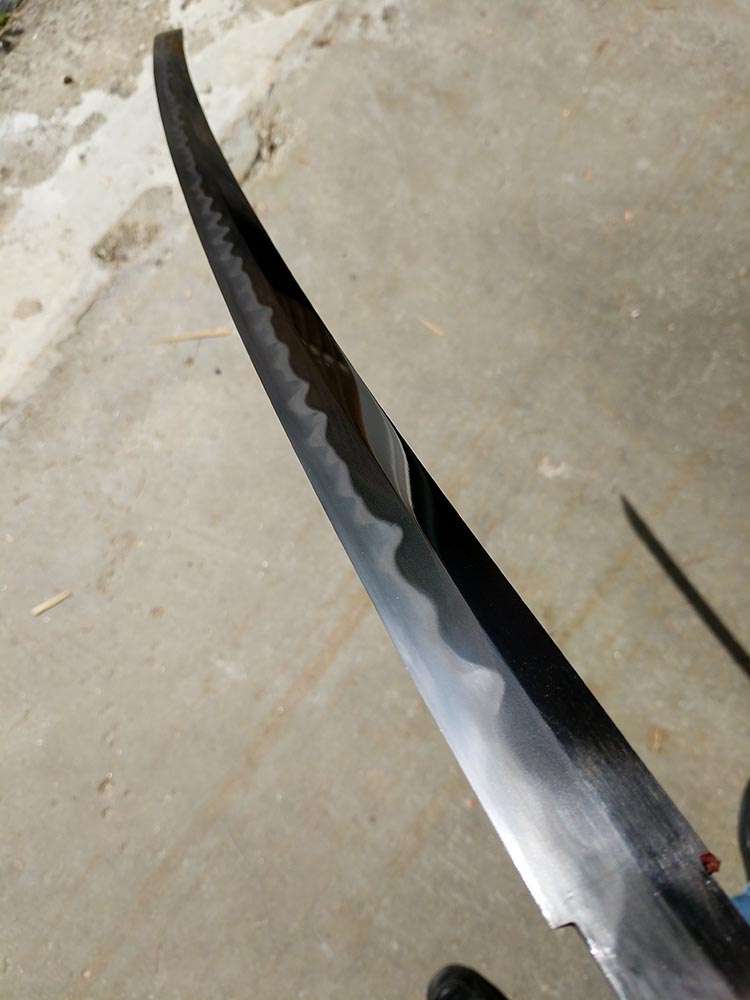
 A subtle hamon is revealed using the acid etch method
Tutorial: How to Do an Acid Etch
Video Tutorial on the same basic technique and principles with a knife
The following info has been put together
from many other sources and adapted in a way I personally prefer, there
is a lot of room for personal experimentation and modification here. Remember that this is not a substitute for a full or modern polish but
just adds to the finished look and that this method is for
enhancing a real hamon that is really there, not a wire brushed or
otherwise false hamon. If your blade has not been differentially heated
where the edge is harder than the spine and instead has been through
hardened, it most likely does not have a real hamon and therefore this
technique will not work for you.
This is what has worked best for me and is not the last word on the subject so just use your best judgment and do some research.
From
what I understand, different acids work better for different steel
types. I use non diluted white or apple cider vinegar for 5160 steel
with very good results. I have also used lemon juice (smells horrible when heated!) and ferric chloride to etch with varied results.
I
would start with vinegar or lemons as it is probably the easiest and
least expensive and then try others to see which works best for you.
List of supplies:
- White or apple cider vinegar (highest acidity possible) or lemons or Ferric chloride (FeCl3)
- Windex, Glass plus or a similar cleaner containing ammonia to neutralize acid
- Mothers mag and wheel polish
- Bon Ami mild cleansing powder or other non abrasive grease cutting cleaner
- Paper towels or cotton balls
- Dish detergent
- Glass bowl
Prep -
Make
sure your blade is very clean before etching. I use bonami cleansing
powder because it doesn't leave a residue after rinsing and won't
scratch the blade. You can use similar products as long as it rinses
clean so there is no grease or dirt or cleaning residue. be sure to
remove all sword parts that can prevent you from cleaning the acid off
thoroughly such as habaki or guard parts, etc.
Make sure blade is
completely dry after cleaning and obviously try to avoid touching it
with your bare hands to avoid getting oil from your skin on it.
I use
rubber dish washing gloves as the acid can be pretty harsh on your skin
and remember to never touch your face, eyes or mouth with the acid
(done it before and it's not pleasant)
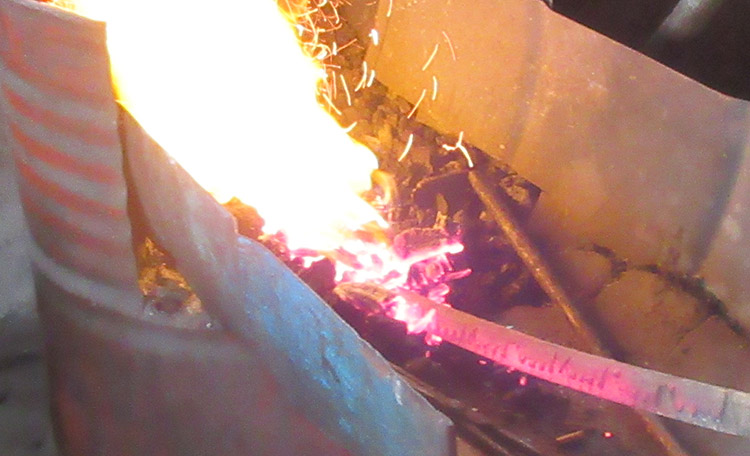
Step 1
I put
about 2/3 of a cup (depends on blade size, can be adjusted) of vinegar
(or other acid) in a small bowl or pot with a couple of drops of regular
dish soap mixed in (helps even coating) I heat this on the stove (or in
microwave in glass bowl) until just before boiling.
If possible, you
can also heat the blade either in the oven or with quick passes of a
mini butane torch until the metal is very warm to hot (not red hot or
you might ruin the temper) this opens the pores in the steel. You can
also use hot water for this.
Once the acid is heated I then use a
clean rag or paper towels (or cotton balls on a stick) and repeatedly
soak the blade with the solution.
You can do this one side of the blade at a time but be sure to mask the side that you're not etching to prevent stains or rust. I
prefer to hold the blade vertically with the tip resting in the bowl
(on something soft to not chip or dull it) and soak both sides at once.
soak the rag and start at the mune machi and work your way down towards
the tip loosely pinching the sides, you don't have to "rub" it in.
Keep
an eye on the steel and notice when it starts to turn a light to medium
gray, this means it is fully saturated and it's time to stop. Also, do
not let the acid sit or pool in one area too long because it can cause
rusting almost immediately (if this happens, just polish it out before
continuing)
Step 2
Once you are done with the first
etching cycle (metal turned grey) quickly spray down the blade with
windex or glass plus to neutralize the affects of the acid (key
ingredient is ammonia).
Step 3
Clean both sides of the
blade with same cleaner you used to prep, rinse and dry. Lightly polish
the blade with mothers mag and wheel polish to remove the grey
especially the shinogi-ji, bo hi (if it has one) and mune (spine). You don't
have to scrub the blade with polish, just follow product directions.
IMPORTANT:
Make sure you clean all the polish residue off of the blade. Use the same cleaners you used before just do a very thorough job
because any residue left on the blade for the next rounds of etching can
cause splotching or streaking.
Step 4
Repeat the process.
I
find I get the best results by doing about 5-8 of these short baths as
opposed to fewer times in longer baths. It seems to bring out more of
the smaller details, If they are there to bring out. Not all hamon will
have a lot of activity so final results will definitely vary.
Remember to do a final polish with Mothers and then completely clean off any residue, dry and oil your blade.
This
method can be altered as you see fit and is pretty fail safe as long as
you have things set up well. You can always polish out the blade and
start over again if you do not get satisfactory results.
Experiment with different combination's of acids, time lengths, techniques and steel types to find what works best for you.
Ferric Chloride
Slav mentioned it briefly in his tutorial, but you can bring out a hamon line when a vinegar acid etch fails using Ferric Chloride. But a little goes a long way with this stuff. Below is a quick account of one SBG members experiences with it.
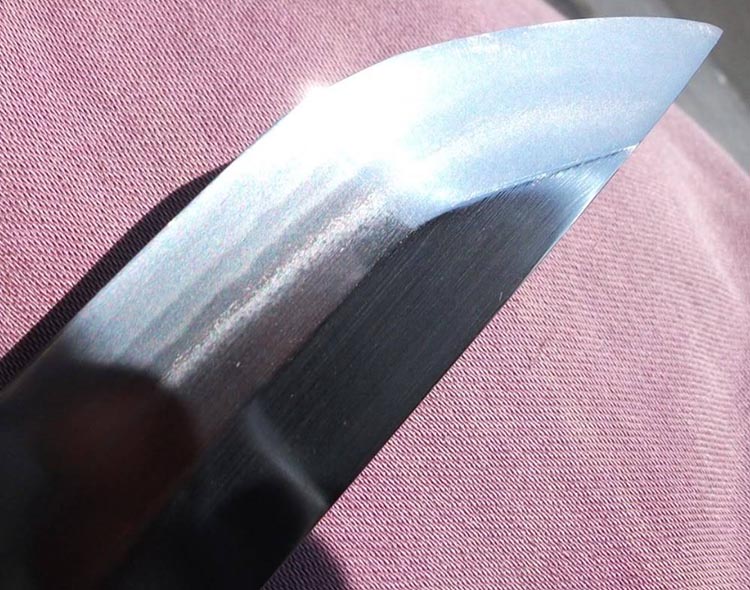
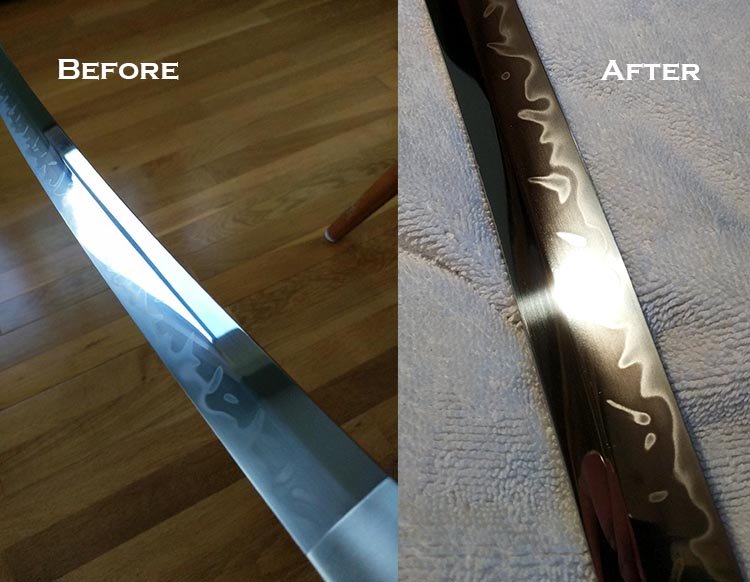
 BEFORE - out of the box, the hamon on this Katana was barely visible
Tutorial: Ferric Chloride
I got a new Kris Cutlery wazkizashi blade, and as it came from Cecil, I
could just barely see the hamon. Thought I'd etch it up. So, I:
1. Tried apple cider vinegar, no effect
2. Tried Lime juice, next to no effect
3.
Tried Ferric Chloride, from an electronics store, about 4-1
water/feCl.
Heated the water, mixed it up, and immersed the blade (in a PVC pipe filled with solution).
Waited 3 minutes.
Results - over
etch, and much cleaning up needed to get blade back to anywhere near
nice. I guess with FeCl, and this blade, I didn't need to heat the
water (or, I could have used less FeCL).
Note to self - CONTINUALLY CHECK HOW THE ETCH IS GOING AND STOP WHEN ENOUGH!:)
 AFTER: It took some trial and error, but in the end this was the result
There is some trial and error involved, but if you screw it up you can reset the blade by just polishing the hamon out again and starting over. As you know, the hamon is there all the way to the core in a differentially hardened blade just waiting for you to bring the hamon line out, even if it takes a few attempts to hit the perfect forumla..
Speaking of perfect formula, one last technique - and yes, we have saved the best until last.. ;-)
The EASIEST way to bring out a hamon line!
The above picture shows the results of using this method. Here's another one..
The method here is the REVERSE of the normal acid polish and instead of lightening the hamon, it darkens the rest of the blade to provide the contrast. For an even MORE prominent result, you can make the hamon jump out using any of the techniques used above, but these two pictures show just the result of using this method by itself.
What is this mystery method I hear you ask?
Well, all you need to do is get some of THIS..
Red Iron Oxide

The technique to bring out the hamon line with Red Iron Oxide is very simple.
Firstly get some nail polish and paint to cover up the surfaces of the hamon to protect it.
Then take some of the iron oxide powder and mix it with some lubricating oil such as Hoppes # 9 in the center circle on a coffee saucer to make a polishing paste - not to runny or to thick, just enough so that it is slightly liquid.
Taking a clean index finger, dab a few tiny dots around an inch apart BELOW the hamon on the section of the steel that you will be darkening - right up to the hamon but not over it and polish it into the steel with a folded triangular shaped pad.
Once you are done, use acetone to clean off the nail polish (nail polish remover) and a light polish with mothers mag or other polishing compound (such as Silicon Powder 1200 grit) wipe it off with a cloth or piece of paper and - viola!
Conclusion
So there you have it, the main modern methods used by hobbyists and enthusiasts to bring out a hamon line at home - ranked in the order from hardest to easiest:
- Hybrid polishing
- Acid Etching with Vinegar or Lemon
- Acid Etching with Ferric Chloride (lighten the hamon)
- Acid Etching with Red Iron Oxide (darken the rest of the blade)
Or if all else fails, do what some Chinese forges do to fake a hamon - make a steel template and grind the thing on.. ;-)
Further Resources
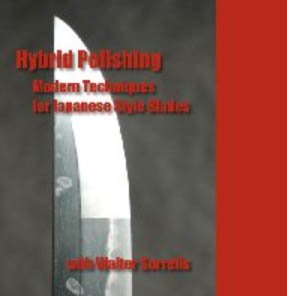
One excellent resource for learning how to do a hybrid polish is the DVD by highly respected sword and blade maker Walter Sorrels entitled "Hybrid Polishing: Japanese Sword Polishing for Modern Blades"
The process of hybrid polishing is also explained in more detail in this short but sweet article here
And of course you can get help, advice and read about other people's results and techniques on both bladeforums.com and of course our very own SBG Sword Forum
I hope this information on how to bringing out a hamon line has been helpful. To return to How to Sharpen a Sword from Easiest ways to bring out a hamon line, click here
Special thanks to SBG members benvk, verity, slav, jblakey and zgs1313
Buying Swords Online Can Be DANGEROUS!
Find the Best Swords in the:

Popular & Recommended ARTICLES


The ONLY true free online magazine for sword enthusiasts. Delivered once a month on the 1st day of the month, no filler and no BS, just the latest sword news & info delivered straight to your inbox.
VISIT OUR SPONSORS:


