Recent Articles
-
Christmas Sword Buying Guide 2025
Dec 03, 25 10:53 PM


Polishing Without Zen
Polishing and sharpening a sword is something that most colectors thing is hard. In Japan, there are specialized sword polishers called Toshigi - an artisan as equally skilled as the smith who forged the blade, polishing it in a process that often takes several weeks..
Well, that's fine for high end Nihonto. But not really appropriate for a $50 Musashi Sword - or any of the affordable blades that we tend to focus on at SBG.
Here's an easier way to polish any blade to a mirror finish and razor sharpness using simple household items. Try it and you will be surprised..
Polishing WITHOUT Zen..
By SBG member Aussie Rabbit
Not to be confused with polishing with Zen – in which you must climb Mt
Fuji to gather Japanese water stones so fine they glitter in the sun.
Thereupon to polish the Hamon until the Yokote gleams with an inward
light.
Lets get a little serious here, we are not dealing with
blades that are hundreds of years old, almost all the blades we deal
with are made from modern steels in Chinese sweat shops where the
workers get a few dollars a day.
Since I have been collecting
sharp things for 50 years I have some experience with the care and
upkeep, collecting and use thereof.
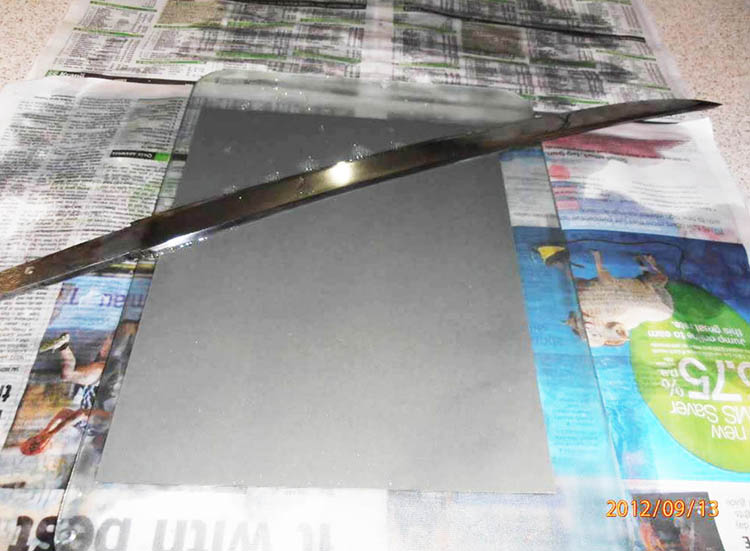
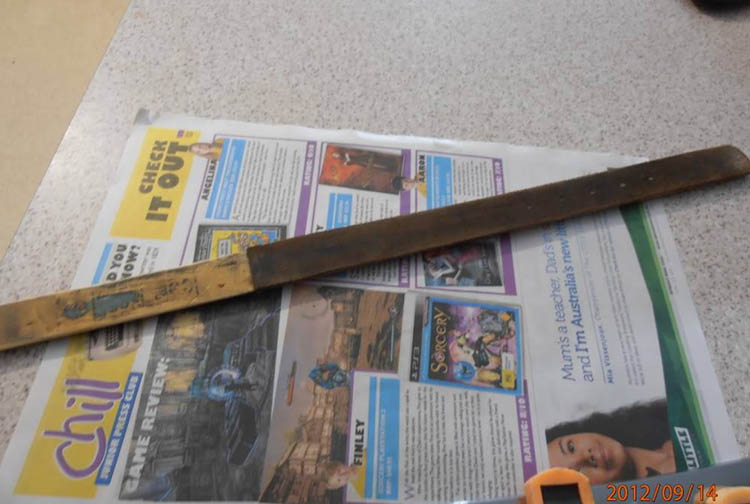
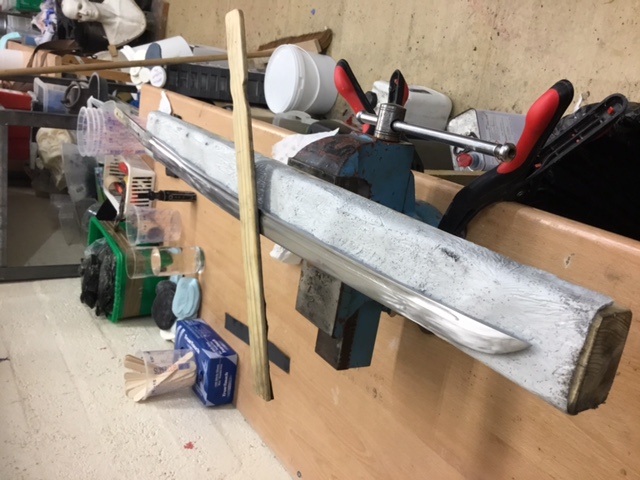
So here we will take a 5160 Hanwei Raptor Wak. That should have been scrap and make it presentable, here is the beginning:

As you can see this blade has everything, rust, grind marks, bad geometry and a list of other faults too numerous to mention.
So here are the requirements -
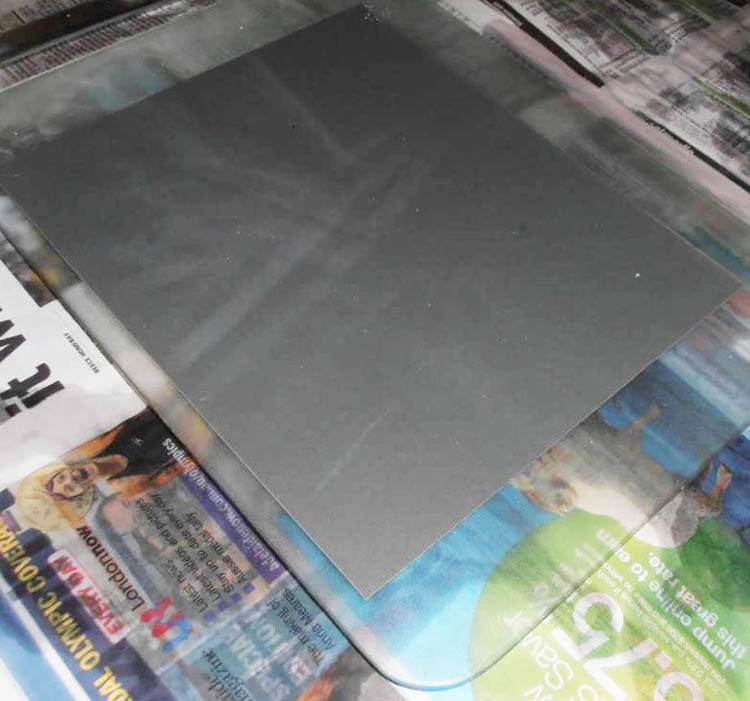
One
or more sheets of glass, approx. 18” x 12” or 300mm x 450mm, not window
glass, you need plate glass or shelving glass 6mm or ¼ inch thick,
(have the edges ground so they are not sharp) next you need sheets of
wet-or-dry paper beginning with 600 grit and up, 1200 is where I stopped
on this project but if you wish to put in the effort you can go higher.
Spray
adhesive, 3m, Sellys or any good adhesive, the cheap brands are not
water proof, now spray the glass sheet and the back of your paper, wait 5
minutes for the glue to become tacky, carefully place one edge squarely
on the glass and roll the paper across with a bottle or similar so as
to avoid any bubbles. You only get one try, if you miss apply you will
likely need hot water and a scraper to get it off.
Here I have used a glass cutting board as the demo -
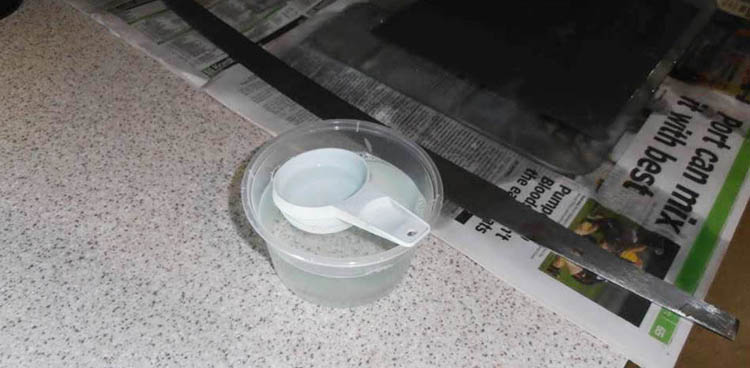
Next you will need a container and a dipper, raid the kitchen cupboard
for both, fill the container with warm water and some dish detergent,
(just a few drops) this lowers the surface tension of the water and
floats away particles.
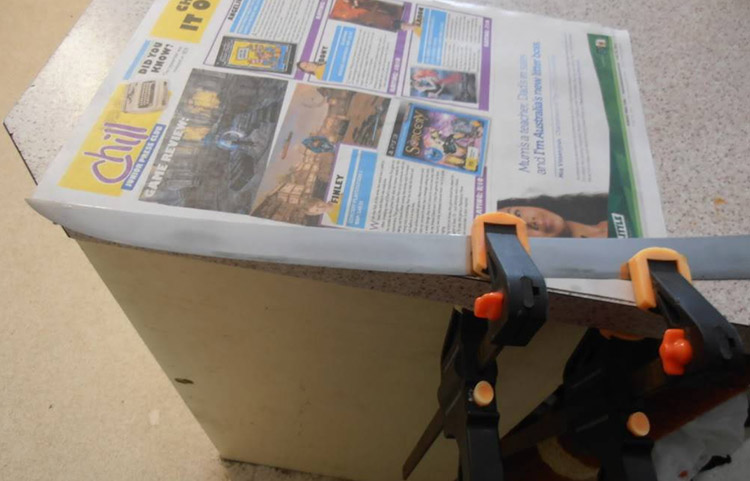
Place damp newspaper on the surface where
you work, the kitchen bench is NOT ideal, news print will stain the
bench and anger the one who wipes up. I have a set of steps and a stool
outside where I work .
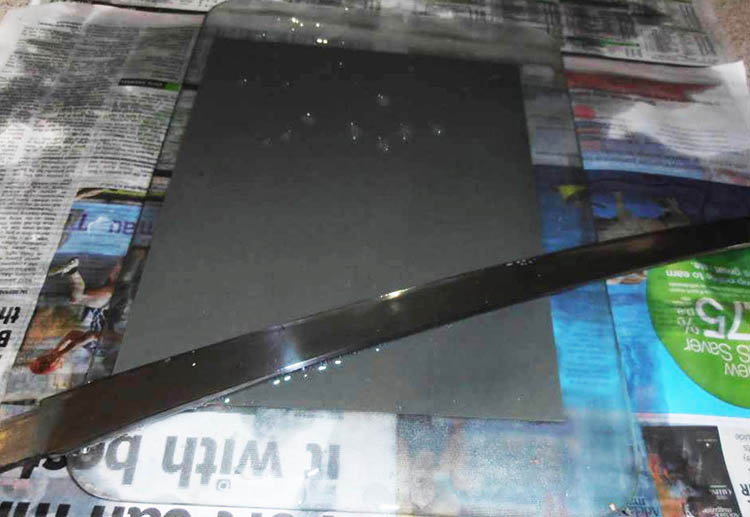
Place your glass sheet on the newspaper and ensure it does not slide around. Pour a little water on the paper with your dipper.
Now take your blade and place on the glass thus.
If you do wish to use this technique to polish a sword with appleseed bevel or niku, with the smooth even motion already mentioned,
you lift the side opposite the edge you are working on. It's not anywhere near as easy and practice makes
perfect with that one. Using the credit card technique you can find your starting and finishing angles, and also importantly
the geometry of the convex. To maintain the geometry you want to work
the surface of the curve evenly.
The majority of blades we
deal with are flat ground, other shapes such as “appleseed” and Shibata
are too time consuming for cheap blades, if in doubt take a credit card
or other straight edge and place it on the blade, if it rocks or if you
can see light through the middle do not continue!
Now with the
blade flat push the blade forward and diagonally away from you holding
the blade with your fingers on the back edge and in the middle, you
should end up here. Use light to firm pressure, release the pressure and
drag the blade back, repeat moving the blade a little lengthwise, it's
an easy rhythm but don't rush.
10 minutes on one side the flip the blade and begin on the other side, continue until the whole surface has the same level of shine.
You will see particles float on the water near the edges of the paper, this is the metal you are removing.
Now switch to the next grade of paper, 800,1000,1200 or higher, each
time you will be removing the polishing marks from the previous paper,
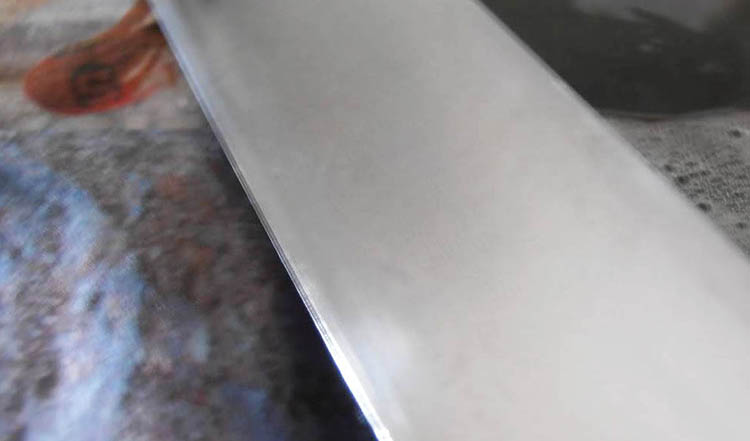
at 1200 you should be able to see yourself in the blade.
SPECIAL NOTE: At 1200 grit your blade is past “sharp” and heading towards “shaving” - be careful, you have wet hands and a wet blade, a slip here is likely to ruin your day!
The perfect polish and that Showroom Shine..
Here we will need to make some tools, the first is the slik-stik, used
in our family for generations and likely known in other places by other
names.
You will need:
- Old leather belts or harness type leather, approx. 450mm or 18” long by 25mm to 50mm or 1” to 2” wide.
- Good heavy cow hide, nothing soft.
- Strips of shoe leather is ideal.
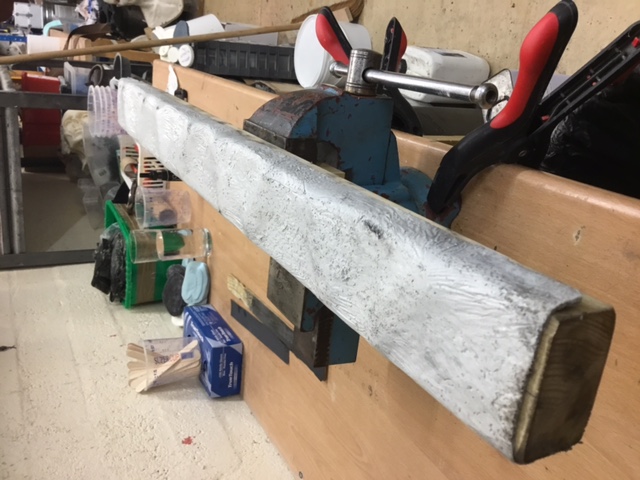
- Some
timber strips 600mm or 2' feet x 6mm ¼ inch or thereabouts, good
straight grained timber that is flat, flexible and not prone to
splinters.
Glue the leather to the timber, you can use the spray adhesive here too but use two coats letting the first dry for an hour or so. You should end up with something like this. Leave for 24 hours, you will need at least 3.
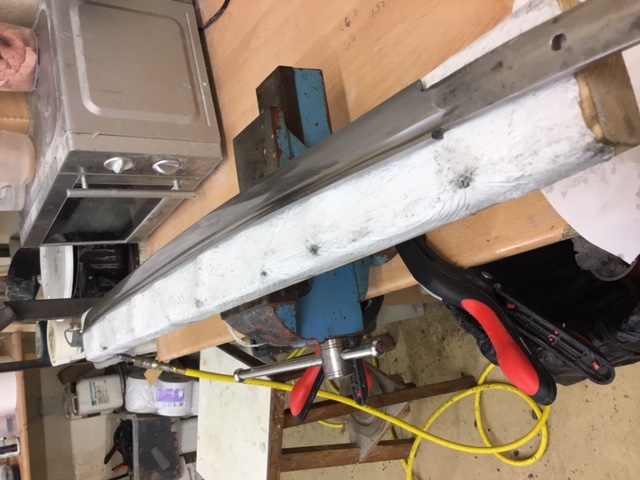
 A simple 'slick stick'
Polishing compound/paste – Choices here are many.
My suggestions are:
- White Blizzard compound.
- Mothers Mag polish
- Autosol Gold and extra-fine
Mark
your slik-stiks with the compound you use, never mix different polishes
on the same stik. Apply compound to the leather working the compound
through and leave to dry, do this two or three times.
In use
slik-stiks will clog after some time, scrape off the excess with a paint
scraper or plastic card, do not cut into the leather as this will ruin
the stik.
Clamp your sword to your work bench using quik-clamps with plastic jaws, aim to work on half a side at a time.
Working from behind the edge place the stick on the sword and with a two handed movement push the stik forward at a diagonal so you stroke 1/3 of the area you are working on, repeat moving the stik a little further along each time.

Keep the stik flat on the surface, you will be able to see this as the
compound works on the blade, always lift the stick on the back stroke or
you will have cuts in the leather which makes the stik harder to work
with.
Lifting the back of the stik just a couple of degrees
will polish the edge, try this with one of your kitchen knives and you
will be surprised at how sharp they become.
When you have done
that half re-clamp the blade and do the next half, turn the blade over
and do the second side, when you have finished wipe the sword and
inspect, change to the next finer slik-stik if you are satisfied.
For a final polish you can use jewellers rouge.
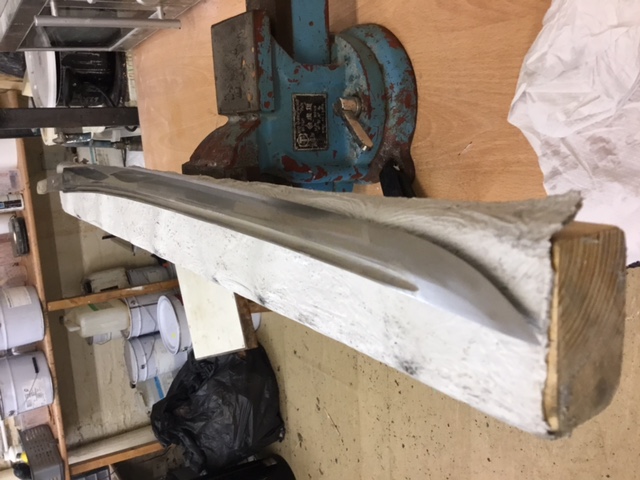
BEFORE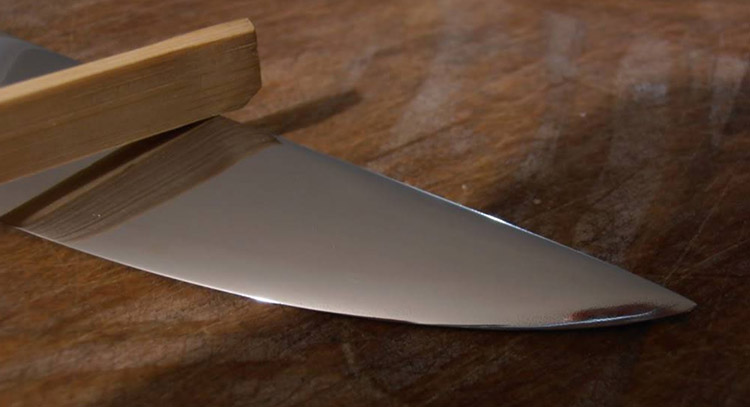 AFTER!
Variation - Polishing with a bit of Zen..
Inspired by the basic technique in this article, Mr. Tom Lauten decided to try and experiment - and came up with his own variation of the basic technique..
I'll let Tom tell his story below:
'I have recently (past 18 months) gotten in working with Japanese blades. Eventually I needed to polish/sharpen my blade. I find working blind on a stone with the polishing surface facing down is something I can struggle through but it feels so counter intuitive.
I used your “slick stick” idea and it felt “right”. I decided to try polishing my blade with a fine file to get the cheap, no longer needed “beater” blade back into a less “lumpy” state. I then used 400-600 grit wet and dry on a purpose made block to begin the polish.
I made a slick stick for wet and dry and continued to “file” the blade with this moving up and up the grits to 8000. I then use a metal polish on a slick stick or rigid strop paddle.
With the polishing face being upward I find I can use my model makers intuition and my eyes and hands to judge the polish and “feel” the surface. However I needed a way to hold the blade so I could work on the flat of the blade perpendicular to the floor…hmmm…
I came up with this. A piece of timber I could clamp in a vice. On this board I fitted flanged neodymium magnets. To protect the surface of the blade I impregnated some heavy upholstery webbing with liquid silicone rubber and wrapped it over the board and magnets.'


'Now I have a jig that allows of positioning the blade with its cutting edge hanging over the edge of the board allowing for filing and polishing. The rubber protects and helps grip the blade and keeps the filings from adhering to the magnets. The cover can be easily lifted off to rinse clean.'
'The jig holds the blade solidly and securely. Now I can
observe each and every stroke of my “polishing paddles”, I can feel the
change in texture of the metal and can judge how and where I polish. I’m
quite proud of my “invention” based on your “PWZ” approach. I’ve NOT
improved polishing but this made it more within my comfort zone and
so far I’m VERY pleased with the result.'
I hope this information on sword polishing has been helpful. To return to How to Sharpen a Sword from Polishing Without Zen, click here
Buying Swords Online Can Be DANGEROUS!
Find the Best Swords in the:

Popular & Recommended ARTICLES


The ONLY true free online magazine for sword enthusiasts. Delivered once a month on the 1st day of the month, no filler and no BS, just the latest sword news & info delivered straight to your inbox.
VISIT OUR SPONSORS:


