Recent Articles
-
Christmas Sword Buying Guide 2025
Dec 03, 25 10:53 PM


DIY Tsuka Tutorial
10 Easy Steps to a Perfect Fit
Making a DIY tsuka isn't really that hard once you know how..
It is not a FAST process, but if you have the right instructions, the right tools, and most importantly - the right mindset (patient, steady - measure twice, cut once as the Japanese proverb goes..) you can craft a custom fitted tsuka core worth several hundred dollars.
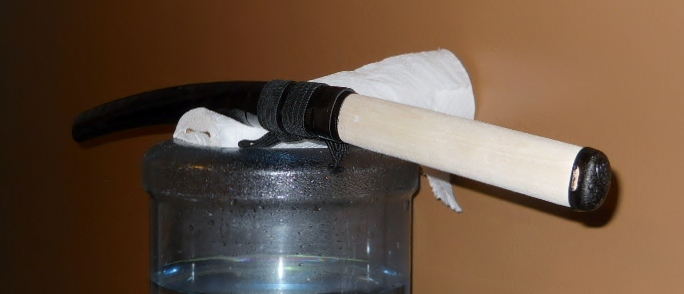
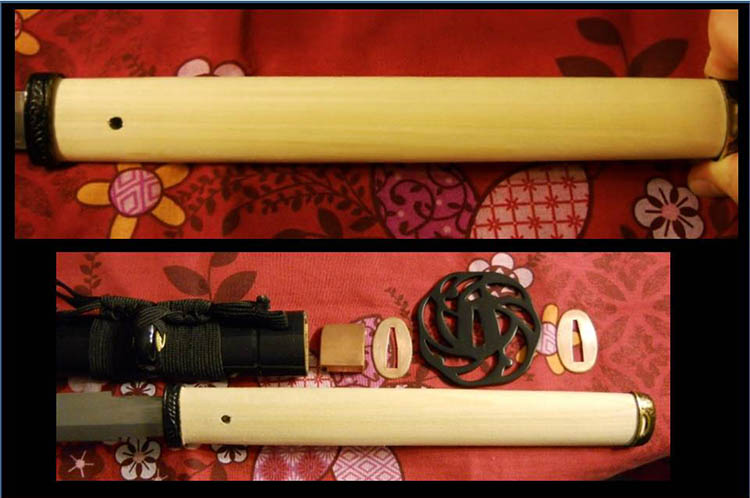 The end result of this DIY Tsuka Tutorial
Above is a picture of such a custom made tsuka, fitted exactly the the nakago (tang) of the sword it is to mount. Would you believe that this was made by a beginner? But not only that, but this was their FIRST time to do a DIY tsuka?
Well it was, and they could make it like this simply because they had the right instruction and lots of encouragement along the way guided by members of the SBG sword customizing community.
Not too much we can do about the encouragement, though we will do our best. The fact is that as this was the result of their first try - that should be pretty encouraging..
But we CAN help with the right instruction..
So let's show you, step by step, the encouragement and advise that our DIY tsuka maker - SBG member Damascus - received and see if you can achieve the same result..
VIDEO: Quick overview of the techniques from JF Knives
Recommended: Watch this video first to get a feel for the process.
Both the method here and the method detailed below are not the traditional nor the ONLY ways to make a DIY tsuka - but what follows is a steady, precise and popular method. If you want to use a dremel instead of chiselling, that's up to you - a table top sander - no problems, pick and choose any method that best suits the 'three T's': your personal Taste, your available Tools and your Temperament.
So let's get started..
DIY TSUKA TUTORIAL
From
here on out, basic instructions and methodology will be bolded text and
the work notes of SBG member Damascus who is making the DIY tsuka seen in the photos will be in italics.
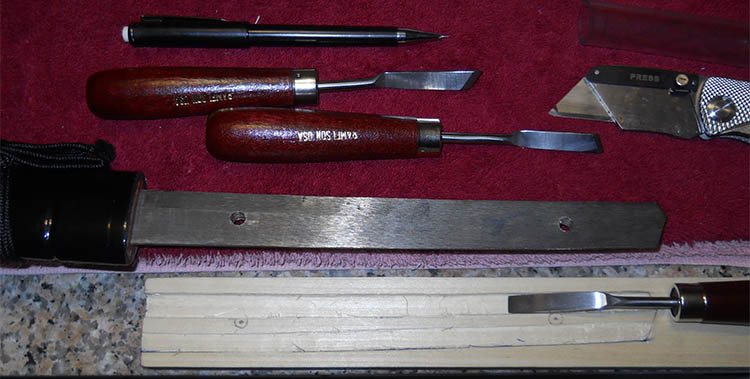
Gear Needed
To make your DIY Tsuka using the following method you will need:
- A set of dogleg chisels
- A work bench and some clamps
- Various grits of sand paper for finishing work
- Table saw or Bandsaw, whatever type of saw you want to cut out the general shape
- A hand drill
- Block of Poplar from Lowes, nothing thicker than 1/2 inch or you will
be doing ALOT of stock removal, you might even get away with 1/4, but best to start with 1/2
- Wood Glue, whatever kind you prefer
- a Sharpie pen
And you will of course, also need - a sword..
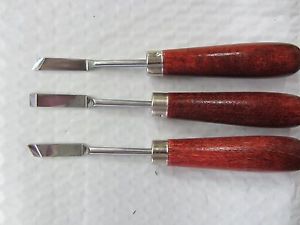
Damascus: I've selected a set of three dogleg chisels for carving out my tsuka core. These are T-10 tool steel and made by UJ Ramelson Co. Pre sharpened. 0.31 inches wide. $47 bucks for the set. I think this is going to work reasonably well for carving the channels in the tsuka halves. Cheaper than the $200 Japanese chisel set but not exactly the same shape.
Took a trip to home depot and selected a 3/4 x 1.5 inch (1x2) straight grain piece of poplar. I spent some time to look for the best piece with sections of grain that were as straight as possible.
DIY TSUKA STEP 1. Determine the length you want for your tsuka. It is recommended to add an extra 3 inches in case a mistake is made to have a few inches left to fix it.
Damascus: Two sections are necessary to make the halves of the tsuka. The best section will hold (receive) the majority of the nakago while the second best section will be the cap or lid.
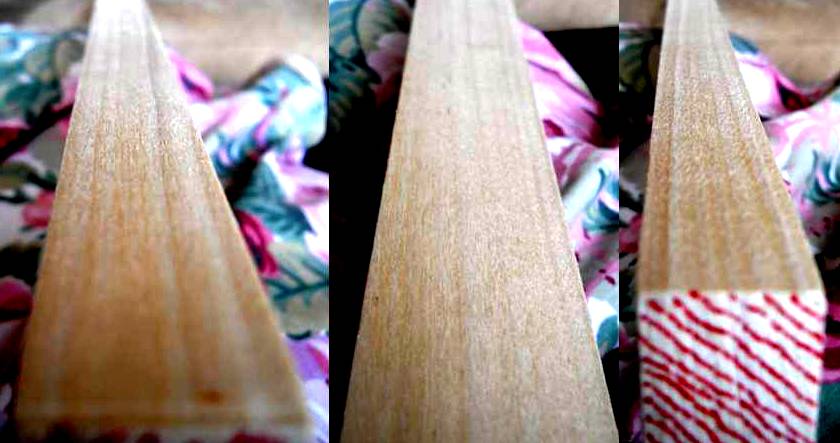
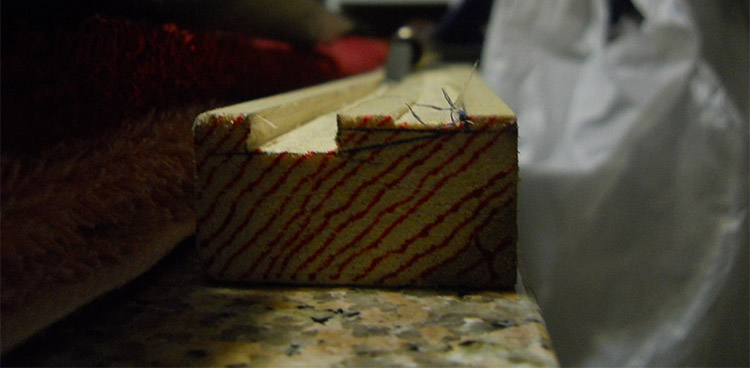
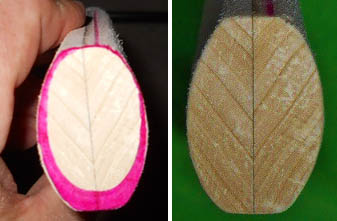
Cut your Piece of poplar into two equal length planks and sandwich them together and observe the grain. The grain should look like this....
 The best half of the wood should hold the bulk of the tang - the other narrower half is a 'cap'
Damascus: Both section will be custom carved with chisels
to fit the nakago "exactly". The snugness of the fit along the entire
surface of the tsuka-nakago surface is critical and allows the energy of
the blade to evenly transfer into the wooden core avoiding stress at
isolated contact points. A fitment where the nakago only touches
portions of the wooden core will cause undue stress and breakage at
those contact point.
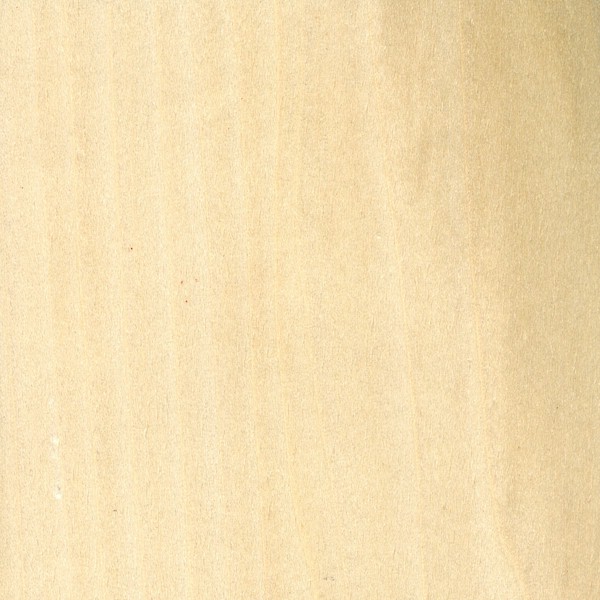 American Yellow Poplar
Traditionally Honoki Wood was used in Japan, however the American Yellow Poplar is the same type of tree and for all intents are purposes, essentially the same thing and more than good enough for even the best DIY tsuka core
Linear grain structure in the wood allows
the sturdiest assembly for the wood core and keeps the support of the
nakago even/consistent across the entire core length. Crooked or weavey
grain structure provides for weak points in the core and increases the
potential for breakage along those inconsistencies.
This
particular piece of wood has two long 13+ inch sections at opposite ends
of the wood that will be cut away from the central piece which has some
broken areas and other wavy inconsistencies. The grain runs straight through both of these sections. The idea is to match the pieces so that
the grain structure is flowing inward towards the edge of the blade.
This mimics rings around a tree with the nakago as the core of the tree.
When the sword vibrates vector forces will travel perpindicularly from
the nakago and will push on the sides of the tsuka. The
rings-around-a-core design allow the wood fibers to absorb those forces
in the same way the fibers of a tree trunk resist breaking and bending.
Carbon
transfer paper will be used to ensure the proper mold of the wood to
the nakago. Careful removal of wood with many checks to ensure maximum
wood-metal contact will be critical.
The poplar will typically
have grain sections that are an olive color contrasted with a lighter
tan color. The olive colored wood is not optimal for use as the tsuka
wood. These sections are located on the far corners of this wood and
are marked with x. These areas will be removed during the carving of
the exterior of the tsuka handle.
While I've read several documents and watched multiple
video's of tsuka creation this is my first attempt.
HOT DIY TSUKA TIPS
Frankthebunny: It helps to have the shaft of your chisels bent slightly to avoid scraping your knuckles. Even though chisels like these are sold pre-sharpened, I would recommend learning how to hone them yourself. Unlike katana blades, the blades of a chisel need to be as sharp as possible at all times. A sharp and well honed chisel will make this task so much easier and so much less frustrating. If along the way you feel like something isn't going right, it's most likely that the chisel is not sharp enough. A sharper blade is also a safer blade.
Mikeeman: Dremels OP. Just sayin. :p
The main chisel I use for this is a regular wood carving chisel I
modified by bending the shaft and fine tuning the blade giving it a
rounded bull nose edge. I think with a little tweaking, you'll be able
to do what you need with the chisels you have. You will have much more
control with hand tools like these than with a dremel router imho
This is the one I'm using now.
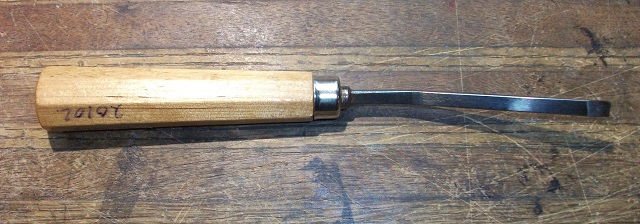 Bend the shaft of the chisel slightly to avoid scraping your hands
This is the easy part..
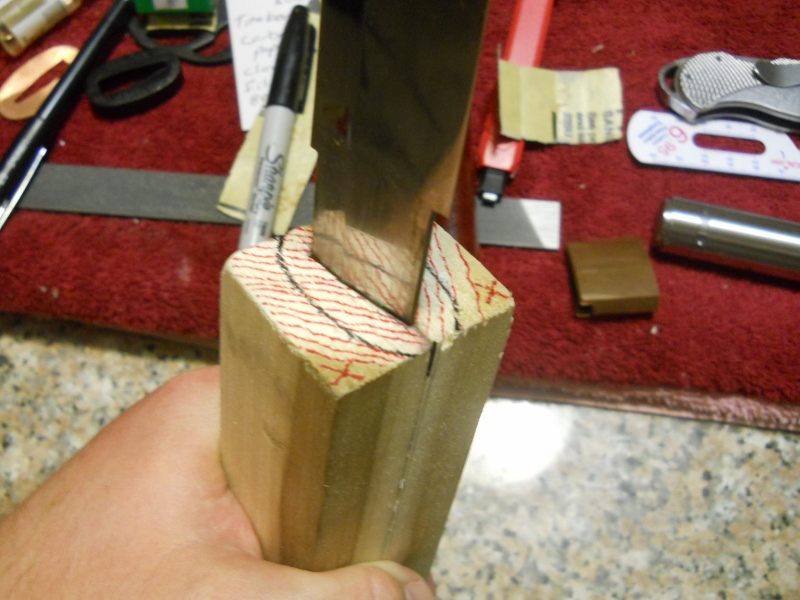
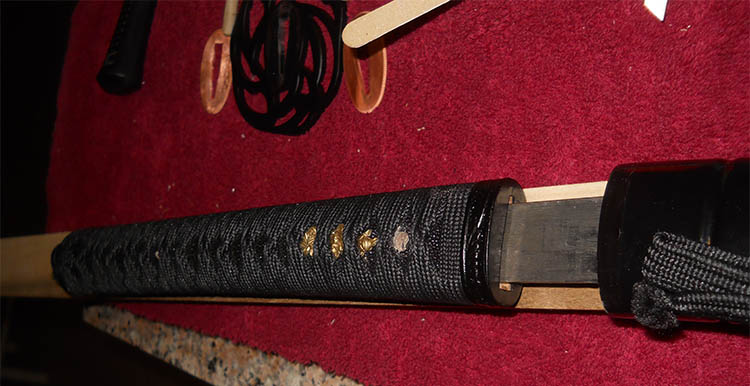 Disassemble the Katana
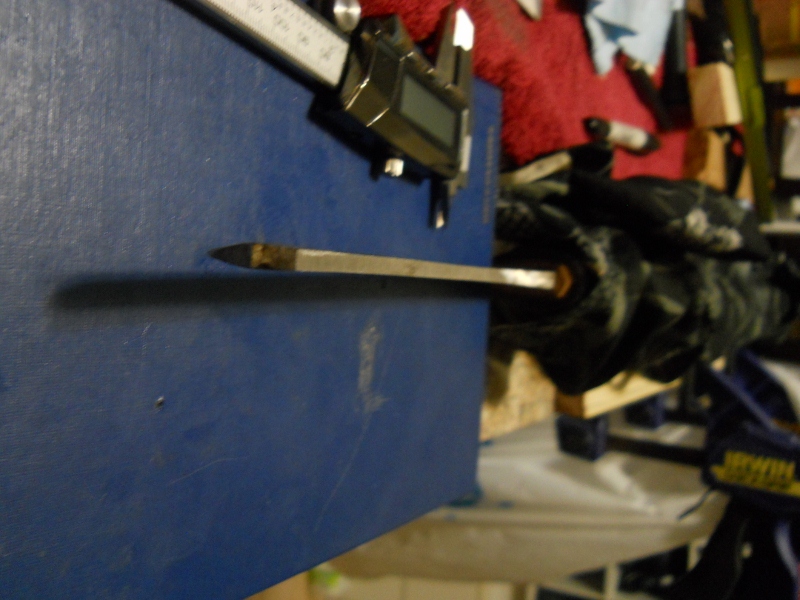
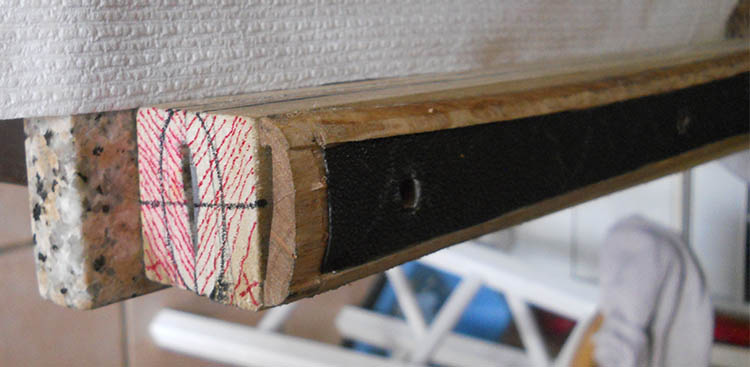
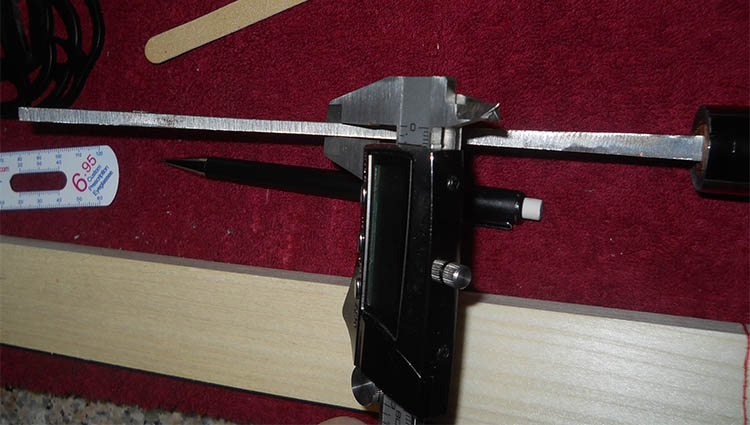 Measure the thickness of the blade to determine the depth you will be chiselling to
 Place the Nakago onto your wood
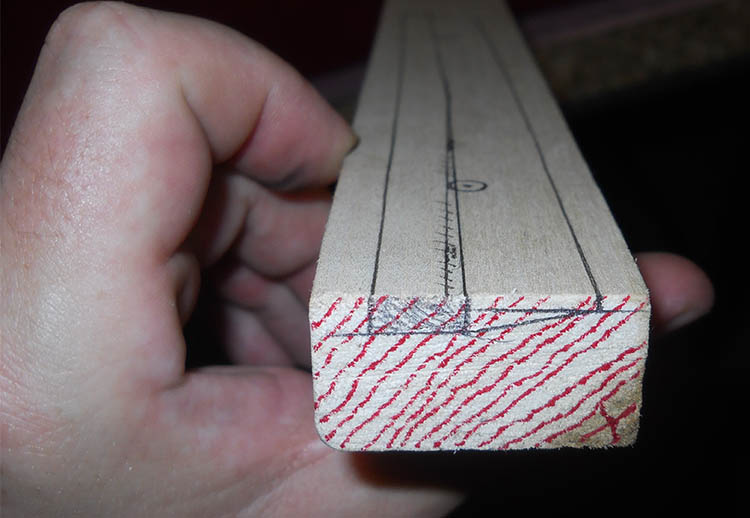
DIY TSUKA STEP 2. Trace the outline of your nakago onto each corresponding plank using a standard sharpie felt pen. This will be your guide for carving out the Nakago ana using your chisels.
 Trace the outline using a sharpie
DIY TSUKA STEP 3. THIS IS THE MOST IMPORTANT STEP. You can do all other steps
right, but if you do not get this step right you will end up with a poorly fitted bad tsuka. Take your time to ensure that it 'fits like a glove'.
Using your clamps, clamp your plank to your work bench so its tight and has no movement. Using your chisel, begin to remove the material.
This is long, boring, tiring, and laborious, so theres no need to do it all in one go.
You will notice after about 20 minutes your work will start getting sloppier. Just before then is when its time to take a break.
Be sure to go slow, often checking the fit of the nakago by clamping the planks together and inserting the tang, going by this you'll get a rough idea of where its sticking and where to remove more material.
 Check the fit often as you go
Keep in mind one thing, when you glue the tsuka cores together they will fit TIGHTER than they fit when you tested the fit clamped. NOTICEABLY tighter. so when the tsuka cores are clamped, it should be a tight fit, but the tsuka should easily slide on and off without effort. It should almost be able to fall off if held upside down, but not quite so sloppy.
Damascus: Considering my wood removal on the tsuka.The end of the nakago is thicker than the middle by about 2mm. This does not facilitate easy removal from the tsuka. This is also likely why the nakago was difficult to remove from the tsuka.
I'm going to file it down until it is the same width as the midsection. Then I'll continue with the tsuka wood removal.
 In this case, the nakago (tang) needs to be adjusted with some filing before Damascus can continue
DIY TSUKA STEP 4. Once you have the rough grinding done and the tsuka fits properly take some sandpaper and smooth out your chiseling marks inside the tsuka core, this will aid in getting that nice glove fit were looking for.
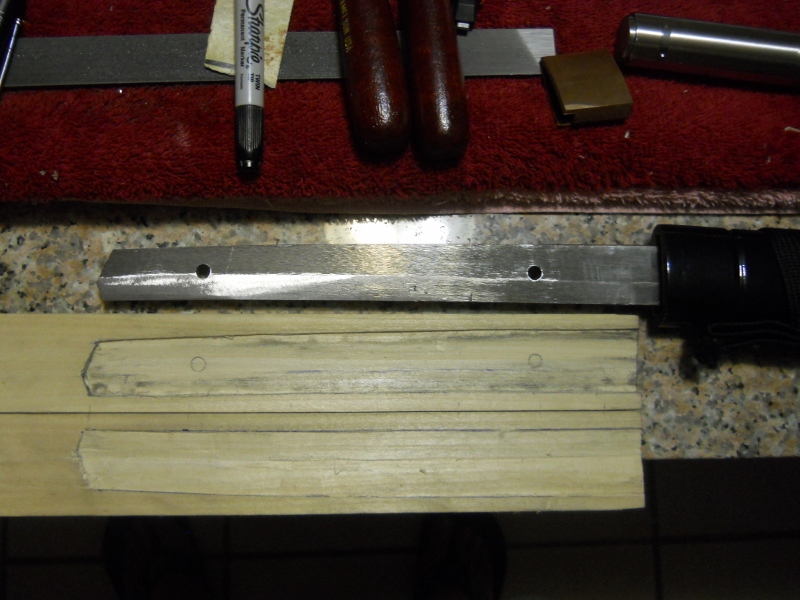 Mark, and then drill, the mekugi ana (in laymans terms, the holes where the pegs go in)
DIY TSUKA STEP 5. Now it's time to drill out the mekugi pin holes. Slide one of your tsuka cores onto the nakago.
Take a drill bit the same size as the holes in the tang, and drill through the wood at a slight angle.
Now take the second plank, slide it on. Clamp in place, and using the hole you drilled in the other plank as a guide, drill though the side of the other plank as well.
You should end up with a slightly canted hole lined up perfectly between the left plank, nakago, and right plank.
Check the fit of your mekugi pins and make sure everything's right
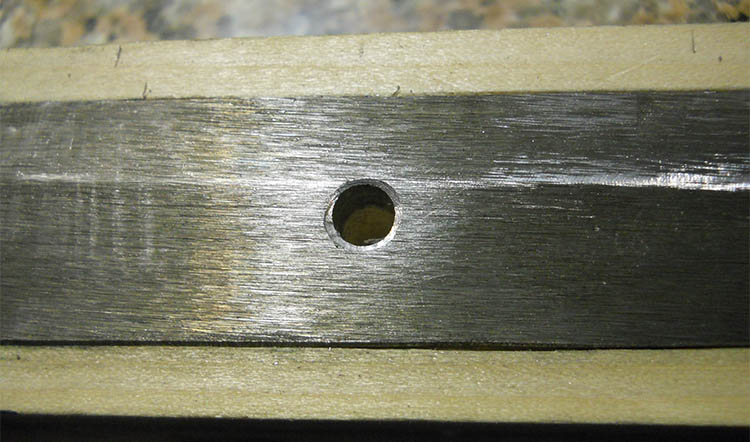
CHAMFER: (in carpentry) cut away (a right-angled edge or corner) to make a symmetrical sloping edge.
Damascus: Everything is assembled and glued. Nakago fits like a glove yet still can be removed with slight tug. I drilled the ana and chamferred the steel hole. I also drew on my carving guides in prep for tomorrows carving.
DIY TSUKA STEP 6. Glue your tsuka cores together using wood glue, you do NOT need alot.
If you use too much it will run into the nakago ana and then your
smooth glove fit will be ruined..
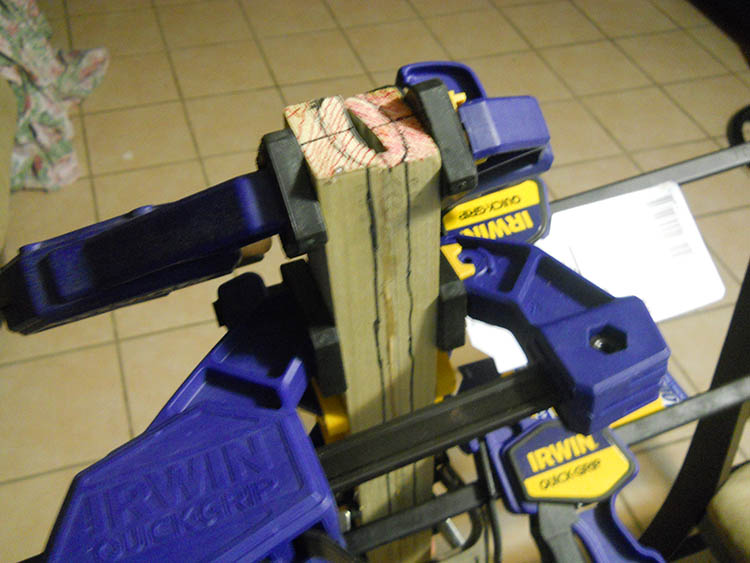 Clamp the two halves together and leave them to dry overnight
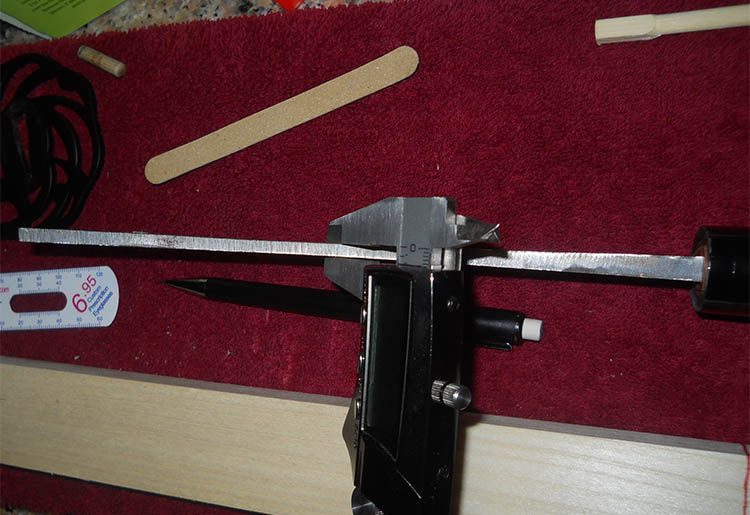
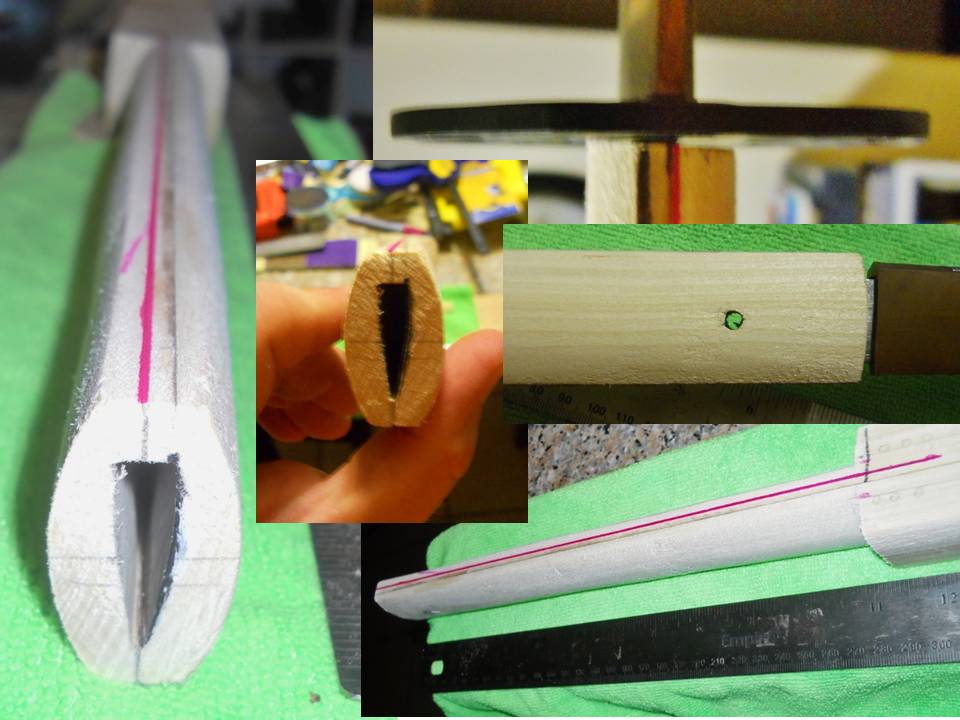
Damascus: I've started to remove some wood to get the feel early what level of
care I'll need in shaping this tsuka.

It looks like I'll be doing some
sawing to speed up my progress. The horizontal and vertical mid-lines
are important guides for keeping the core centered with the exterior.
The end-lines allow me to understand my depth progress. It really is
going to help a lot having the original tsuka and the caliper to check
my progress.
 Comparing to the original tsuka core that came with the sword
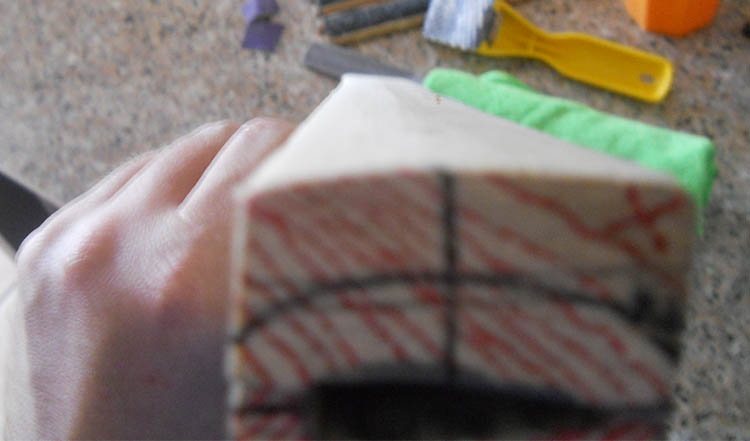
DIY TSUKA STEP 7. Now for the fun part, using your chosen hand tool, begin shaping the handle to the desired shape, just be sure you don't overdo it and sand right into the nakago ana.
Once you have the tsuka the proper shape and size you want it move on to step 8
Damascus: Rough cuts...
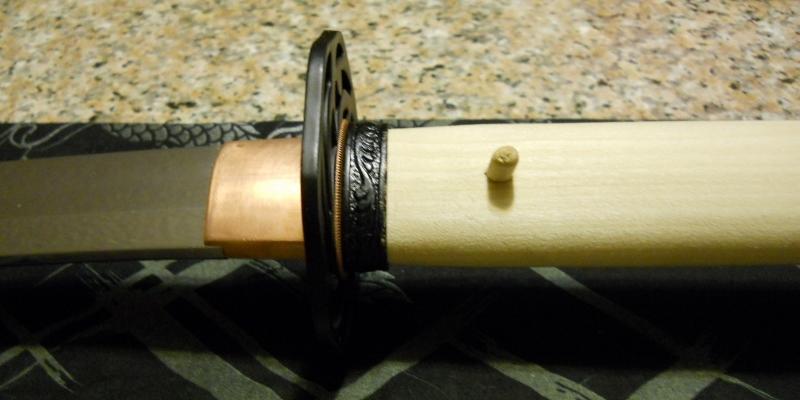
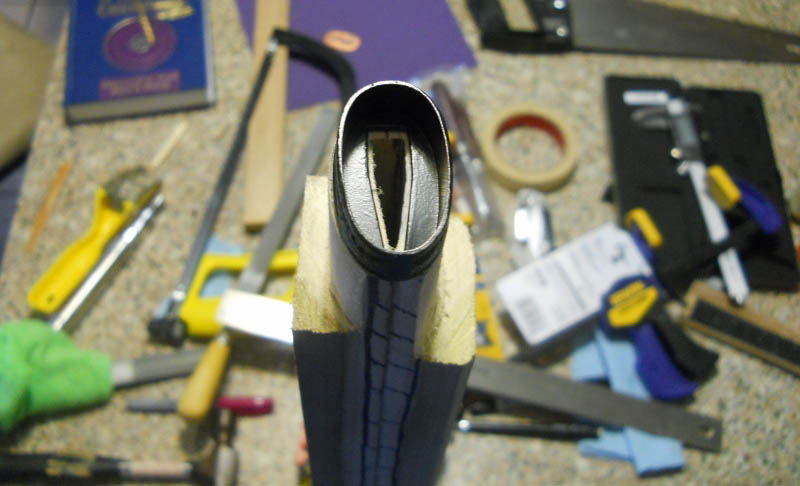 Checking against the fit of the Fuchi cap to make sure it also fits perfectly
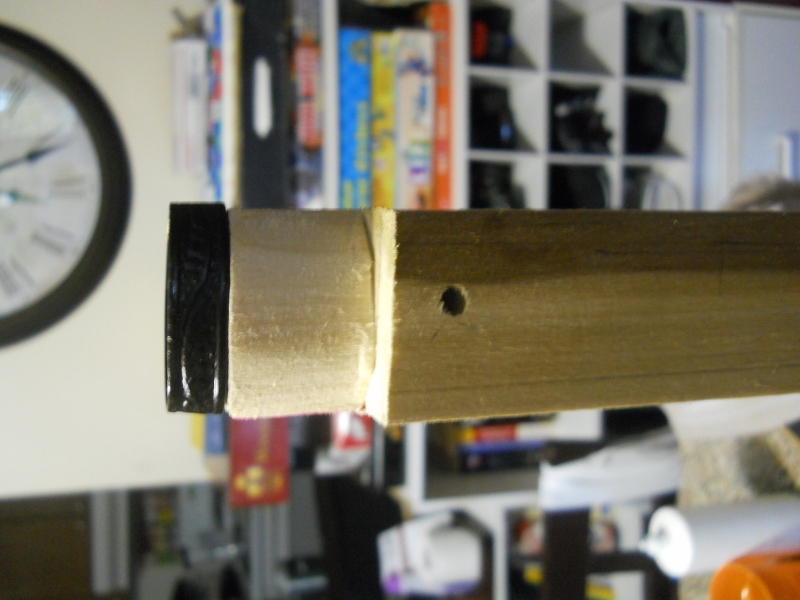 Tsuka is taking shape out of the block of wood. Note the holes for the mekugi pegs.
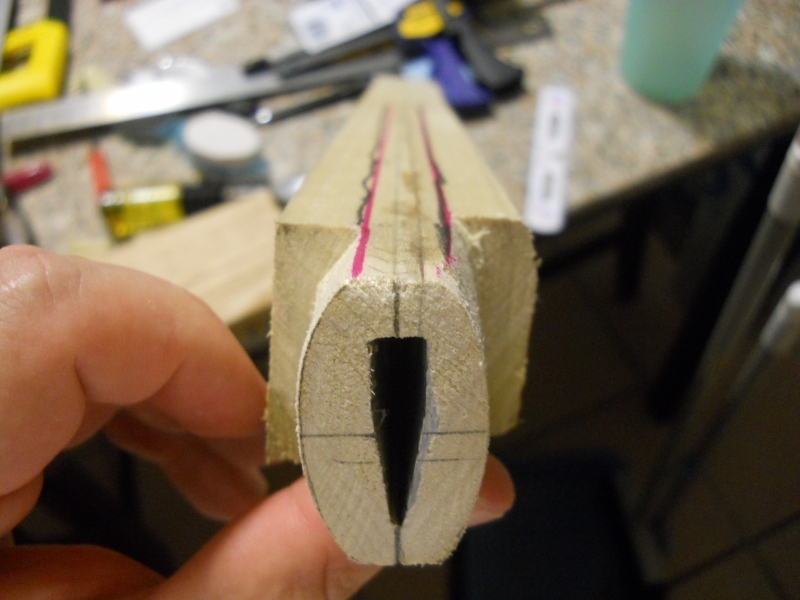 Round one of carving..
Finished up with the first round of carving. There is still a decent amount of wood to come off. I'm liking the 60 grit sandpaper right now. Using 60 and 100 grit at the moment. Slow and steady wood removal.
A
few pictures of the tsuka interior included.
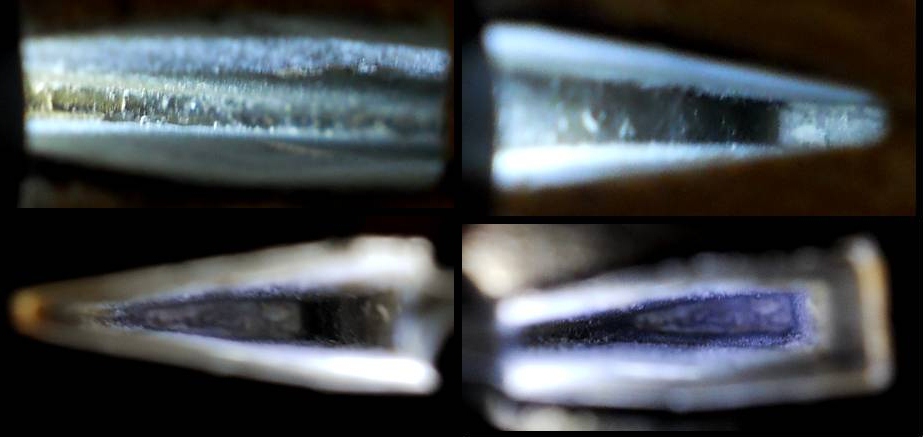 Peering into the inside, not bad for a first attempt at a DIY tsuka
The grain of this wood is really much better than I thought it would be at the HW store. Pretty good alignment considering these cuts were on opposite ends of a 4 foot 1x2 board. The pink outline is wood to be removed during the next round and represents the kashira OD and also the true high center position on the tsuka.
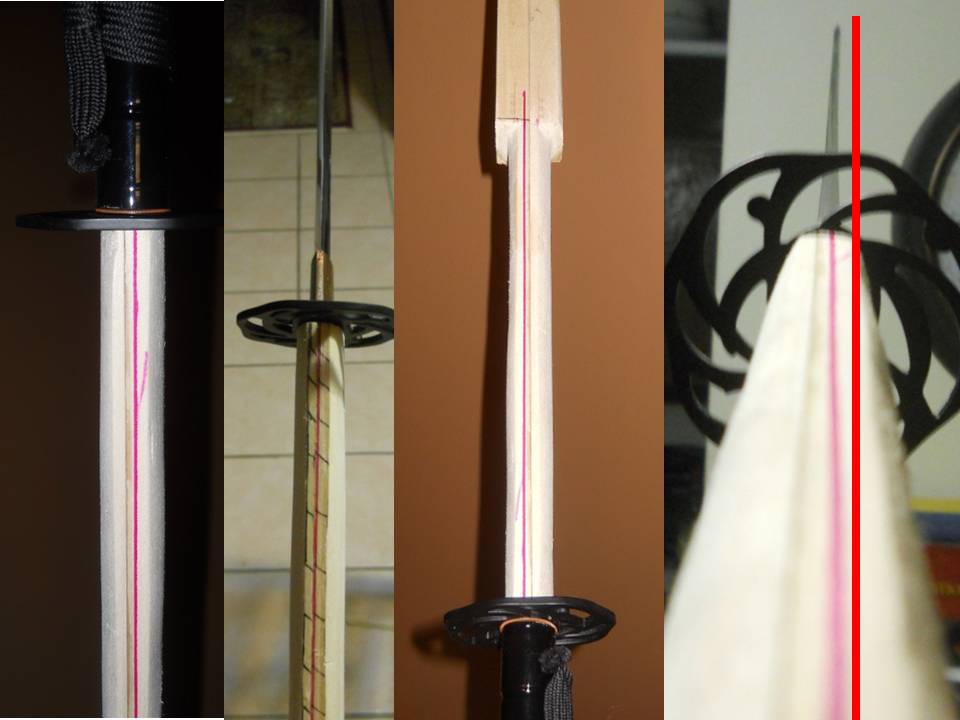
 Use a sharpie to mark which areas you will remove and stop when the color disappears.
I had the feeling that this is a good time to analyze my blade curve and
see where my sweet spot would be for the tsuka curve. With wider planks
this would not have been a problem. But this size wood leaves very
little extra wood for curve. Rayskin and ito are in the mail.
HOT TIP
Frankthebunny: The overall aesthetic flow of curvature is usually gauged with the curve of the saya as well.
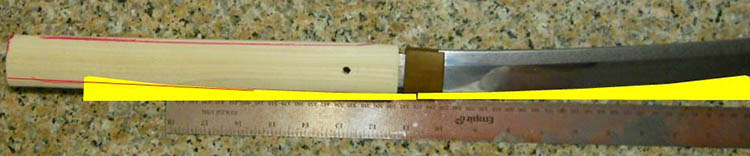 Blade curve analysis
There is still much to remove, I'm still getting the fuchikashira fitted on. It's slow work I'm taking my time.
So far the alignment is good around the sword and the saya. A bit more needs to come off the front but I'll wait a bit longer to make this final cut when I make my mekugi pin.
The next step is to get the furniture on and then carve it down to
fit the samegawa and ito. The same (rayskin) is going to be fit under the
fuchikashira.
 Getting there..
HOT DIY TSUKA TIP
Etiennehamel: www.ksky.ne.jp/~sumie99/samewrapping.html if you haven't seen it already, this page might help :) can't wait to see it complete
DIY TSUKA Step 8. If you will only use panels for rayskin, take your samegawa panels and lay them out on the tsuka, and draw a line outlining them to carve out the slots to fit the panels. Be careful during the stock removal, samegawa is pretty thin and you don't need to go very deep.
DIY TSUKA Step 9. Fit the Fuchi Kashira. This is pretty straightforward, remove material until they fit snugly. Don't forget to cut the slot for your ito to pass through the kashira.
Damascus: I was able to fit the pieces together and everything is tight. It's going to be tighter after a proper tsukamaki. Curvature looks good I think. There is still some wood removal needed to fit the samegawa.
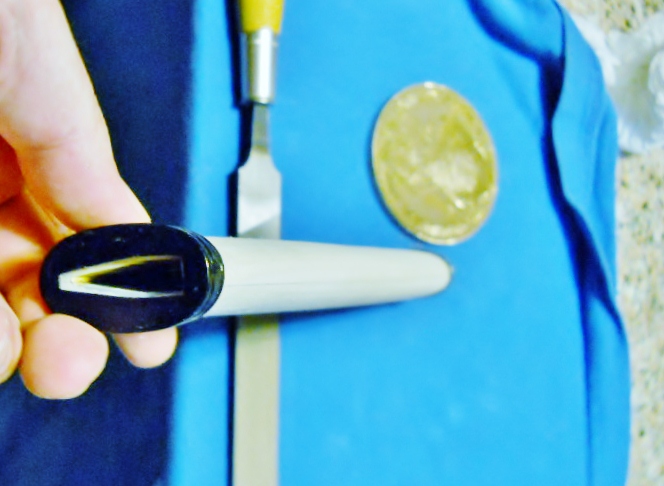 Fit the Fuchi
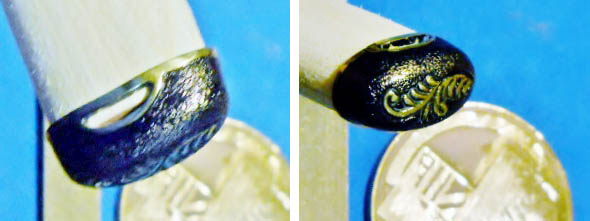 Fit the Kashira. The coin in the background will be used to make a new tsuba..
There is still a bit of wood to remove from the tsuka. I'm carving with 30 grit foam sanding block. This foam block gives me a lot of comfort for this particular job.

 Nearly ready..
STEP 10. With the fuchi kasira on the tsuka and the samegawa secured take a piece of your ito and lay it flat next to the fuchi kashira and make sure its flush.
If it sticks up too far, you need to remove more material from the tsuka core.
If everything fits flush...
Congrats on your DIY tsuka!
Finishing Up the DIY Tsuba
Damascus: I have 2mm to remove at the kashira and 1mm to remove at the fuchi. With
about 1.5 mm of blending in the mid-section. Very little wood will be
removed from this point forward. I'm hoping to leave at least 2.5mm of
wood evenly around the nakago. With proper Same wrap and ito wrap this
handle should still be robust. The handle will also be 1-2 mm larger in
diameter than some of the lower profile handles. I do like petite, but I
have no problem with a slightly thicker handle.
The shape is
really delegated by the cut of the wood. These were 1x2 planks so there
was really no flexibility for positioning the nakago. I had to center
it to keep enough wood on both sides. This leaves me with more of a
symetrical imogata and less of a tapered haichi, with regard to
traditional shape. Wider planks would have allowed me to craft the
shape a bit better. Also trimming down the nakago would have given me
some more room to spare. I could have removed a few mm at least from a
rather robust nakago.
I'm sure I'll be happy with the results.
Sometimes these projects take on their own honorable personality. The
Zen is knowing when to embrace the result.
I hope this information on how to make a DIY tsuka has been helpful. To return to Basic Sword Care and Maintenance 101 from DIY Tsuka Tutorial, click here
Special Thanks to SBG members Damascus, Lonely Wolf Forge, Frank the Bunny and Mikeeman
Buying Swords Online Can Be DANGEROUS!
Find the Best Swords in the:

Popular & Recommended ARTICLES


The ONLY true free online magazine for sword enthusiasts. Delivered once a month on the 1st day of the month, no filler and no BS, just the latest sword news & info delivered straight to your inbox.
VISIT OUR SPONSORS:


