Recent Articles
-
Christmas Sword Buying Guide 2025
Dec 03, 25 10:53 PM


How to fix a loose ito wrap on your Katana
Normally if your Katana has a loose ito wrap, the best thing to do is to re-wrap the thing. We have some good tutorials on how to do this here, even a tutorial on how to do it in the Katatemaki 'battle wrap' style..
However, it isn't really all that easy - especially the end knot - and while with our tutorials it is doable, it is quite time consuming,
If you don't want to go to all this trouble, there is a MUCH easier fix by permanently by lacquering the ito down into place once and for all. And the best part is, this is not a modern idea - it was quite common during the violent Sengoku Jidai - the warring states period.
There are two methods to do this depending on what materials you have on hand and which method you personally prefer. It is recommended to experiment with some really cheap wall hanger swords first, most collectors have them and they can FINALLY be of some use.. ;-)
What you will need - method one:
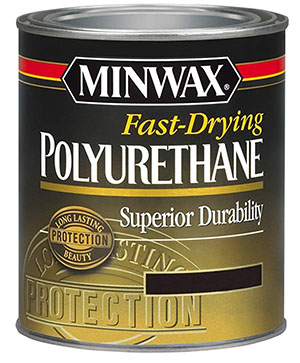
- A can of fast drying semi-gloss polyurethane.
- Mineral spirits which you will use as a thinner
- An artists paintbrush
- Rubber gloves
What you will need - method two:
- A spray can of Polyurethane from your local hardware store
- acrylic floor varnish or sico crystalex urethane
- An artists paintbrush
- Rubber gloves
Method one is best if you only wish to tighten the ito and do not want to laquer the rayskin below for a more subtle effect. Method two laquers everything - so it just depends on what finish you like.
Lacquer loose ito - method one
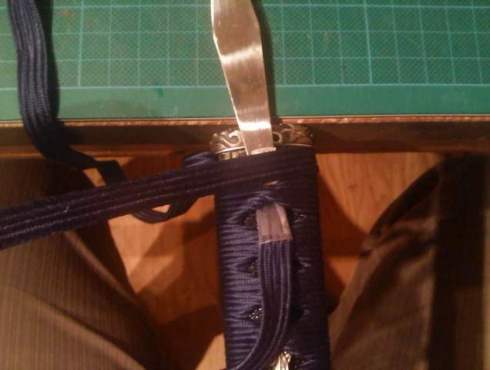
Before you lacquer, make sure that the ito is not covering the mekugu pegs otherwise you will never be able to take the handle off!
In order to make the lacquer soak into the ito it needs to be a fair bit thinner than what it comes out of the can in. So you should thin it down with 1 to 2 to parts thinner to 1 part lacquer and then just apply it to the wrap using the artists brush. You will know if you have the mix right as it should absorb the lacquer deep into the fibers of the wrap.
Make sure to wear gloves as getting the lacquer on your hands gets really messy and sticky. Also, if you have gloves you can rub the lacquer in afterwards to make sure it soaked right down into the ito.
Give it one coat, then leave it to dry overnight so that you can see exactly how it is coming along and if you need to adjust the lacquer to thinner ratio. Then apply another two to three coats - by the end of it, the loose ito should look quite similar to how it started, though will be a little darker, however it will be rock hard not not move one inch..
Here are some examples:
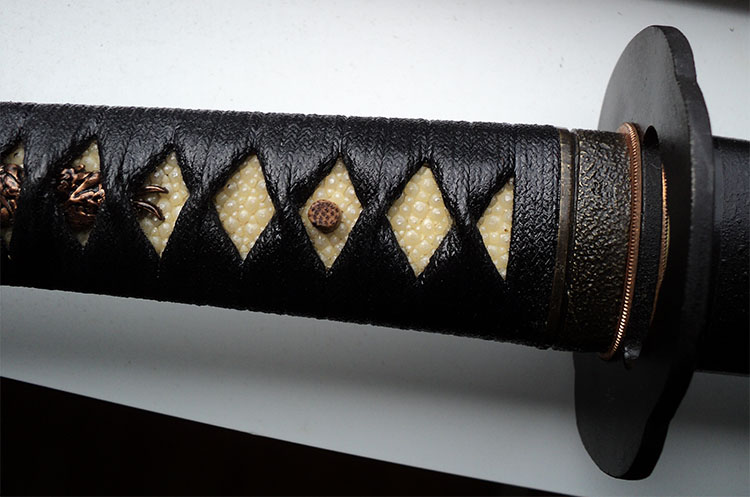
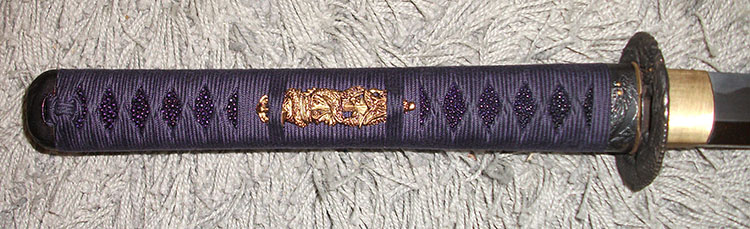 Cotton ito with a high lacquer to thinner ratio
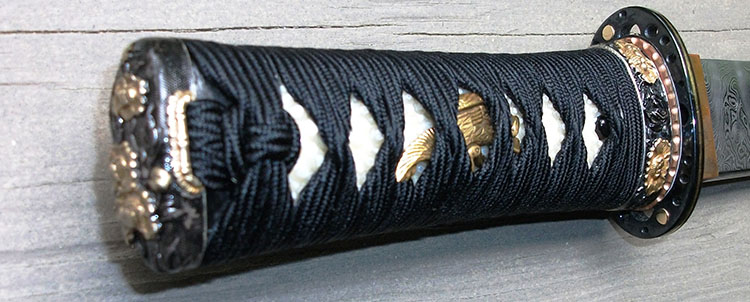 Silk ito, also with a relatively low thinner ratio
Lacquer Loose ito - Method 2
Soak the ito on the tsuka with the spray can of lacquer wait until everything is thoroughly dry (generally best to let it dry overnight) and apply a second coat.
After the second coat is dry, take the brush an apply a layer of varnish and let it dry as indicated on the can for a complete curing. If you like how it looks at this stage, you can stop right there - otherwise, after it has dried, you can apply a second layer to give the finish more sheen.
 2 coats of lacquer and 2 coats of varnish
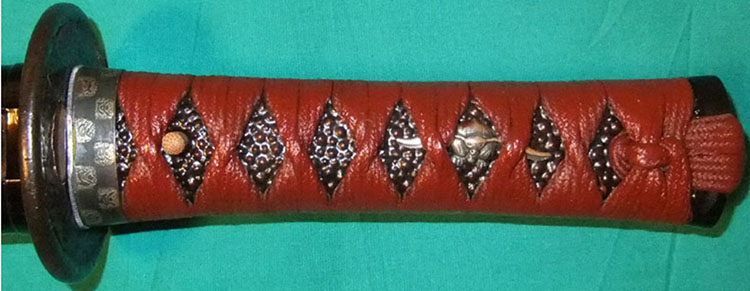 Go heavy for a very glossy finish
Whichever method you prefer, this is the quickest and easiest way to permanently fix loose ito and/or deal with the 'fuzz' from some cheap ito by sticking it down. Have fun!
I hope this tutorial on how to fix loose ito has been helpful. To return to Basic Sword Care and Maintenance 101 from How to fix a loose ito wrap on your Katana, click here

Buying Swords Online Can Be DANGEROUS!
Find the Best Swords in the:

Popular & Recommended ARTICLES


The ONLY true free online magazine for sword enthusiasts. Delivered once a month on the 1st day of the month, no filler and no BS, just the latest sword news & info delivered straight to your inbox.
VISIT OUR SPONSORS:


