Recent Articles
-
Christmas Sword Buying Guide 2025
Dec 03, 25 10:53 PM


How to do a Sword Handle Wrap the Easy Way
It's not all that hard to do a good sword handle wrap that looks much better than what most production swords come with. All you really need is some leather, some twine, some wood glue and some patience..
This tutorial is nothing new - but is based on a project done by SBG member dustinf11 on a Hanwei Rhinelander Sword - but feel free to modify the style and position of the risers to best suit your individual tastes.
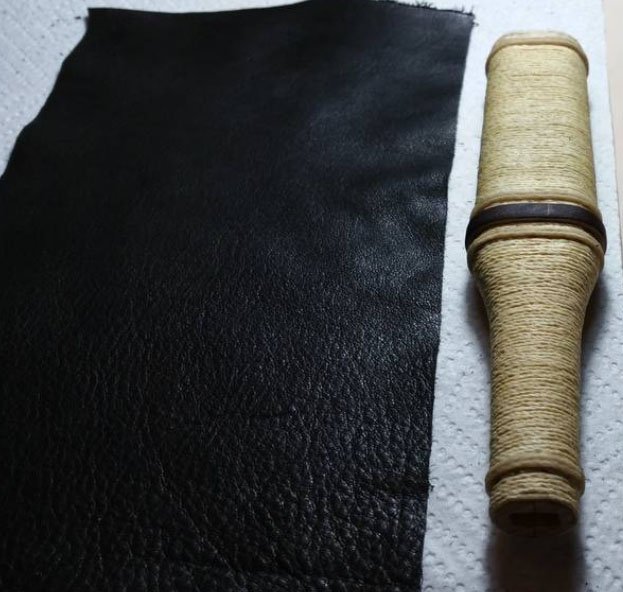
Materials Needed:
- Disassembled wooden handle core
- Twine (do not use twine with wax covering, it feels very uncomfortable afterwards)
- Leather
- Glues (wood glue, super glue and epoxy)
The first thing you need is the disassembled wooden core - which you can either make yourself or strip back, sand and otherwise prepare the original.
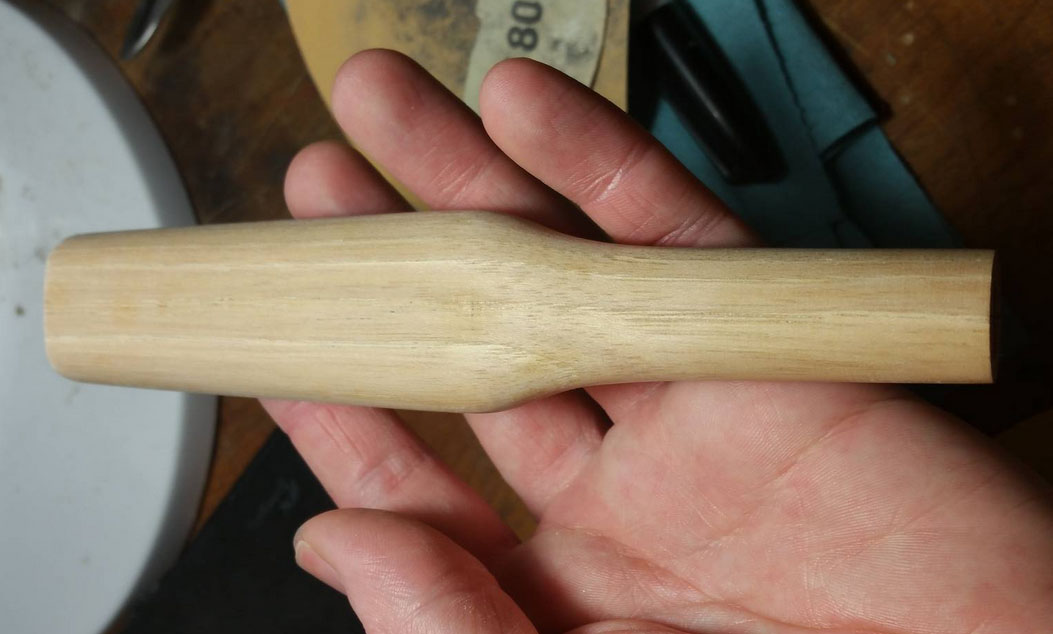
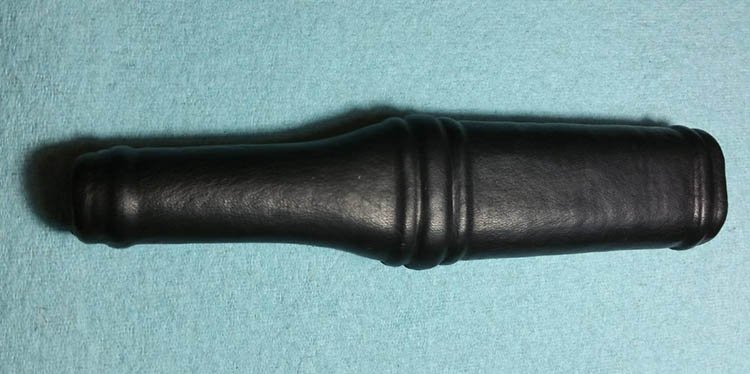
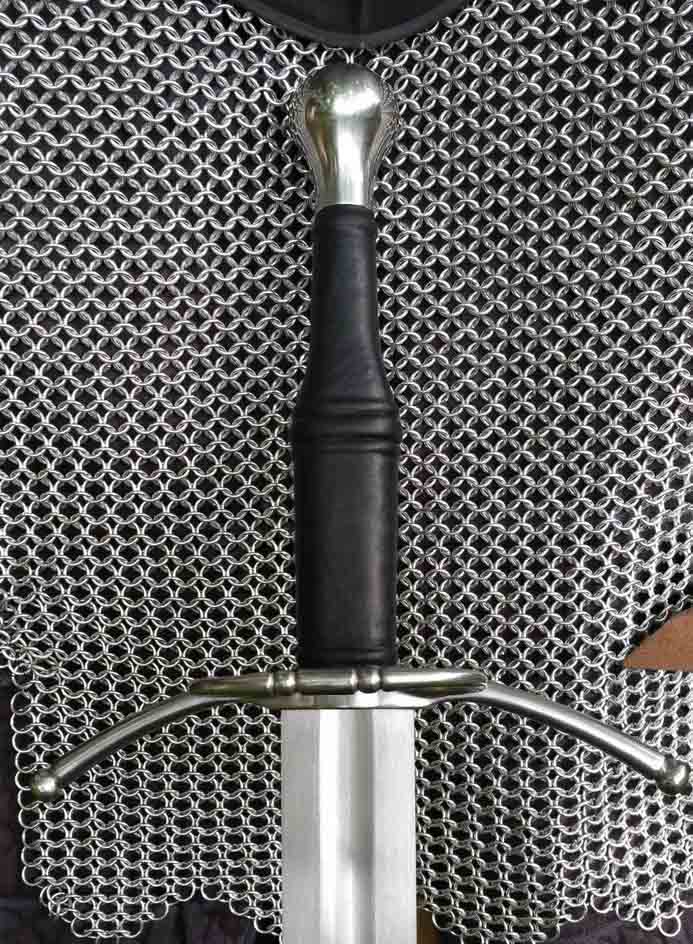
It's always a nice touch when doing a sword handle wrap to add a 'riser' for a more comfortable grip and to add visual interest. So you will want mark out on the wood core where your riser (or risers) will be positioned.
Then skeeve out a strip of leather, rounding it with sand paper, and glue it into position using super glue.
Glue down the first inch - this provides an anchor for pulling the rest around firm. Press firmly and check that it has gripped after about 20 seconds. It should have a firm grip by then but no so firm you can't still rip your fingers off if they've stuck.

Then continue to glue the rest of the riser down a few centimeters at a time. Before gluing the last bit down check where it will join with the start, mark it with your fingernail, then cut it just before that mark. The leather will happily stretch an extra millimetre, but you don't want it bunching at the join and lifting off the wood or to the side.
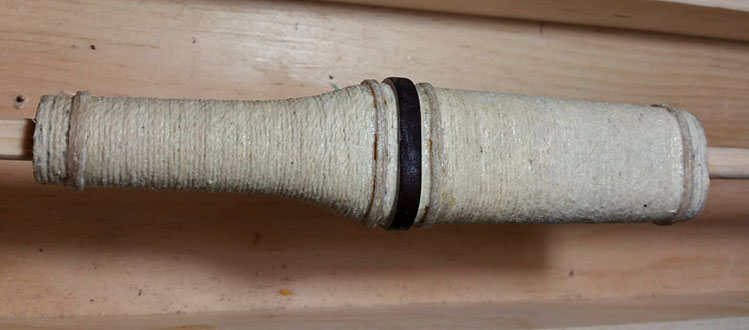
The next step is to wrap the wooden core with a length of twine with wood glue to give it that cord wrapped texture that is so popular, but that so few production swords have.
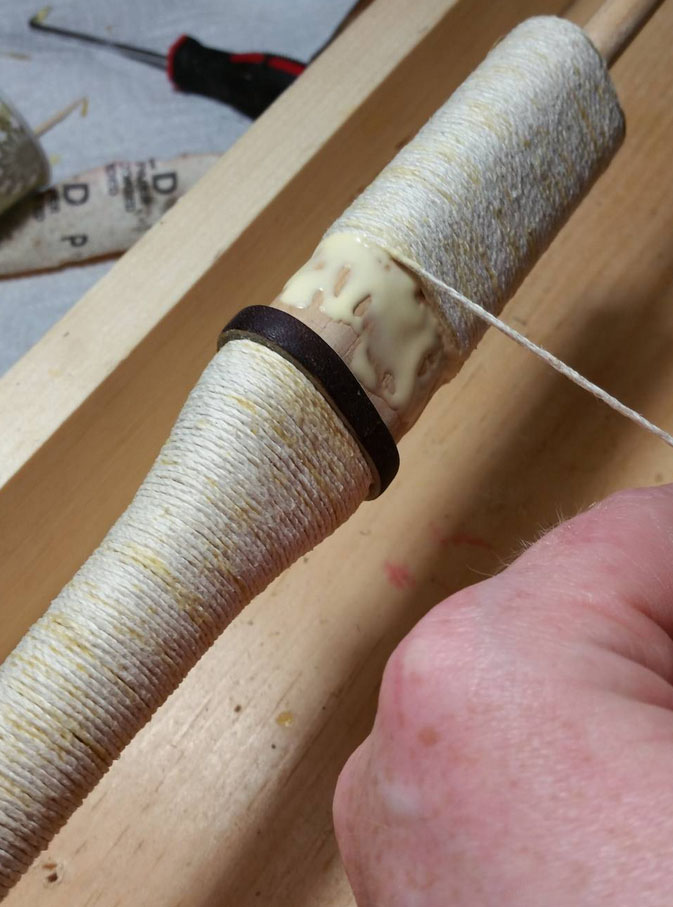
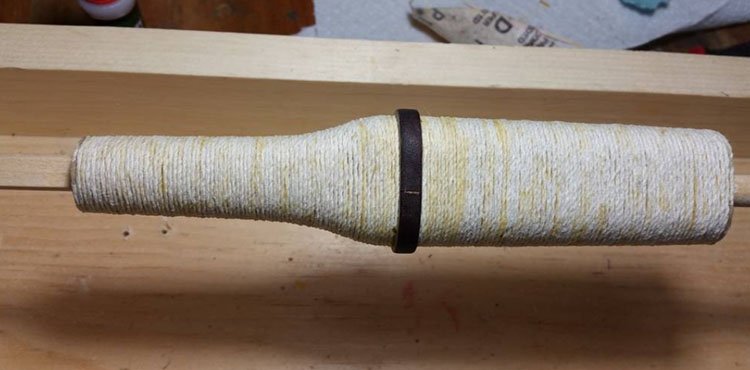
If so desired, additional smaller risers can be added to the sword handle wrap using hemp cord soaked in wood glue - which when it dries has the consistency of wood.
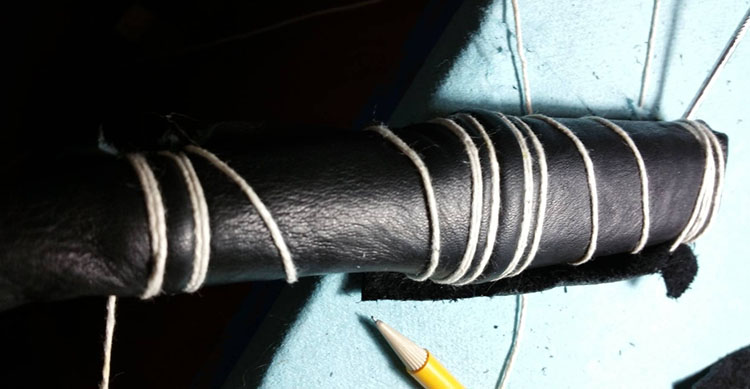
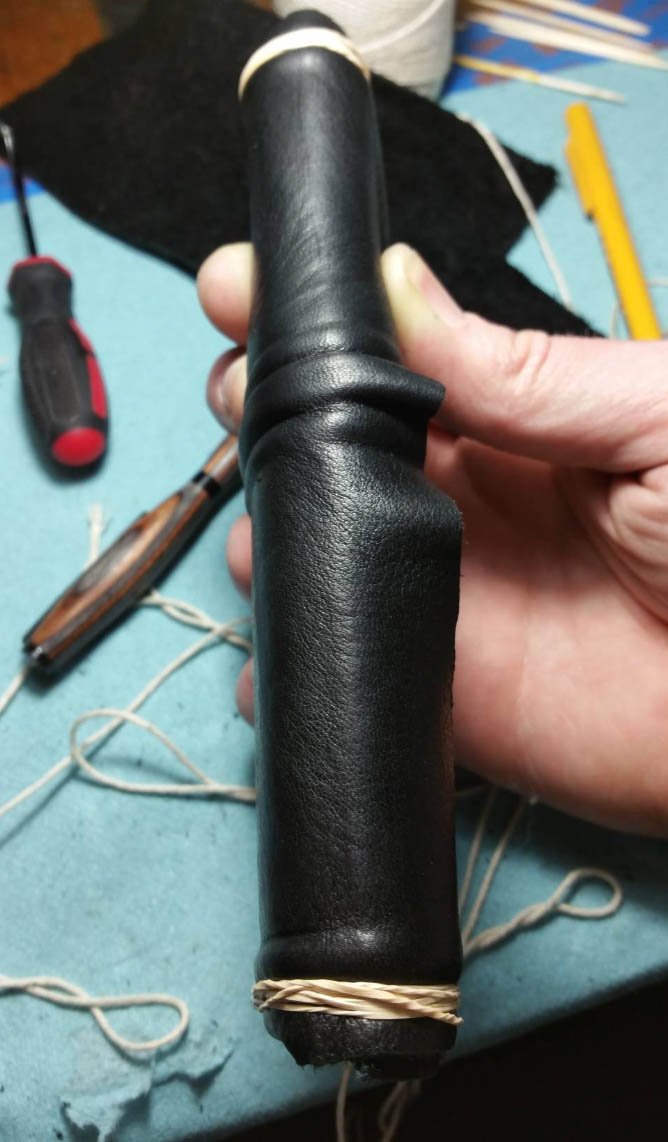
All your risers are on. You want to start the leather wrap. Take/cut a nice piece of fine leather, that you have checked will make it all the way around the grip with maybe a half inch overlap (to be cut off later), and allow about an extra inch at each end. Now make a straight cut down one side to give you a good straight starting point. Use a steel rule and hobby knife.
TIP: For best results, use a paper towel and wet the leather for 10-15 minutes before wrapping. Do not oversoak - a great way to test the leather to see if it's soaked through, is to take your fingernail, and gently make a mark in the leather. If the leather keeps the mark, even after you brush the water away, then it's ready to bind.
To glue that straight edge down along one narrow side of the grip (you don't want to be looking at it on the flat face). Use 5 minute epoxy or this job will take a week. You are only adding glue to a half inch strip of the grip at this time. Use a decent layer of glue but not too thick or it will press out into places you don't want it, either giving you lumps or gluing down leather you don't want glued down at the moment. Make sure the glue goes over the risers too.
Place the leather on in a straight line down the side of the grip. Now
take your roll of cotton cord and wrap it round the whole thing to press
the leather down firm, and be sure to really strap it down into the
valleys by the risers tightly to show off those risers.
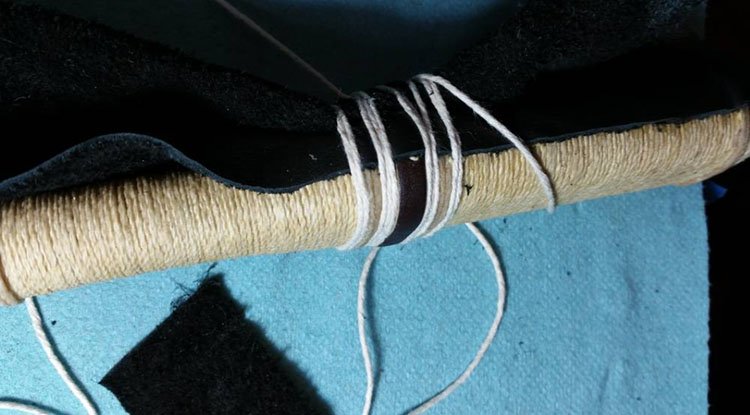
You will be aware that the other end of leather would overlap the gluey area and you don’t want that, or it will stick down accidentally, so fold that part of the leather over twice so it’s bunched neatly on the face of the grip out of the way. When you are happy it’s positioned neatly and strapped down firm go watch TV for 10 minutes, or check the drama on the forum. 5 minute epoxy allows you about 3 minutes of working time and takes about 10 more minutes to go hard.
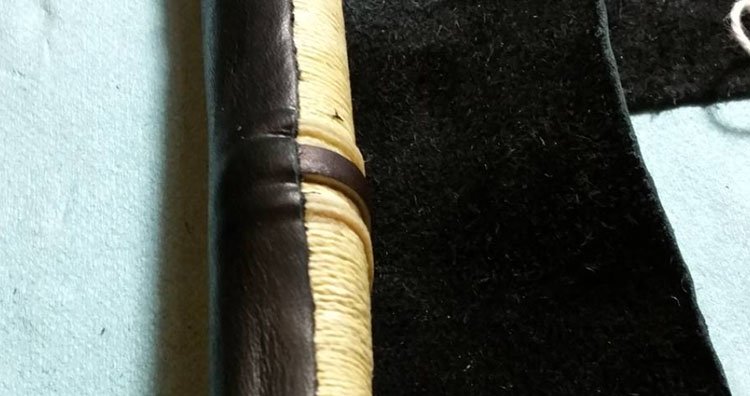
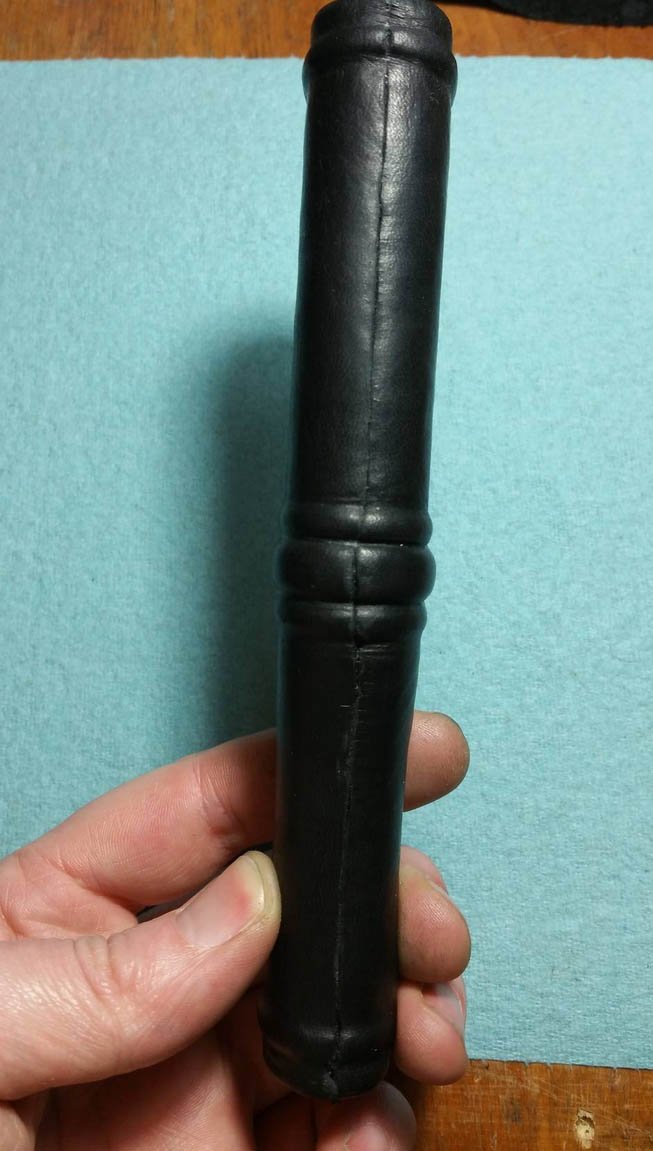
What I will do here is to take a fine ball point pen that is a compatible color to the leather, and run it along on the low side of the ridge where the leather overlaps. That will then show you where you need to cut your leather.
Now cut the leather with sharp scissors on the far side against the pen line - so you are keeping the inked bit. If you cut off the ink your leather will be too short.
Go ahead and glue that down, again making for perfect glue coverage. Press the leather so it nestles in and doesn't form a ridge, and you should have a join with no gaps and no bumps either.
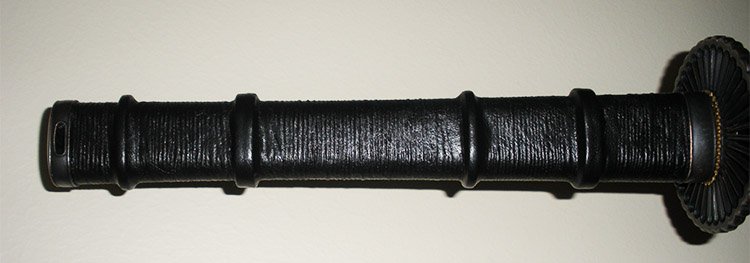
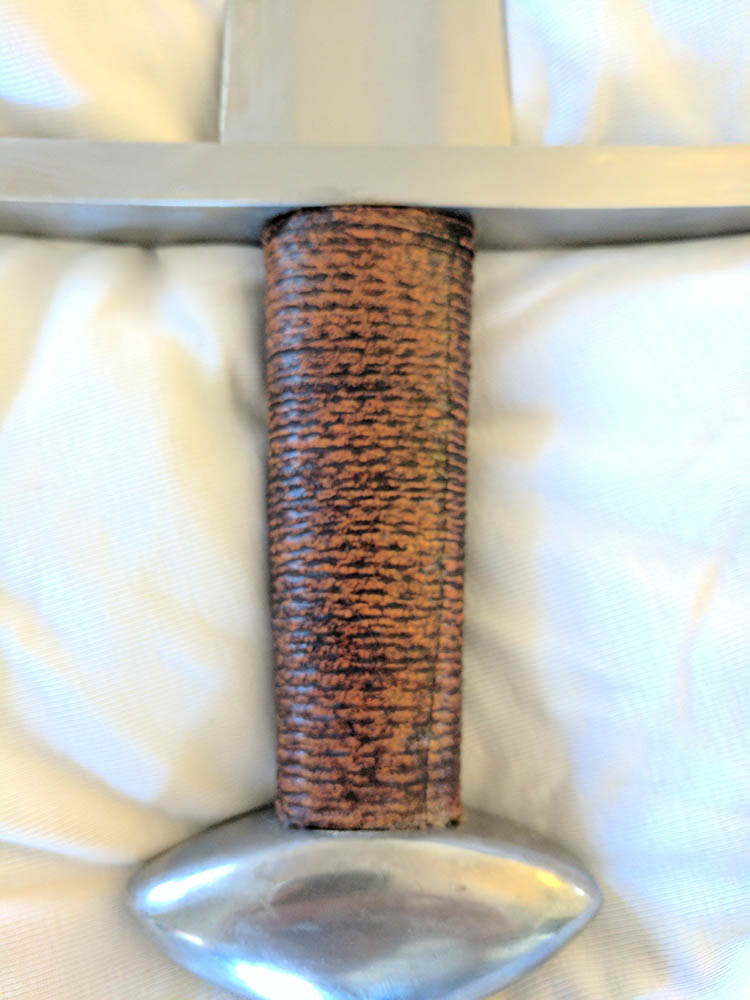
By this stage you have almost completed the sword handle wrap - here are a couple of pictures - the second one shows the seam.
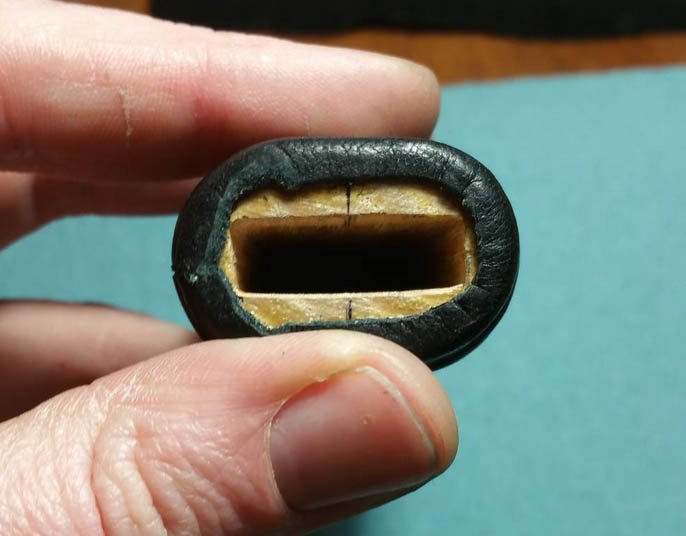
If you have a removable grip I see advantage in being able to tuck the leather in over the ends of the grip. It provides a compression zone for when you tighten your hilt, removing the pressure from the wood of your grip. Also it prevents lifting of the leather.
If your grip is permanent, I would personally make sure all the grip is glued so theres no lifty spots, and I would take an exacto knife and trim along the junction of the guard and pommel for a crisp finish. Though I have observed Albion and many others leaving 1/8" overlap over the guard and pommel, so I suppose that's acceptable.
For the removable grips, you will notice that the leather pleats at the corners when you fold it over, so I remove several little triangles with sharp scissors, where the pleats would be, so it folds down in one layer only and neatly. To glue it down you can either use super glue which is quick and easy, as the compression fit will hold them fixed once it’s assembled, or for epoxy you’ll need to press the flaps in with your fingers as you assemble the parts and tighten your hilt down why they dry.
And there you have it - a brand new much more attractive and classy looking sword handle wrap - and the best part is, it is uniquely your own.
One more thing - while this sword handle wrap technique is primarily designed for medieval swords, there is no reason why it cannot be used on any other sword type. Here is what it looks like on a Katana!
One more sword handle wrap method - the Shammy!
If you don't have access to or cannot afford leather, there is a budget option that has been successfully used by members of the SBG forum to do a sword handle wrap on the cheap using a genuine (not synthetic) Shammy!
The method is the same - wrapped twine around the bare wood, and then wood glue to wrap damp chamois leather (like you use for washing cars) over the top of it. To give it a that ribbed look, simply wrap twine around the outside of the leather while it was drying. Cut the twine off the outside when it was done and use shoe polish to give it the brown color, and then cover it with paste wax and viola!
With options to add risers, leave the finish smooth or ribbed and of course, any color leather or polish you want to use - this simple method to do a sword handle wrap can be modified or changed to create a myriad of different styles and designs.
Have fun!
I hope this information on how to do a sword handle wrap has been helpful. To return to Free Sword Customization Tutorials from How to do a Sword Handle Wrap the Easy Way, click here

Buying Swords Online Can Be DANGEROUS!
Find the Best Swords in the:

Popular & Recommended ARTICLES


The ONLY true free online magazine for sword enthusiasts. Delivered once a month on the 1st day of the month, no filler and no BS, just the latest sword news & info delivered straight to your inbox.
VISIT OUR SPONSORS:


